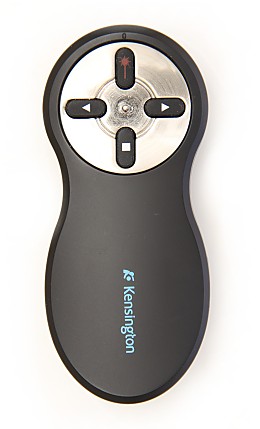
The photo booth can operated using a keyboard or a wireless presenter such as the Kensington wireless presenter shown below. A wireless presenter provides a convenient way to operate the photo booth and can control clip capture, replay and printing.
Basic Operation
Connect the camera and then press the "Start" button in the main window to start full screen photo booth mode and display the Ready Screen. On a dual monitor system move the main window onto the monitor where you want to display the screens before pressing the "Start" button.
The various screens and commands available are described below:
Ready Screen
Displays the ready.jpg screen image with the camera's live view off.
Press F5 or the wireless presenter laser button to switch to the Start Screen
Press F6 or the wireless presenter play button to switch to the Playback Screen and start replaying the current clip (if available)
Press F7 or the wireless presenter stop button to switch to the Printing Screen and start printing the current clip (if available)
Press 1, 2, 3, 4 or 5 to switch to the Printing Screen and start printing 1, 2, 3, 4 or 5 copies of the current clip (if available)
Press Ctrl+L to load previously saved live view frames for display or reprinting (using a directory browser)
Press Ctrl+O to load previously saved live view frames for display or reprinting (using a thumbnail browser)
Press Esc to exit full screen photo booth mode and return to the main window
Shift+Ctrl+1 - select profile 1
Shift+Ctrl+2 - select profile 2
Shift+Ctrl+3 - select profile 3
Shift+Ctrl+4 - select profile 4
Shift+Ctrl+5 - select profile 5
Shift+Ctrl+6 - select profile 6
Shift+Ctrl+7 - select profile 7
Shift+Ctrl+8 - select profile 8
Shift+Ctrl+N - select next profile
Shift+Ctrl+P - select previous profile
Start Screen
Displays the start.jpg screen image with the camera's live view on.
Press F5 or the wireless presenter laser button to switch to the Countdown Screen and start the countdown before capturing a clip
Press F6 or the wireless presenter play button to switch to the Playback Screen and start replaying the current clip (if available)
Press F7 or the wireless presenter stop button to switch to the Printing Screen and start printing the current clip (if available)
Press 1, 2, 3, 4 or 5 to switch to the Printing Screen and start printing 1, 2, 3, 4 or 5 copies of the current clip (if available)
Press the spacebar to display the current camera settings and keyboard shortcuts for changing the settings. Press the spacebar again to hit the settings display
Press Esc or the wireless presenter back button to return to the Ready Screen
Countdown Screen
Displays the countdown.jpg screen image and the countdown text during the countdown then changes to the Capturing Screen. The camera's live view is on
Press Esc or the wireless presenter back button to cancel the countdown and return to the Ready Screen
Capturing Screen
Displays the capturing.jpg screen image during capture together with a progress bar then switches to the Ready Screen after capturing the clip. The camera's live view is on
Press Esc or the wireless presenter back button to cancel the clip capture and return to the Ready Screen
Review Screen (optional)
Displays the review.jpg screen image with the camera's live view off.
Press F5 or the wireless presenter laser button to switch to the Ready Screen and start the countdown before capturing a clip
Press F6 or the wireless presenter play button to switch to the Playback Screen and start replaying the current clip
Press PageUp, S or the wireless presenter back button to swap the current clip with the previous clip and start playing it (if available)
Press F7 or the wireless presenter stop button to switch to the Printing Screen and start printing the current clip
Press 1, 2, 3, 4 or 5 to switch to the Printing Screen and start printing 1, 2, 3, 4 or 5 copies of the current clip
Press Esc or the wireless presenter back button to return to the Ready Screen
Playback Screen
Displays the replay.jpg screen image and a progress bar during playback. The camera's live view is off
Press F6 or the wireless presenter play button to start replaying the current clip
Press PageUp, S or the wireless presenter back button to swap the current clip with the previous clip and start playing it (if available)
Press F7 or the wireless presenter stop button to switch to the Printing Screen and start printing the current clip
Press 1, 2, 3, 4 or 5 to switch to the Printing Screen and start printing 1, 2, 3, 4 or 5 copies of the current clip
Press Esc or the wireless presenter laser button to cancel the clip capture and return to the Ready Screen
Printing Screen
Displays the printing.jpg screen image when printing then switches to the Ready or Playback Screen. The camera's live view is off. If the print option is selected in the properties dialog the flip book will be printed out using the current printer. If the "Save live view frames" option is selected the live view frames will be saved to disk for future reference. If the "Save print layout" option is selected the print layout will be saved to disk for reprinting in another app or for debug purposes.
Please note: live view frames and the print layout are only saved to disk when print is selected. They are not saved when the clip is captured.
Camera Not Connected Screen
Displays the camera_not_connected.jpg screen if the camera connection is lost or the camera is turned off. If the auto reconnect option is selected (from the Camera menu in the main window) it will switch to the Ready Screen if the camera connection is restored or the camera is turned on.
Press Esc to exit full screen photo booth mode and return to the main window
Recommended Camera Settings
It is recommended that the camera is set to manual exposure mode with the lens set to auto focus. This will allow the exposure and focus to be adjusted from the Start Screen.
Ideally the ISO should be set to a low value (e.g. 800 or less) to reduce noise and give the best image quality. The aperture should be set to a mid value (e.g. f/8) to give good depth of field. For best results the camera's white balance should be set to custom using a gray card to set the color balance with the photo booth's lighting on. Please see the camera manual for details on how to set a custom white balance.
The camera's picture styles can be setup to give different image styles e.g. one could be set to normal colors, another to high contrast highly saturated colors, anther to standard balck and white and another to black and white with sepia toning for a retro look.
Live view auto focus with face detect can be used during capture by setting the camera live view to continuous AF. You also need to uncheck the "Enable depth of field preview" setting in the main window. This is because live view AF is only available when the lens is at its maximum aperture. Unfortunately this means you can't use a smaller aperture to maximize the depth of field and use continuous AF in live view.
Use Camera Video Mode to Reduce Motion Blur
The default setting is to use the camera's normal photo mode when capturing clips. This gives clear, high quality live view images but has the disadvantage that the camera will use a slow shutter speed for the live view images which can result in motion blur. You can reduce motion blur by selecting the "Use camera video mode" option in the main window and setting the camera's exposure mode so that you can choose a fast shutter speed. With Rebel series cameras you need to set the exposure mode to M (manual) and then select the required shutter speed. The suggested settings are: manual exposure mode, 1/200 shutter speed, f/8 aperture and auto ISO. It is important to make sure there is plenty of light when using a faster shutter speed otherwise the ISO setting will be very high in order to give the correct exposure and this could result in a reduction of image quality.
Please note: with older Rebel series cameras (ones which don't have a power switch with Off, On and Movies) you need to enable manual exposure in video mode using the camera settings. (please see the camera manual for details).
Adjusting the Camera Settings
Pressing the spacebar when the Start Screen is displayed will display a summary of the current camera settings together with a list of keyboard shortcuts for adjusting the camera settings. Pressing the spacebar again will hide this display.
| • | Pressing A decreases the aperture and pressing Shift+A increases the aperture. Decreasing the aperture (e.g. a smaller number for the Av setting) will let more light into the lens and make the image brighter but will decrease the depth of field. Increasing the aperture increases the depth of field but reduces the amount of light causing the image to become darker. |
| • | Pressing T decreases the shutter speed and pressing Shift+T increases the shutter speed. Increasing the shutter speed will darken the picture but should reduce the amount of blur due to movement in the captured images. Increasing the shutter speed will lighten the picture but may increase the chances of blurred images and may also reduce image quality due to noise. |
| • | Pressing I decreases the ISO setting and pressing Shift+I increases the ISO setting. Increasing the ISO setting will make the images brighter but will also reduce image quality by increasing the amount of noise in the image. Ideally the ISO should be 800 or less. |
| • | Pressing E will decrease exposure compensation and pressing Shift+E increases exposure compensation. This setting only has an effect if an auto exposure mode is selected in the camera. It will have no effect if the camera is set to manual exposure. If the camera is set to Av exposure mode adjusting the exposure compensation will have the same effect as varying the shutter speed. If the camera is set to Tv exposure mode adjusting the exposure compensation will have the same effect as varying the aperture. If the camera is set to one of the program settings adjusting the exposure compensation may change the shutter speed or aperture depending on the lighting conditions and the program mode selected. |
| • | Pressing P or Shift P will switch to a different picture style. Depending on how the picture styles are setup in the camera this could be used to switch between B&W, sepia and color images. |
| • | Pressing Ctrl+left/right will rotate the live view display. Use this option to display the images the right way up if the camera is mounted in portrait orientation. |
| • | Pressing left and right cursor keys will adjust the lens focus. Please note that this will have no effect if the lens is set to manual focus. |
| • | Pressing the + and - keys will increase or decrease the cropping of the live view images. In landscape orientation cropping reduces the width of the images. In portrait orientation the top and bottom of the images but because the live view display is zoomed to a fixed height the images will appear to get larger and the width will increase. |
Binding and Finishing
The pages are printed so that when all the pages are gathered up after printing they can be cut to give piles of pages in the right order e.g. a 30 page flip book printed on ten 6" x 4" pages will have pages 1, 11 and 21 on the top sheet; 2, 12, 22 on the second sheet; 3, 13 and 23 on the third sheet and so on. If these are stacked in order and then cut into three you end up with three piles: the first has pages 1 to 10, the second has 21 to 20 and the third has 21 to 30. These can be stacked together, a cover added and then stapled to give the final flip book. The pages have the page number printed in the staple area to help put them in the right order. The final page has the date and time printed so that the book can be easily identified if someone asks for another copy (this corresponds to the date and time used to name the folder where the live view frames and print layout are saved if enabled).
The cover could be made up pre-cut sheets added to the top and bottom of the pile to form the front and back covers or you could use a single pre-cut and pre-folded sheet which wraps around the book to form the front and back covers.
A heavy duty manual stapler should have no problem stapling a book with 30 to 40 pages. When stapling the book together it is important to make sure the end of the book which is flicked has evenly aligned pages. It doesn't matter if the edges of the pages at the binding end are uneven as this can be covered by a wraparound cover or book binding tape.
Example Pages
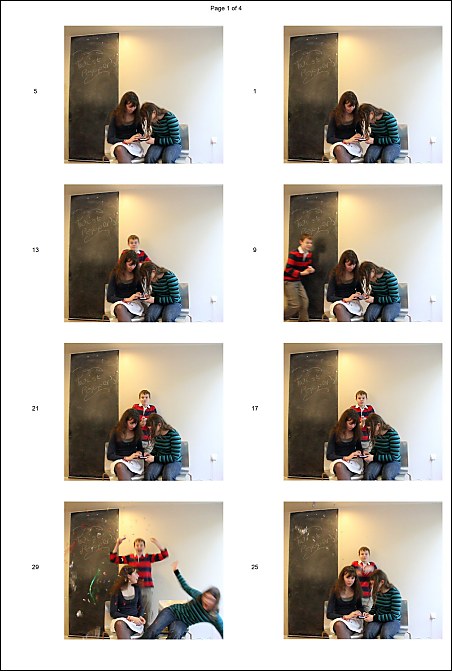
The page below was created using a dye sublimation printer loaded with 6"x9" media and is the top page of a set of four 6"x9" pages with 8 images per page. The printed page number is shown at the top ("Page 1 of 4") and the individual flip book pages are to the left of each image. Flip book page 1 is in the top right hand corner and page 5 is in the top left hand corner. When printed pages are stacked together flip book pages 2, 3 and 4 will be underneath page 1.
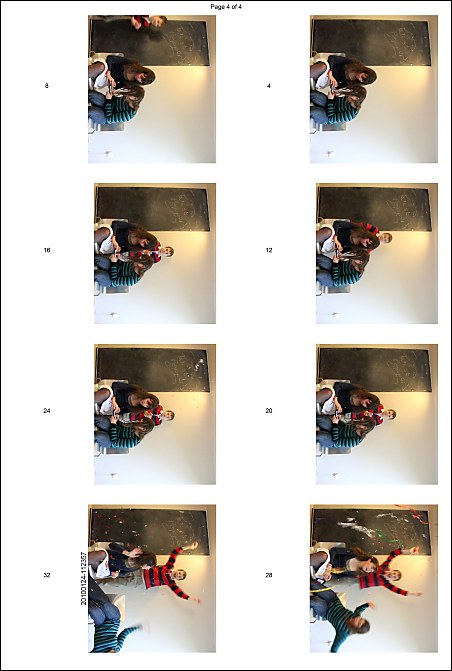
The page below has the images rotated by 90 degrees clockwise to give a flip book which is held at the bottom in one hand and flipped at the top using the other hand. This shows the last page ("Page 4 of 4") with flip book page 4 in the top right hand corner. The last page in the flip book is in the bottom left hand corner and this has the date and time of capture printed beside the image to make it easier to identify a book if someone wants another copy.