Auto Bracketing
Multi-Camera has flexible settings for auto bracketing (taking a sequence of shots using different exposure settings) which simplify the taking of shots which are later combined together to form a single HDR (high dynamic range) image. To enable auto bracketing select the "Auto-bracket" checkbox and then click on the "Settings..." button to display the auto bracket settings dialog below:
You can set the number of shots in the sequence using the first dropdown list. Then set the number of exposure stops should separate each shot. This can be 1/3, 2/3, 1, 1 1/3, 1 2/3, 2, 2 1/3, 2 2/3, 3, 3 1/3, 3 2/3 or 4 stop per shot depending on your camera's settings (if your camera is set to use 1/2 stop increments instead of 1/3 stop increments selecting a value of 1/3 or 2/3 stop increments will result in 1/2 stop increments being used).
The different exposures are set using the camera's exposure compensation control if the one of the auto exposure modes is selected. If manual exposure mode is selected the exposure will be varied using either the shutter speed or the aperture according to the settings in this dialog. Normally it is better to keep the aperture constant (and hence the depth of field) and vary the shutter speed.
Multi-Camera can optionally run a command at the end of the auto bracket sequence to combine the shots. To do this click on the "Execute command at end of auto bracket sequence" checkbox and enter the name of the program or script to run. In the screenshot above the script "photomatix.bat" has been entered. This will run the Windows batch file "photomatix.bat" which combines the images using Photomatix Pro (which can be purchased from http://www.hdrsoft.com) and displays the result in BreezeBrowser Pro (http://www.breezesys.com/BreezeBrowser ). The batch file can be found in the Multi-Camera installation folder (usually C:\Program Files\Breezesys\Multi-Camera) and makes use of the command line interface for Photomatix Pro. Please see the batch file for details.
Suggested procedure for auto bracketing:
| 1. | Use a tripod and compose the shot as required |
| 2. | Switch to manual exposure mode and low ISO setting to maximize the quality |
| 3. | Set the required aperture (e.g. use a small aperture like f/16 for good depth of field) |
| 4. | Take a preview shot to determine the correct exposure (this can be judged by looking at the histogram display). It may be necessary to take a number of test shots to get the correct exposure. Adjust the exposure by changing the shutter speed |
| 5. | Set the lens to manual focus and focus carefully |
| 6. | Set the required number of shots and number of stops separating each shot (a 5 shot sequence with 1 stop increments is a good start, more shots may be required if the brightness range in the shot is very large) |
| 7. | Press the "Release" button and Multi-Camera will automatically take the sequence |
Auto exposure bracketing is particularly useful for product shots and for taking pictures of the interiors of buildings. The photos below compare the results from a single exposure of the interior of a church with an image which was blended from seven separate exposures taken using DSLR Remote Pro's auto bracketing feature:
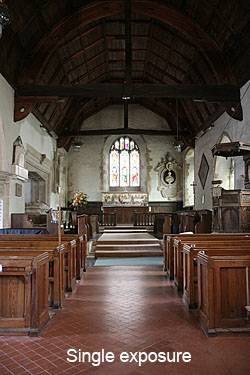
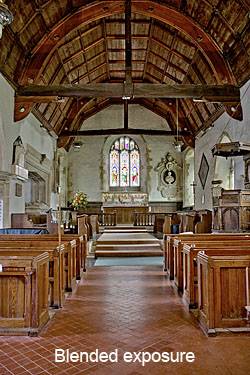
Photo of the interior of St Andrews Church, Sherborne St John, Hampshire, England.
(The image on the right was created by blending the auto bracketed images using a separate image editor which is not part of Multi-Camera)
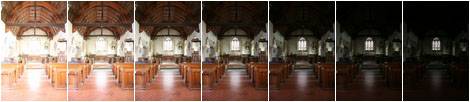
The seven shot auto bracket sequence used to create the blended exposure above:
Please Note: Multi-Camera doesn't support auto bracketing with multiple cameras when shooting in raw+JPEG mode.