The automatic layout option allows images to be automatically arranged on a page in a grid. An optional background, header, footer and overlay can be added to the layout. Please see the print layout editor section if you need more precise control over the layout, to rotate images or to print the images different sizes.
To use the automatic layout option select "Preferences..." from the File menu and the dialog below will be displayed:
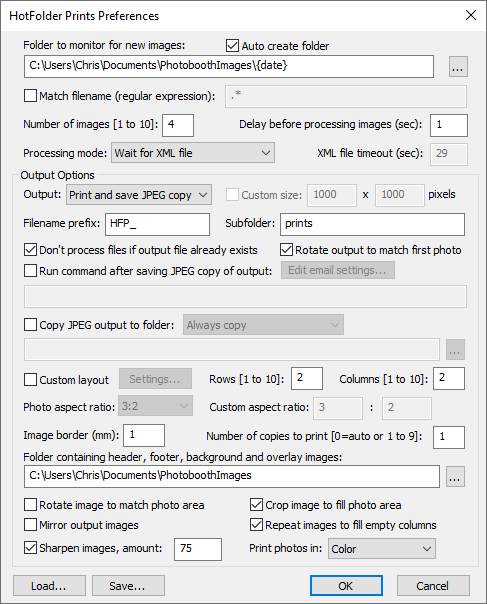
Make sure the "Custom layout" option is unchecked, then select the number of images to be used and how they are arranged. This could be a single image on one sheet of paper (1 image, 1 row, 1 column), a passport style strip of images (e.g. 4 images, 4 rows, 1 column) as shown above, 2x2 grid of 4 images or any other arrangement of up to 10 images arranged in a grid. Alternatively select "Custom layout" and click on the "Settings..." button next to the checkbox to position each image manually on the page.
Print layout
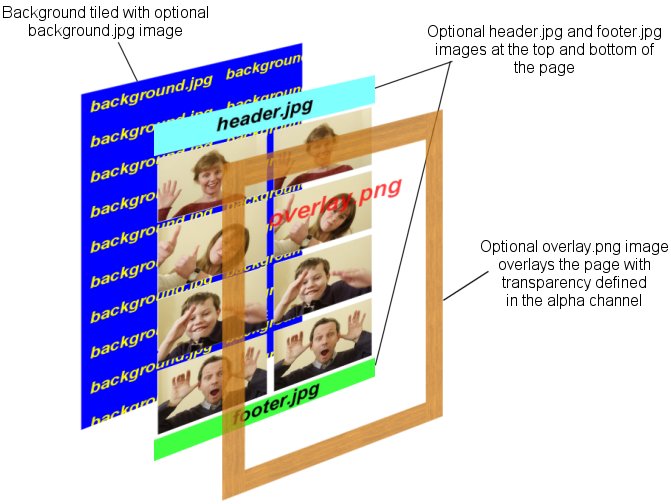
The print can have an optional background with a header and or footer image and an overlay image. When Hotfolder Prints prepares the image for printing it looks for the following files in the image folder:
background.jpg - optional image which is centered on the page before adding the photos
header.jpg - optional image which is centered and placed at the top of the page
footer.jpg - optional image which is centered and placed at the bottom of the page
left.jpg - optional image which is centered vertically and placed on the left of the page between the header and footer
right.jpg - optional image which is centered vertically and placed on the right of the page between the header and footer
middle.jpg - optional image which is centered vertically and placed between each column of images
image_overlay.png - optional image which is overlays each photo and uses transparency information stored in the alpha channel
overlay.png - optional image which is overlays the page and uses transparency information stored in the alpha channel
The images are then arranged in a grid which fills the printable area of the page less any space taken up by a header or footer image. If the "Rotate image to maximize size" checkbox is selected the images are rotated through 90 degrees if this would give a larger image. e.g. if the printable area for the image within the grid is 80mm high and 50mm wide and the image was shot in landscape orientation it would be rotated by 90 degrees to better fill the printable area.
If the number of images matches the number of rows the images can be repeated in each column by selecting "Repeat images to fill empty columns". This is useful when printing strips of images on paper from a dye sublimation printer e.g. two copies of 4x1 strips on a sheet of 8x6 paper.
If the "Crop image if required to fit the printable area" checkbox is selected the image will be cropped to fill the printable area within the grid. e.g. if the printable area within the grid is square equal portions of the left and right of the image will be cropped to make it square.
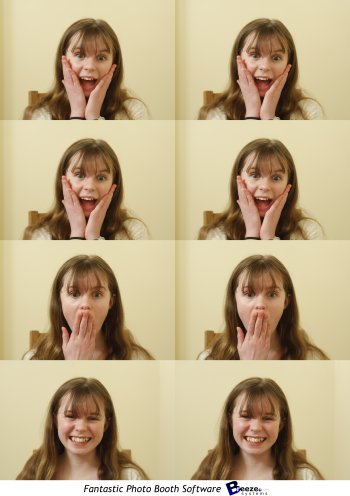
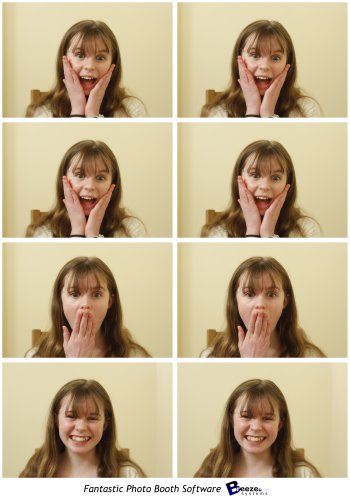
Some example layouts using four shots arranged in two columns of four:
|
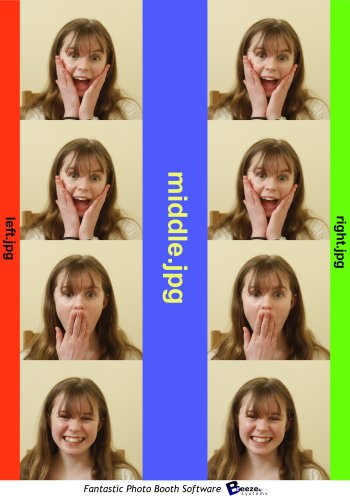
With left.jpg down the left border, middle.jpg placed between the columns, right.jpg down the right border and footer.jpg at the bottom
|
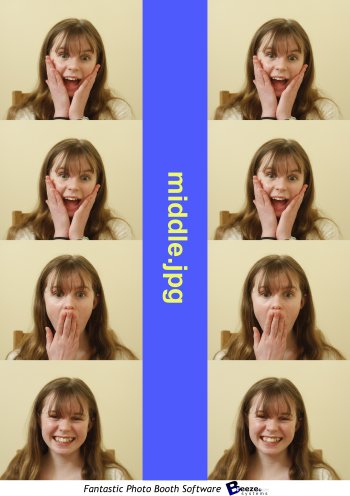
Same layout as the first example but with no left.jpg or right.jpg images defining the left and right borders
|
Same layout as the previous example but with no middle.jpg image placed between the columns
|
Same layout as the previous example but with a 2mm border around each image