The photobooth setup wizard provides a fast and simple way of creating the screens and the print layout for common photobooth configurations.
Before you start
Before running the setup wizard please ensure that your printer is setup correctly. The photo booth software uses the Windows default printer and page settings. These can be setup by selecting "Devices and Printers" from the Windows Start menu. Right click on the printer you wish to use and check that "Set as default printer" is selected. Then select "Printing preferences" and setup the layout, paper and quality settings ready for for photo booth printing.
Then select "Photobooth Setup Wizard..." from the File menu to start the setup wizard.
Step 1: Printer Settings
This step displays the current printer settings and asks you to select a print layout. The settings for a Mitsubishi CP70D printer loaded with 6x4 paper are shown below:
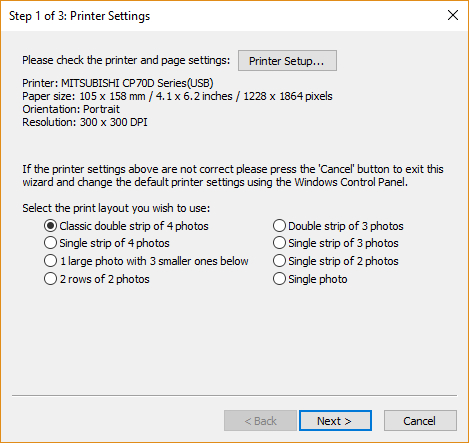
First check the printer settings and click on the "Setup printer..." button if they need changing.
Please note: if you printing a double strip of 3 or double strip of 4 photos and are using a dyesub printer which can cut a 4"x6" sheet into two 2"x6" strips you need to select this option in the printer driver by clicking on the "Setup printer..." button.
Next select one of the seven print layout options:
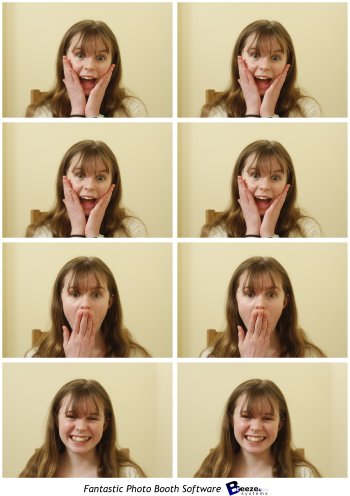
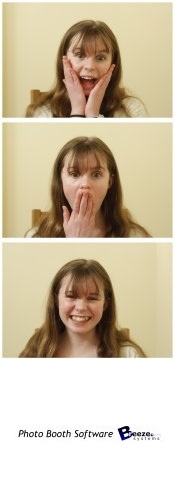
"Classic double strip of 4 photos" - This prints two columns of four images side by side as shown below:
|
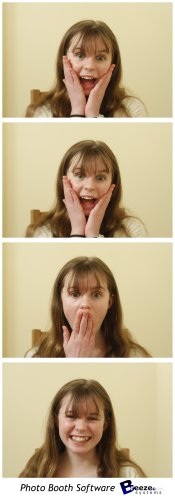
"Single strip of 4 photos" - This prints a single column of four images as shown below. This option is useful for printers like the DNP DS-RX1 which can cut 6x2 strips from 6x4 paper and treat these as 6x2 pages.
|
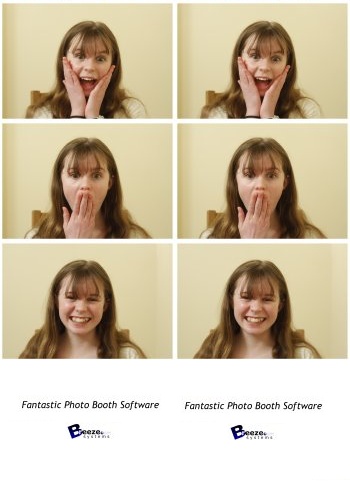
"Double strip of 3 photos" - Similar to the "Classic double strip of 4 photos" but with only three photos and more space for logos etc.
|
"Single strip of 3 photos" - Similar to the "Single strip of 4 photos" but with only three photos and more space for logos etc.
|
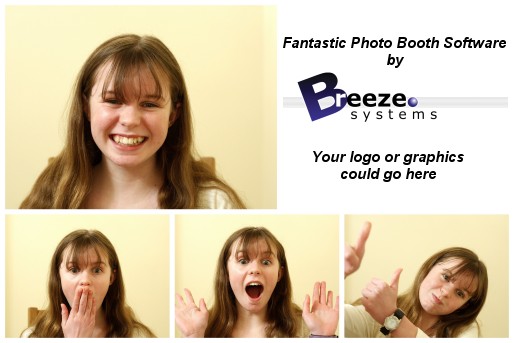
"1 large photo with 3 smaller ones below" - This layout gives plenty of space for logos and captions as shown below:
|
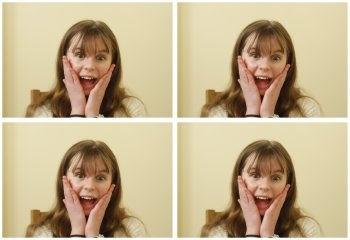
"2 rows of 2 photos" - This option fills the page with four equally sized photos arranged in a 2 x 2 grid:
|
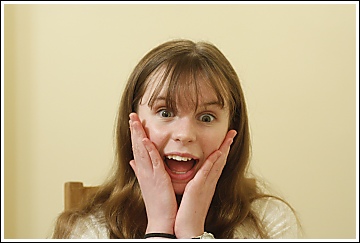
"Single photo" - This option fills the page with a single photo:
When you have selected your preferred layout press the "Next >" button to go to step 2.
Step 2: Specify the photo booth images folder
This step allows you to specify the name of the folder where the various screen and layout images should be stored and looks like this:
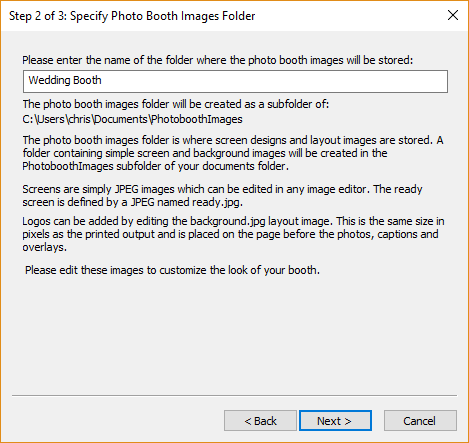
Enter the name of the photo booth images folder. The screens for the photo booth and the optional layout images will be saved in this folder and can be edited later using an image editor to personalize the look of your booth.
Press the "Next >" button to go to step 3.
Step 3: Specify user interface options
This step allows you to specify the options available to users of your photo booth and looks like this:
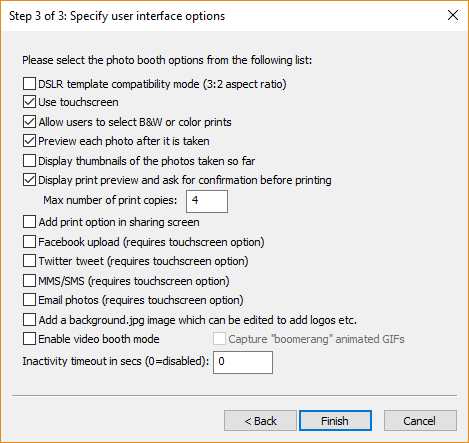
Select the options you wish to use and then press the "Finish" button to create the photo booth settings. The settings are saved to a file named settings.xml in the photobooth images folder. These settings can be loaded again by pressing the "Load..." in the photobooth settings dialog.
"Use touchscreen" - select this option if your booth has a touchscreen. The setup wizard will automatically add buttons and touchscreen actions to the screens shown to users.
"Allow users to select BW or color prints" - If the "Use touchscreen" option is selected this option will add buttons and touchscreen actions to allow users to choose color or B&W prints. If "Use touchscreen" is not selected this option will do nothing but users will be able to select B&W or color using the keyboard shortcuts Ctrl+B and Ctrl+C.
"Preview each photo after it is taken" - when this option is selected a full screen preview will be displayed for 3 secs after each shot is taken.
"Display thumbnails of the photos taken so far" - select this option to display a small thumbnail of each shot taken so far down the right hand of the screen. Each screen will have a series of small gray rectangles added to show where the thumbnails will be placed. Please see the section on the optional thumbnail display for more information.
"Display print preview and ask for confirmation before printing" - when this option is selected a full screen preview of the print layout will be displayed before printing. If the "Use touchscreen" option is selected buttons and touchscreen actions allowing users to print or reject the photos will be added. If the "Use touchscreen" option is not selected users need to press A to accept the print or X to reject it.
If the "Use touchscreen" option is selected you can also define the maximum number of copies the user can select in the confirm printing screen. The photo booth wizard will create buttons and touchscreen actions for increasing the number of print copies and display these on the right hand side of the screen. Multiple confirm_printing.jpg screen will be created: confirm_printing_1.jpg which is displayed when 1 copy is selected, confirm_printing_2.jpg for 2 copies, confirm_printing_3.jpg for 3 copies etc.
"Add print option in sharing screen" - select this option to allow users to print photos from the sharing screen.
"Twitter tweet" - select this option to allow users to post photos their personal Twitter feed direct from the photobooth (requires an internet connection). Please see the section on uploading photos to social networks for more information on posting photos to Twitter.
"MMS/SMS" - select this option to allow users to text photos to their cellphone via MMS or SMS (requires an internet connection and an account with Twilio.com). Please see the section on uploading photos to social networks for more information texting photos.
"Email photos" - select this option to allow users to email photos direct from the photobooth (requires an internet connection). Please see the section on uploading photos to social networks for more information on emailing photos.
"Add a background.jpg image which can be edited to add logos etc." - select this option if you want to add logos etc. to the prints. This will create a background.jpg image the same size in pixels as the printed output and place it the photo booth images folder. Please edit the background.jpg to add logos etc.
"Enable video booth mode (10 sec video capture)" - select this option if you are using a camera which supports video (e.g. a Rebel T3i/EOS 600D) and wish to offer users the option to record a 10 second video (the settings can be adjusted later using the "Video Booth Settings" dialog). Select the "Capture 'boomerang' animated GIFs to capture boomerang style animated GIFs instead of normal videos. This will set everything up to create a an animated GIF that is approximately 3 secs long and plays forwards then backwards at approximately double speed.
The inactivity timeout can be set to switch the booth to standby mode and display the welcome.jpg screen after a preset number of seconds if there is no user input. Set this to 0 to disable the inactivity timeout. The booth can be switched back to the ready screen by pressing F6 or touching the screen (if available).
What happens next?
Please try running the booth and taking a set of photos to check the print layout. If the photos aren't correctly centered on the page or the gaps between the photos is too large you can adjust the settings by clicking on the "Print Layout" shortcut button (or by selecting File->Photobooth settings... and clicking on the "Settings..." button to the right of the "Custom layout" checkbox. Please see the section on the print layout editor for more details.
Logos and other graphics can be added to the prints by creating a background.jpg image and editing this in an image editor. The background.jpg image needs to be the same size in pixels as the print output. If you selected the "Add a background.jpg image which can be edited to add logos etc." option when running the setup wizard there will already be a dummy background.jpg image in the photobooth images folder.
The various screens presented to the user are defined using JPEG images saved in the photobooth images folder. The look of your booth can be customized simply by editing the screen JPEGs using an image editor such as Photoshop Elements. The screen that is shown when the booth is ready to take the next set of photos is called ready.jpg. Please see the section on images displayed to the user for more details.
There are many other settings that can be adjusted. Please see the section on photobooth setup for more information. There is a series of articles on our website which includes lots of useful information about photobooth shooting and a section giving answers to frequently asked questions.