Event photographers often want to shoot tethered and print their images with custom overlay and/or background. This tutorial explains how to use Hotfolder Prints to
- add overlay and/or background to the photo before printing
- automatically switch between portrait and landscape print layouts
- choose from automatic printing or saving print layouts to print later
Shooting tethered
Tethered shooting lets you take photos with the camera and automatically download them to your computer/device. It is usually fastest to transfer the photos via wired connection such as a USB cable. Many cameras can also download images wirelessly.
There are many tethered shooting programs for different makes and models of camera. Hotfolder Prints supports JPEG images from any camera once they have been downloaded to a Windows PC. Tethered shooting apps include
- Breeze Booth for Windows + DSLR (aka DSLR Remote Pro) can be used for tethered shooting with many Canon cameras
- Canon’s EOS Utility
- Camera Control Pro 2
If you want Hotfolder to select a different overlay/background for photos captured in different orientations, you need to ensure that image orientation is included in the EXIF data for the image.
Tethered shooting with DSLR Remote Pro
When shooting with DSLR Remote Pro, check the Orientation Sensor box is checked:
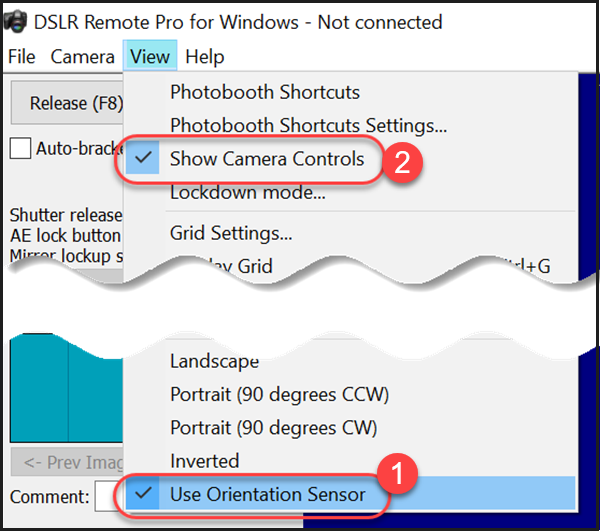
Check (1) Use Orientation Sensor on the DSLR Remote Pro View tab to tell Hotfolder whether images are taken in landscape or portrait. (2) Show Camera controls should also be checked
Create the overlays to your photos
- If you plan to shoot entirely in landscape, you need one png overlay called overlay.png which is the same size in pixels as your print.
- If you plan to switch between landscape and portrait shooting, use 3 overlays so that you can rotate the camera both clockwise and anti-clockwise: overlay_0.png, overlay_90.png and overlay_270.png.
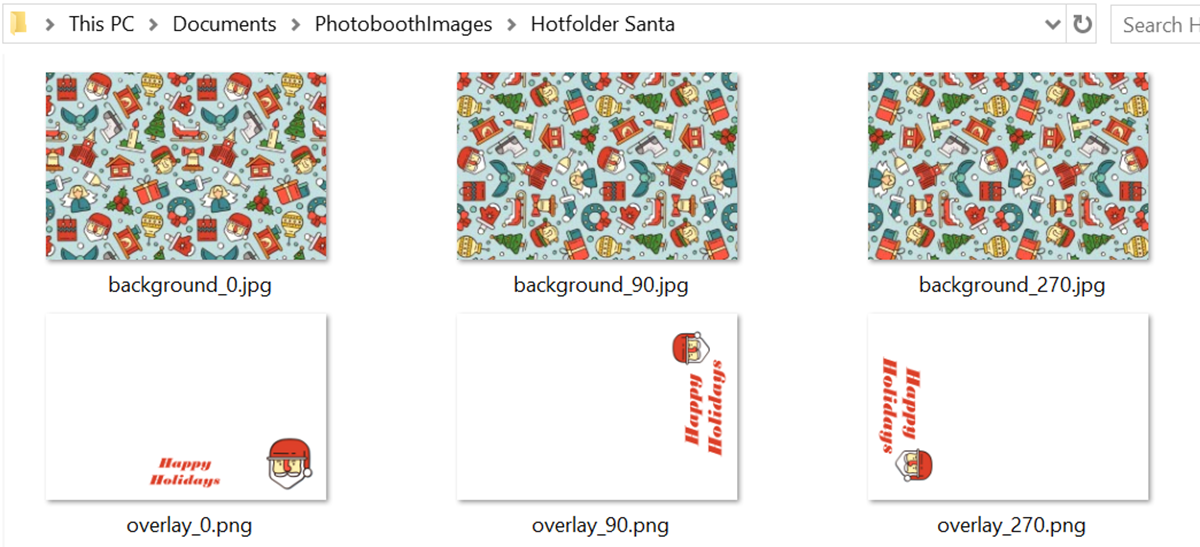
- Create a PhotoboothImages folder for your event in your Documents folder. The folder used for this tutorial is C:\Users\sue\Documents\PhotoboothImages\Hotfolder Santa
- Place your overlay(s) in this folder:

PhotoboothImages folder with 3 overlays for the camera in landscape (overlay_0.png) and portrait (overlay_90.png and overlay_270.png) Breeze Hotfolder 1.8
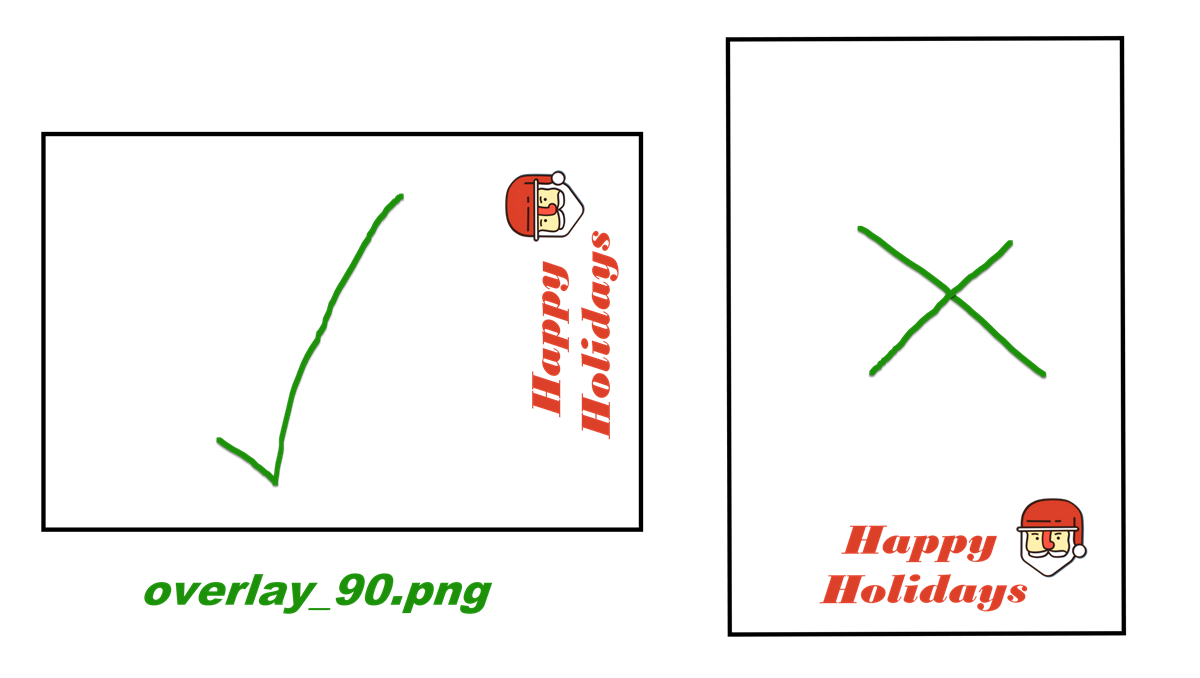
Overlays for portrait images should be similar the left hand image above for auto-rotation to work correctly
Create backgrounds for your photos
If the print area is larger than the photos you are printing, you may want to add a background. This can be plain white, a single color, or a JPEG image.
- Hotfolder will default to a plain white background
- To select a plain background color use the Print Layout Editor
- A single background image called background.jpg can be placed in your PhotoboothImages folder. background.jpg should be the same size in pixels as the print.
- To use different backgrounds for landscape and portrait shots, use 3 background images called background_0.jpg, background_90.jpg and background_270.jpg . These background images should all be the same size in pixels as the print.
PhotoboothImages folder with three backgrounds for the camera in landscape (background_0.jpg) and portrait (background_90.jpg and background_270.jpg) Breeze Hotfolder 1.8
Prepare Hotfolder to add your overlay/background to the photos as they are downloaded
Connect your printer to the computer and set it up
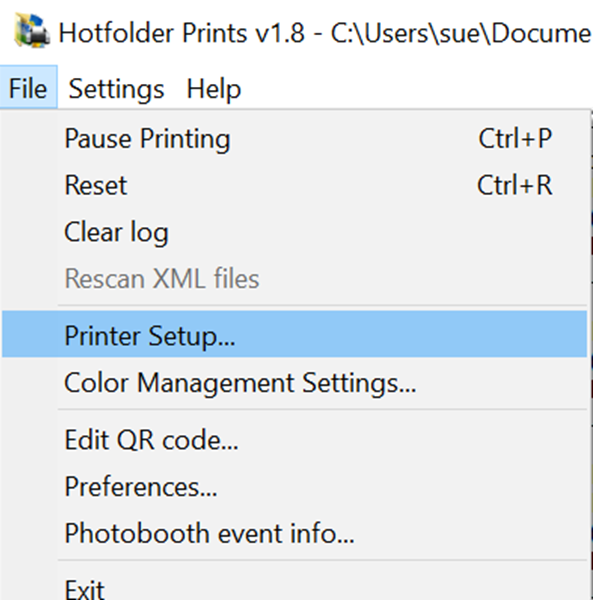
Select the Hotfolder File Tab then Printer Setup to choose the printer settings you need
Select your preferences
Tell Hotfolder which folder to monitor, where to store the prints, and where to find your overlay(s) and background(s)
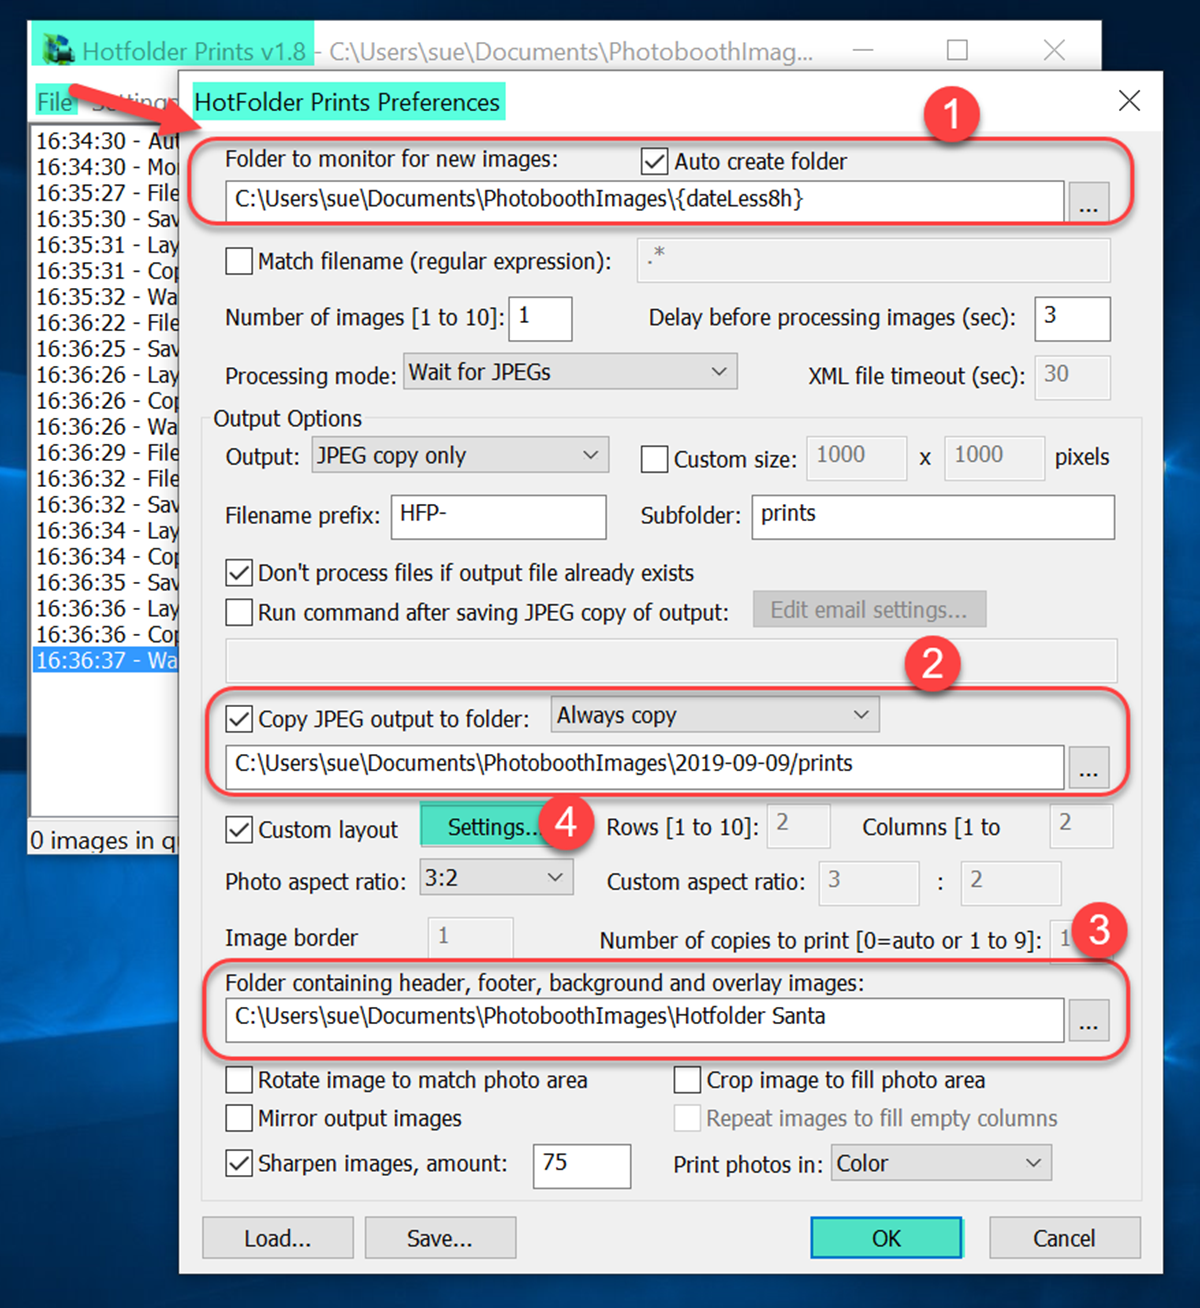
Hotfolder Preferences screen (v1.8.1)
(1) Folder to monitor (where photos are stored as they are downloaded from the camera)
Note: As Auto create folder is checked, Hotfolder automatically creates the folder when the program starts. The folder name uses a token {dateLess8h} which is coverted at run time to the current date less 8 hours. Using this token keeps the same date for events running past midnight.
(2) Folder where Hotfolder stores the prints
(3) Folder containing your overlay(s) and background(s)
(4) Select Custom layout Settings button to access the Print Layout Editor
More information about Hofolder preferences screens
Select automatic printing or save the prints to share and print later
You may want to print every photo immediately, or save the layout to share, display, and choose whether to print later. Make your choice on the Hotfolder Preferences screen:
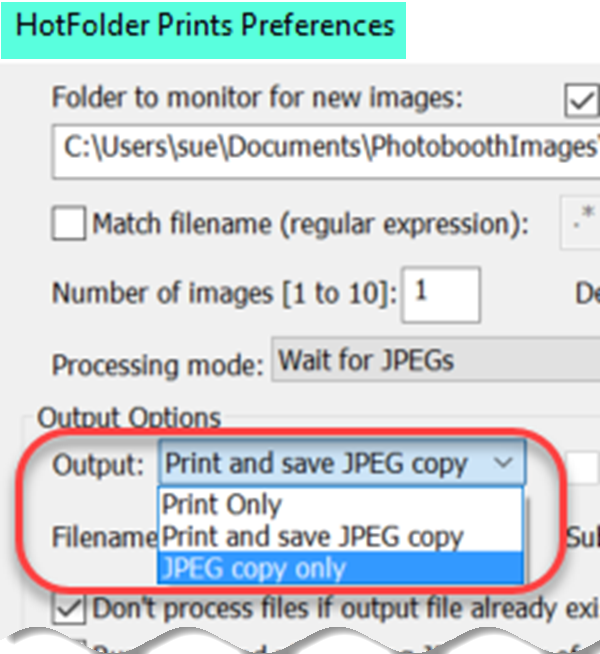
Select Print and save JPEG copy for automatic printing, and JPEG copy only if you don’t want to print the images immediately
You can run our Kiosk software on the same Windows tablet to share and print your images..
Summary
Hotfolder Prints monitors a folder for incoming images then automatically formats them for printing and other purposes. It’s a great tool to add branding and custom layouts to prints when shooting tethered.
I have explained how to use Hotfolder Prints to
- add overlay and/or background to the photo before printing
- automatically switch between portrait and landscape print layouts
- choose from automatic printing or saving print layouts to print later
Find out what more you can do with this great suite of tools for event photographers and photo boothers.
© Breeze Systems December 2019