This tutorial explains how to print from the email sharing screen in Booth (DSLR + Windows) aka DSLR Remote Pro. This is a useful way to improve workflow when your guests choose whether to print and/or email their photos. You can also learn how to limit the number of prints, customize the text on the sharing screen and adjust the preview image.
We shall cover:
- using the Setup Wizard to print from the sharing screen
- limiting the number of prints
- adjusting the on screen text
- resizing and moving the preview image
Run the setup wizard
Run the setup wizard as usual. At Step 2,
(1) check Add print option in sharing screen, and uncheck Display print preview…
(2) check the boxes for Email photos and MMS/SMS sharing as required
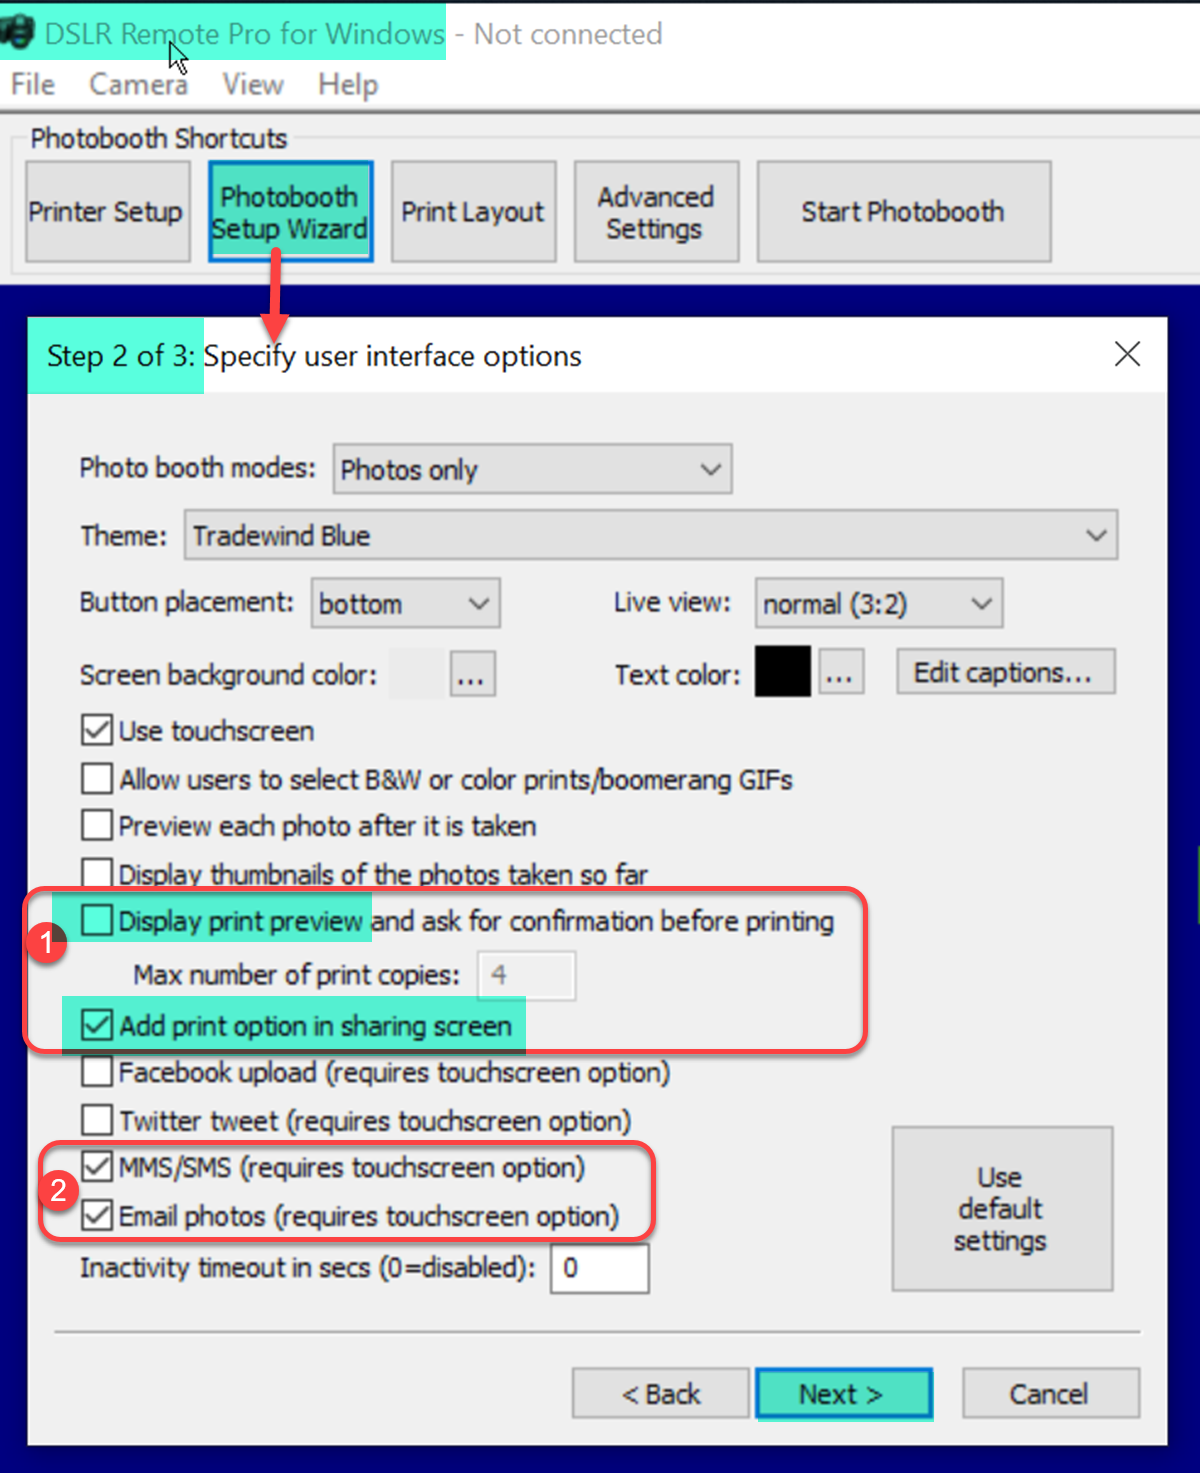
DSLR Remote Pro 3.14.3 Setup Wizard Step 2: showing settings to print from the sharing screen
Complete the wizard and the program will create a full set of screens for a working booth.

When the DSLR Remote Pro setup wizard finishes, a message is displayed showing the location of the new PhotoboothImages folder
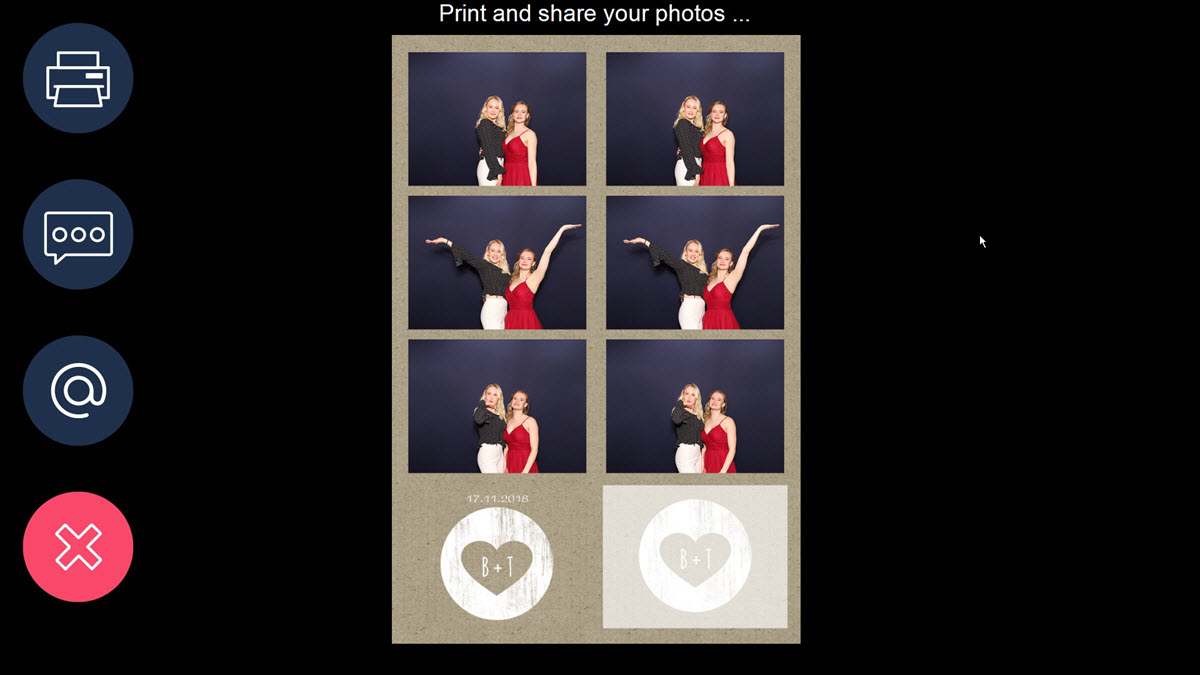
If you look in the PhotoboothImages folder, you will see the screen backgrounds. The sharing screen share.jpg has buttons to print and share photos:
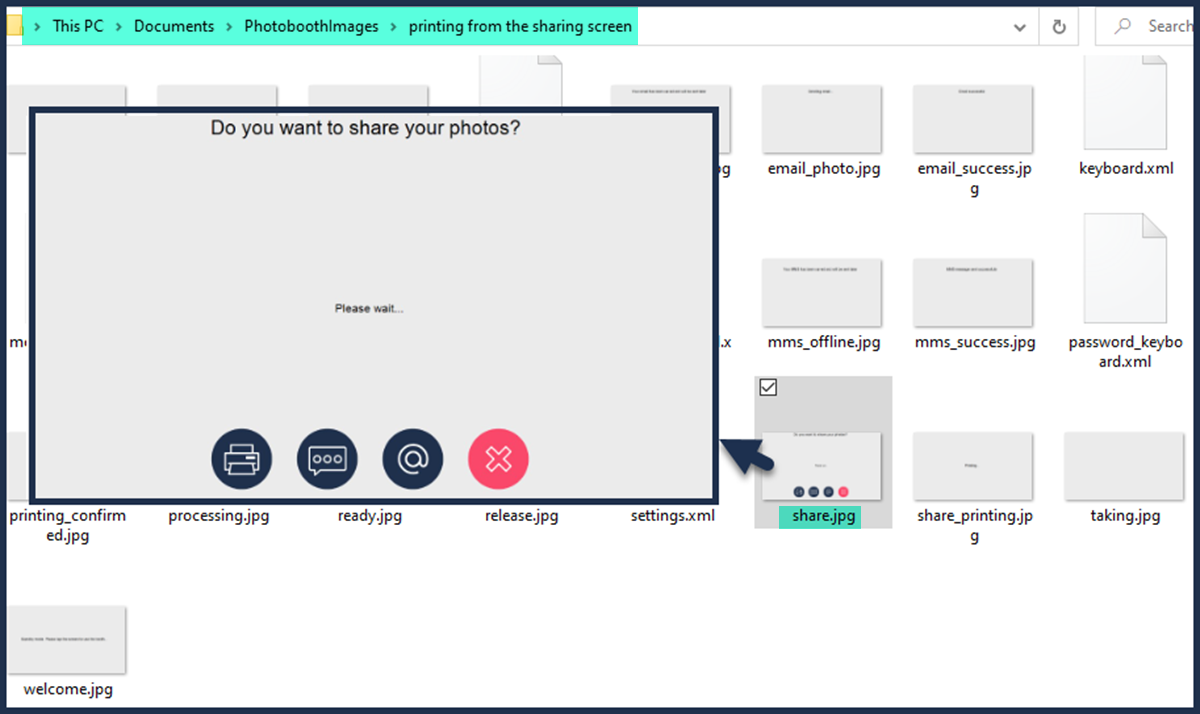
PhotoboothImages folder showing the sharing screen share.jpg (DSLR Remote Pro 3.14.3)
Edit your captions to suit
DSLR Remote Pro includes the ability to create custom captions in the Setup Wizard.You can use this to adjust or remove the standard text
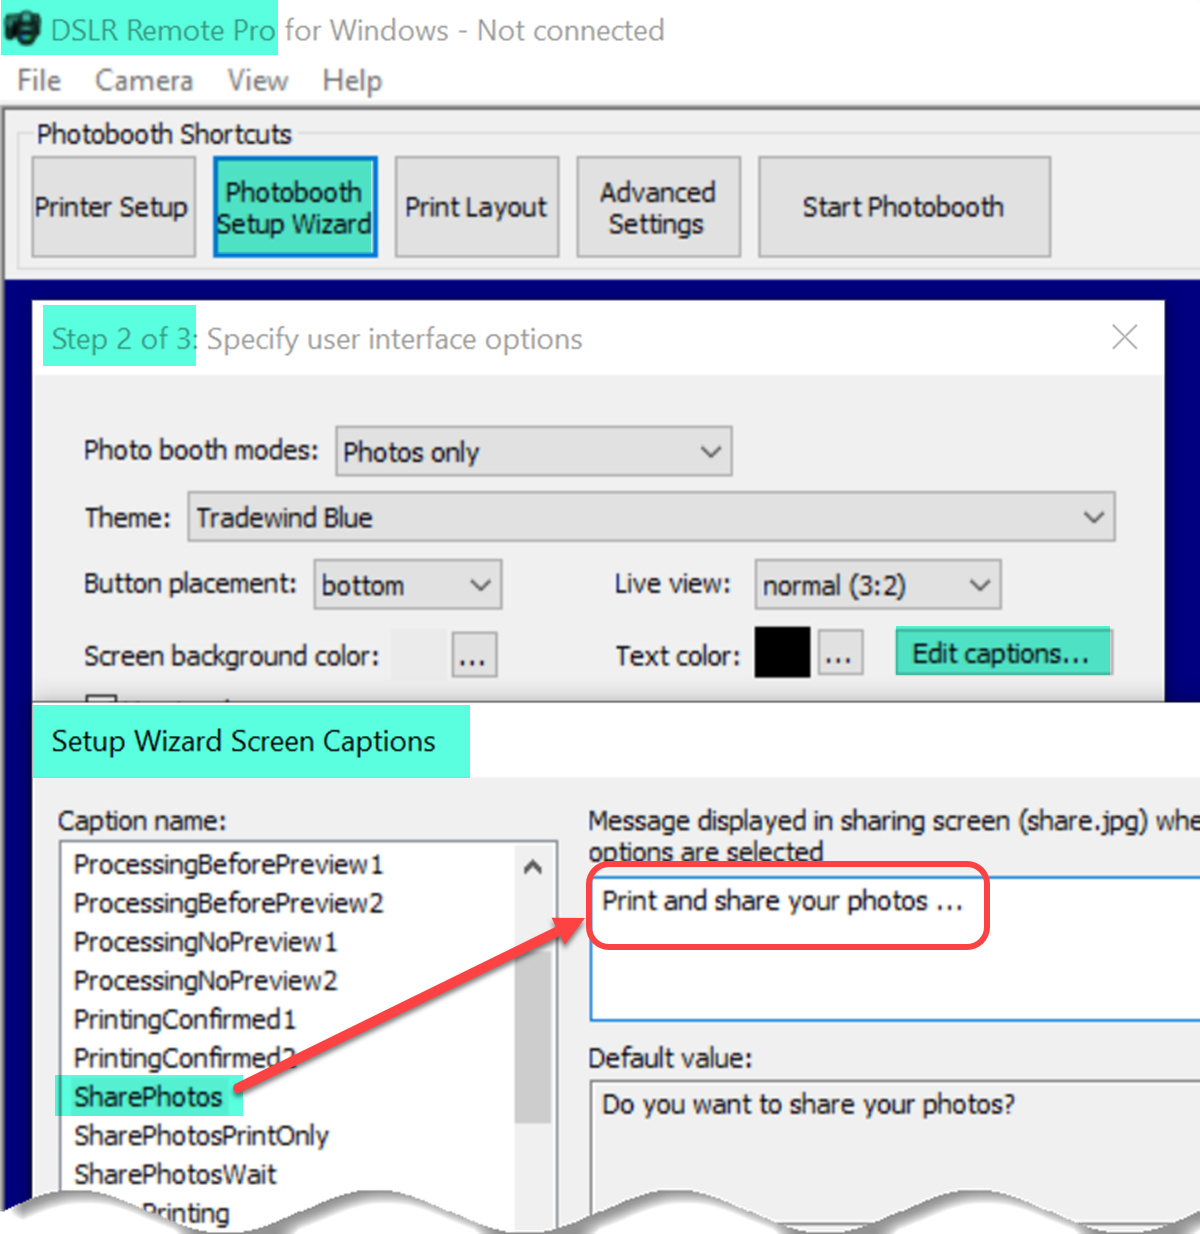
Editing the sharing screen caption (DSLR Remote Pro 3.14.3)
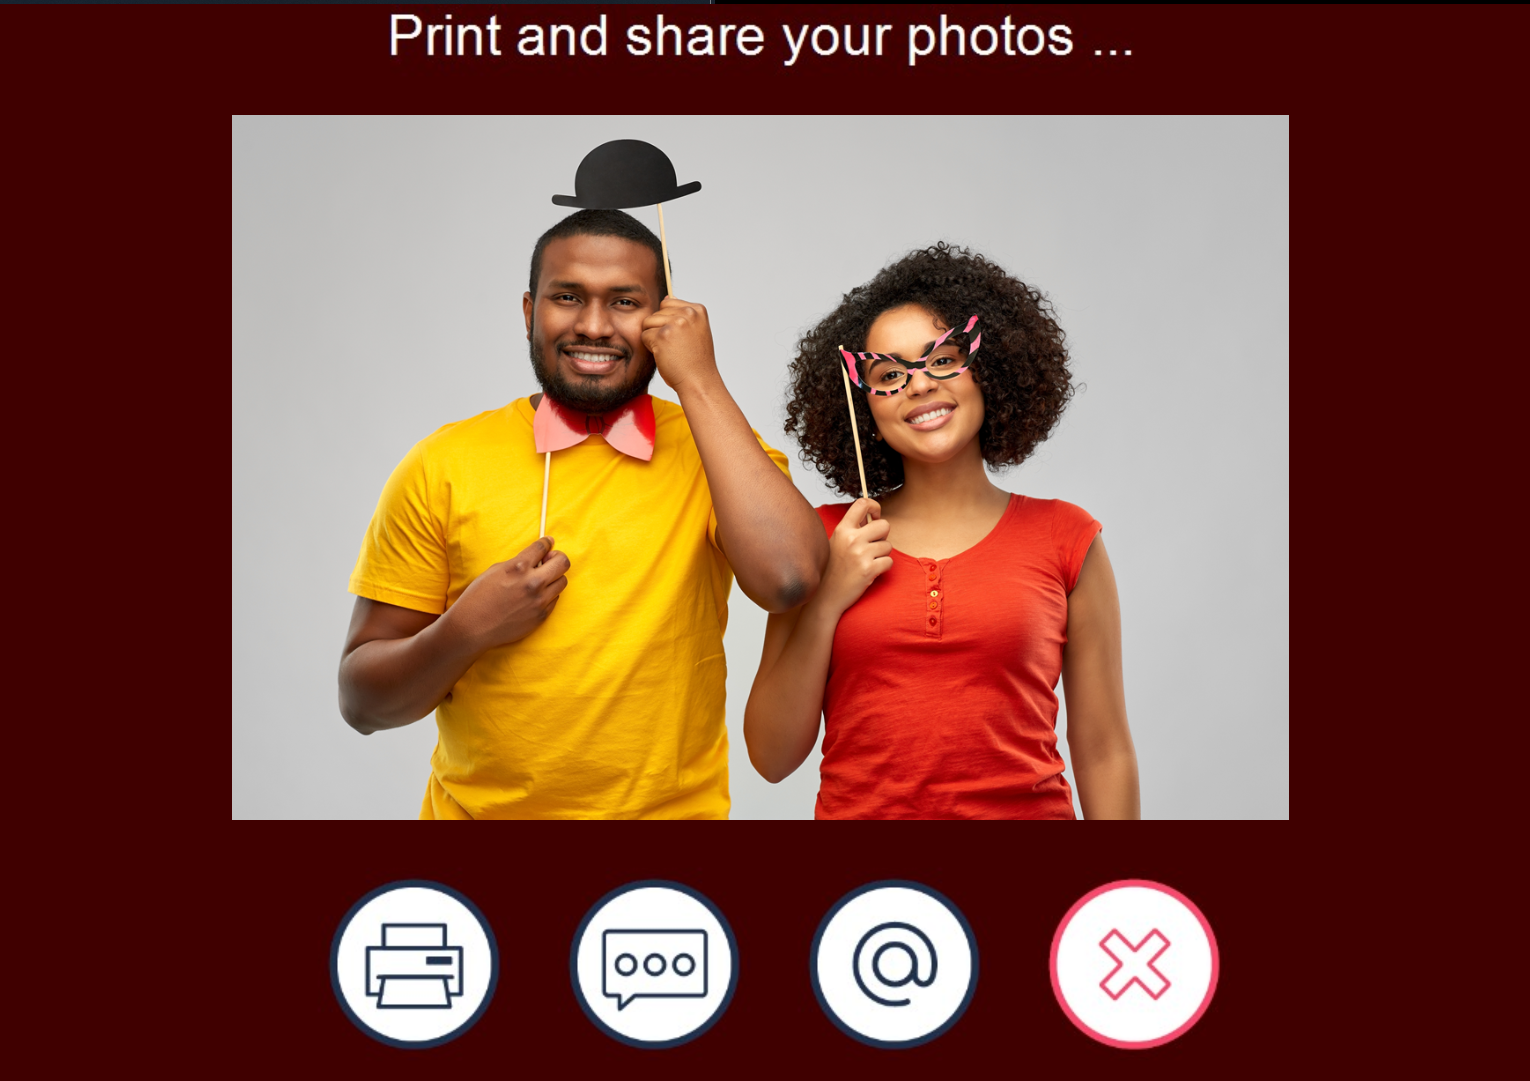
Sharing screen with new caption (DSLR Remote Pro 3.14.3)
Limiting the number of copies of each print
(3) You can limit the number of copies of each print requested from the sharing screen using Advanced Settings.
(4)Edit the message guests see if they try to print more copies than you allow on the same window:
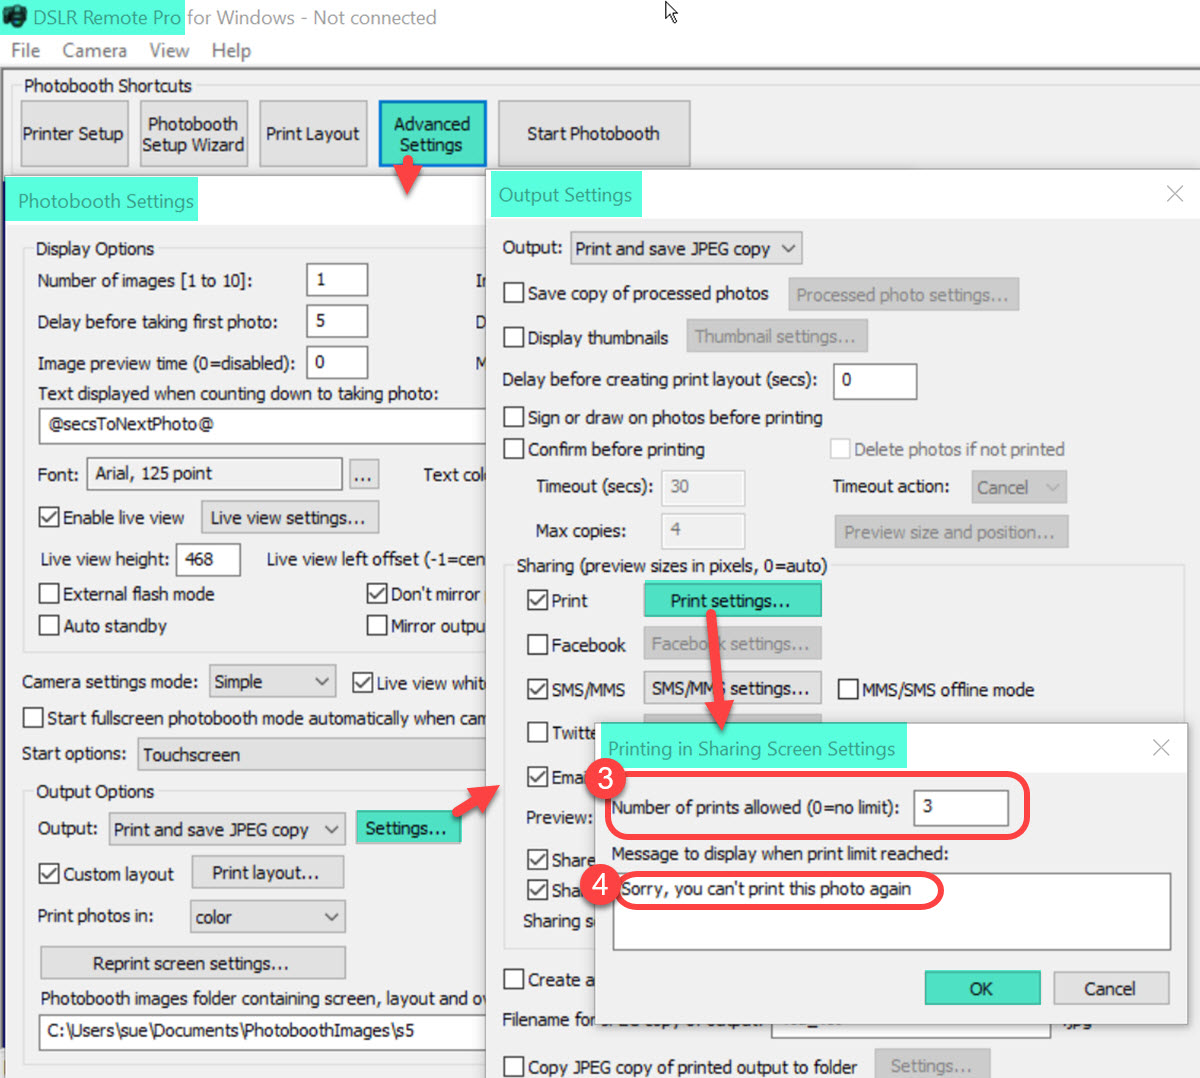
Limiting the number of prints made from the sharing screen (DSLR Remote Pro 3.14.3)
Resizing the preview image on the sharing screen
When you print strips, portrait oriented layouts, and use custom screen designs you may need to move or resize the preview image to fit your screen.
There are two ways you can do this, both described below. ‘Drag and drop‘ is simpler to use. ‘Pixel counting‘ may be useful for precise alignment.
‘Drag and drop’ the preview image
(1), (2) & (3) Go to the touch screen editor:
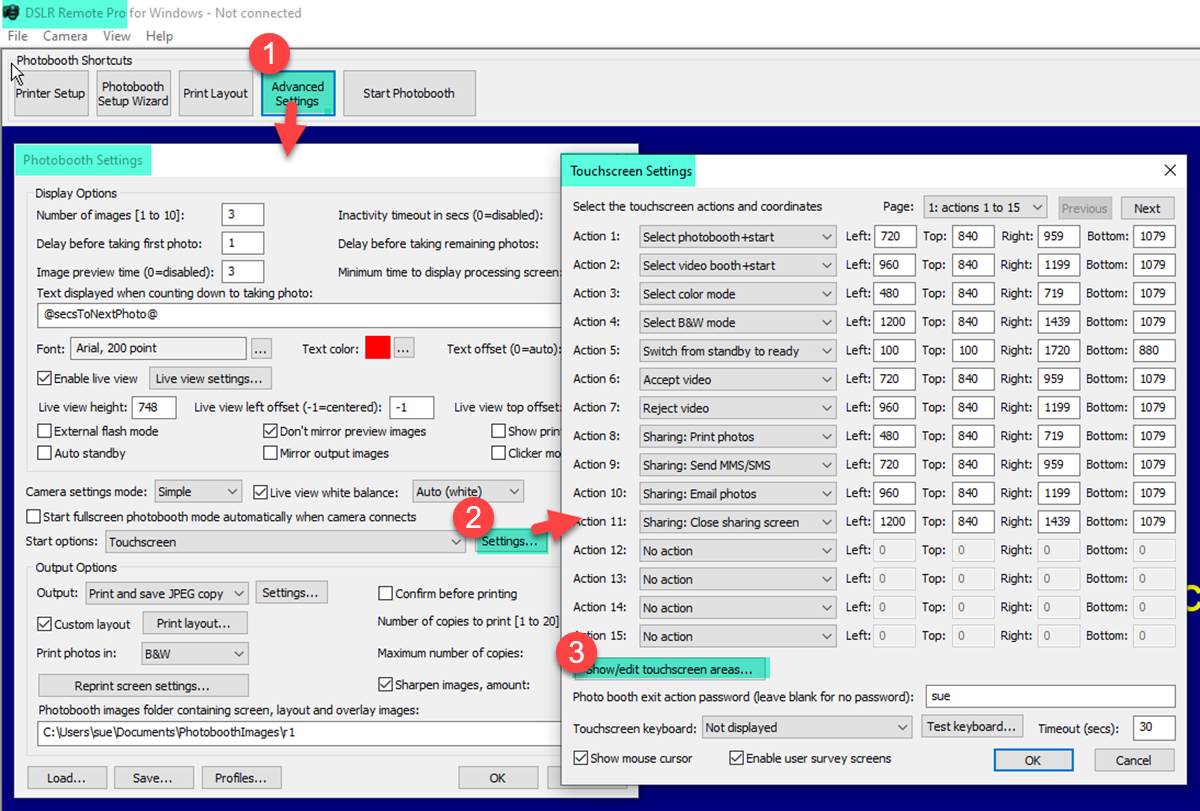
Accessing the touch screen editor for share.jpg
(4) Right click on the screen and select Share: share.jpg screen
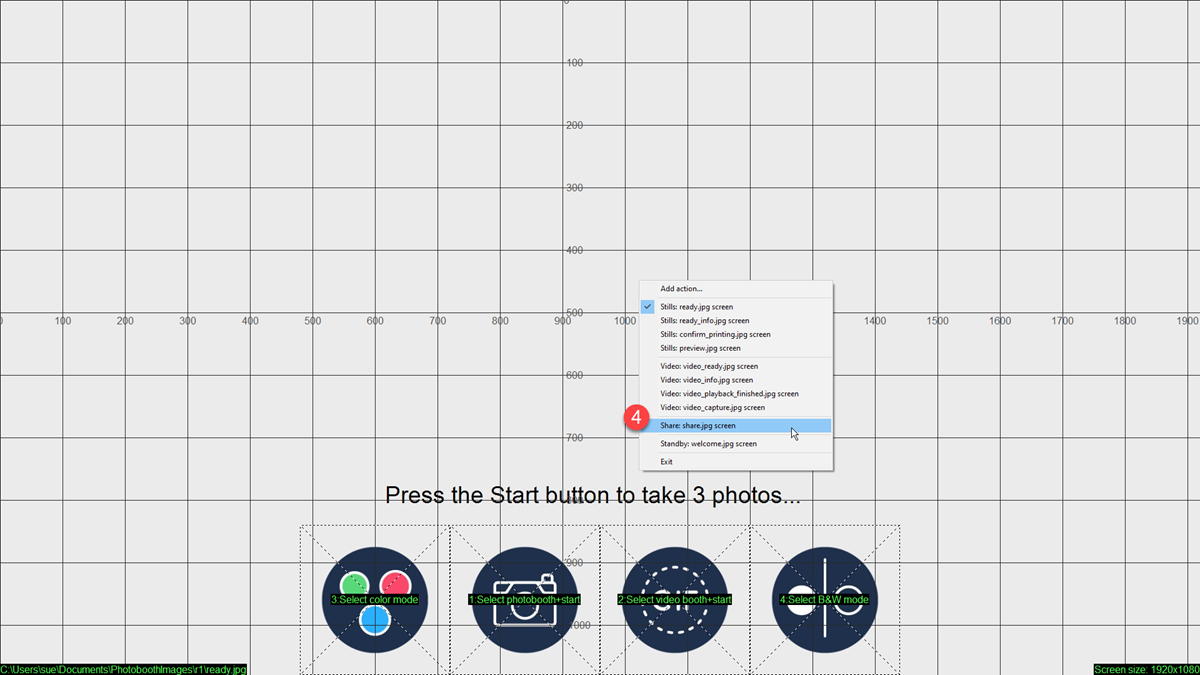
Right click and select Share: share.jpg screen
(5) Click on the preview image and resize/move it to the correct position.
NB Try to keep the same aspect ratio as you adjust thepreview. If necessary you can correct this using the ‘counting pixel’ method below.

Drag and drop the preview image into the correct position
Right click to save your work as you leave this screen.
Counting pixels for precise alignment
An alternative and precise method is to position the preview image using pixels.
(6) & (7) Go to the Output settings window
Positioning the image preview on the sharing screen using pixel counting
(8) Adjust the position/size values for the preview image on sharing.jpg
A combination of 4 boxes Left, Top, Width and Height position the preview image. If these all contain 0 (zero) the program will choose where to place the image. If you enter values,
- Left is the number of pixels to the left of the image preview
- Top is the number of pixels above the image preview
- Width is the width of the preview (as shown on screen) in pixels
- Height is the height of the preview (as shown on screen) in pixels
Tip for advanced users: you can adjust the size of the preview by shrinking or expanding it. Do not try to crop or change the aspect ratio here. Use the email or MMS settings screen if you want to crop the preview. You can find more details in the online manual.
(9) Save your changes as you leave
Summary and more …
You should now be able to
- use the wizard to set up DSLR Remote Pro to print from the sharing screen
- limit the number of prints guests can make of each session
- use your own words (or none) on the sharing screen
- resize and move the preview image for the best interface
You can find more detailed informaiton in the online manual
© Breeze Systems 2020