This tutorial shows how to use Breeze profiles to add interest and excitement to the guest experience.
Breeze profiles are unique and powerful building blocks used to design sophisticated custom interfaces and user experiences. Random profiles enable you to delight guests with the unexpected, and add variety without slowing the line at busy events. They also work well with touch free booths.
The post was written for Booth (DSLR +Windows) aka DSLR Remote Pro, and can be adapted for use with Booth (Webcam+Windows) aka Webcam Photobooth.
If you are new to profiles, work through Getting Started with Profiles before starting this tutorial.
- Getting Started with Profiles shows how to let your guests choose their experience from a menu.
- Random Profiles add excitement to the booth, helping you stand out from competitors
- Profiles Part 3 covers troubleshooting and shows how to combine menus with random profiles
This tutorial teaches you how to set up your booth to randomly switch between different designs. The worked example MultiColor Booth is simple to build and easy to test.
MultiColor Booth randomly switches between 7 designs based on the colors of the rainbow. The same approach works for action booths, magic mirrors, prints and GIFs with varied backgrounds as well as wheel of fortune booths.
Note: You can randomly vary print and GIF designs without using profiles. This is a simpler way to offer prizes, and explained in How to vary print and GIF designs automatically. If you want to add bells and whistles announcing when a prize is won, you need random profiles.
How to create a booth which switches randomly between designs
- Create and save a set of photobooth designs/experiences. You can use the Photo booth Setup Wizard to build each design quickly.
- Create a set of profiles listing these designs
- Tell the program to randomly choose one design for each new session
- Start the photo booth and check everything works correctly
Multicolor Booth has a simple design for each of the seven colors of the rainbow. Once you see how this works, replace the color designs to give guests different experiences using variety of animations, sounds, instructions or completely different experiences such as GIFs or photos.
I will run through 3 different ways you can set up random profiles. The first method is simplest to use and best for beginners. The second two methods are useful for more experienced users building more complex setups.
Lets get started..
Method 1 – Multicolor Booth for beginners
Note: This is Method 1 in the online manual
Run the setup wizard to create the Red design
Start DSLR Remote Pro and run the Photobooth Setup Wizard
- At Step 1 choose a meaningful name for the design. I used Red
- At Step 2 choose your screen design, captions, and sharing options as usual
- At Step 3 check the printer is set up correctly and choose your print layout
Customize the Red print layout
To customise the print template or load predesigned layouts select Print Layout.
Note: when you leave the print layout editor you may be prompted to Save print settings to the default profile? Choose No.
Save all the settings for design Red
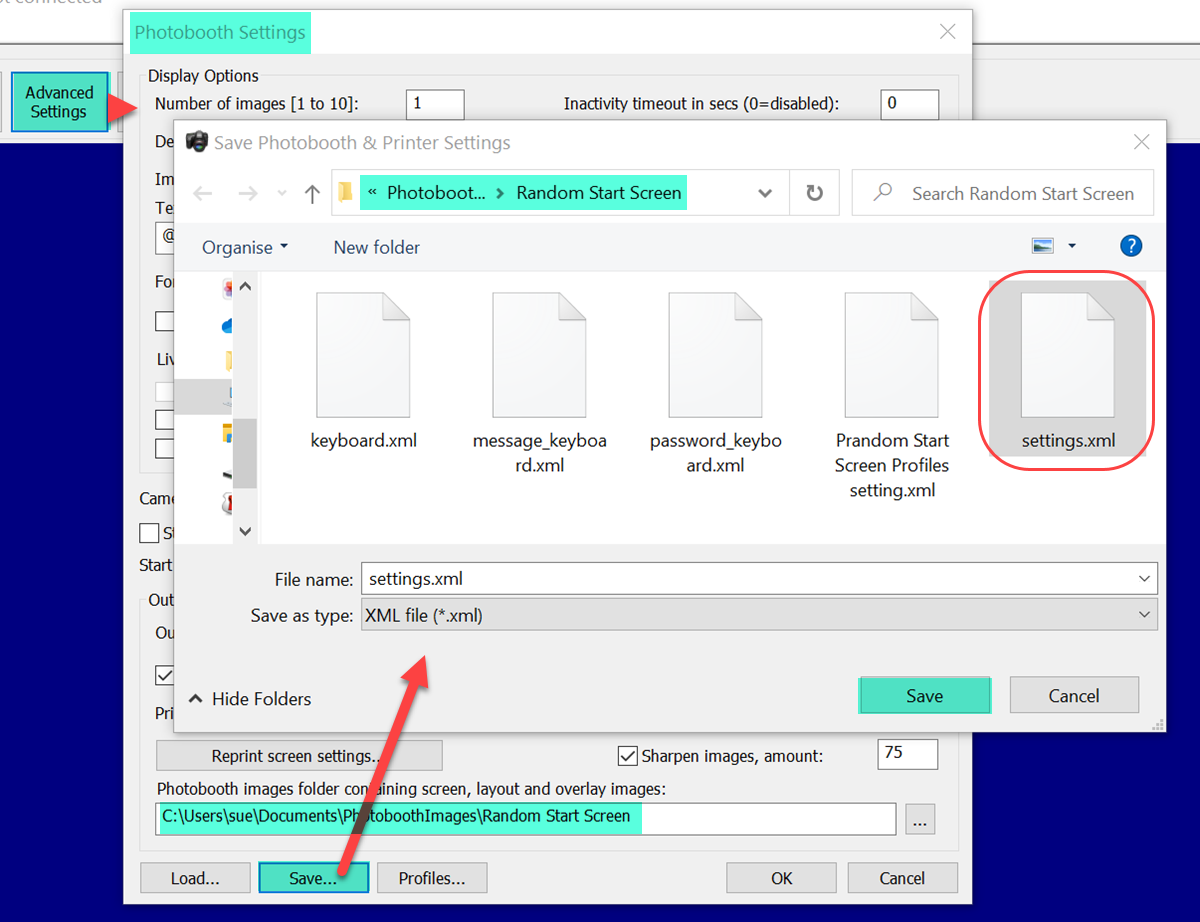
Select the large Advanced Settings button then Save.
Note: You will be asked whether to Save the printer settings as well as the photo booth settings? Choose Yes.
This Save command stores your current choices for screen and output designs, sharing instructions and everything else needed to run Red in a file called settings.xml.
Be careful to save settings.xml in the correct PhotoBoothImages folder, here …\PhotoboothImages\Red\settings.xml
Note: you can make other changes as well as customising the print layout. Once you finish making changes to any option, or to the menu design, you will need to return to Advanced Settings and save them.
Once you are done press OK to leave the Photobooth Settings screen. Before moving on, select Start Photobooth and check this design works as you expect.
Red Print Preview screen (Breeze DSLR Remote Pro 3.15.3)
Run the setup wizard again to create the Orange design
Repeat the process for the Orange design.
Run the Setup Wizard again. This time
- At Step 1 choose a meaningful name for the design. I used Orange
- At Step 2 choose your screen design, captions, and sharing options (you can make these different from your other options)
- At Step 3 adjust the printer settings if necessary and choose your print layout
Customize the print design
Customise the print using the Print Layout Editor and make any other changes you need.
Save the settings for design Orange
Select the large ‘Advanced Settings’ button then Save. Take care to save the settings in the correct folder; here …\PhotoboothImages\Orange\settings.xml
When you have saved your settings Press OK to leave the Photobooth settings screen.
Note 4: During this process you need to keep saving your updated settings. Take care to check you are saving them in the correct folder each time.
Before moving on, select Start Photobooth and check this design works as you expect.
Repeat the process to create the five other designs Yellow, Green, Blue, Indigo and Violet
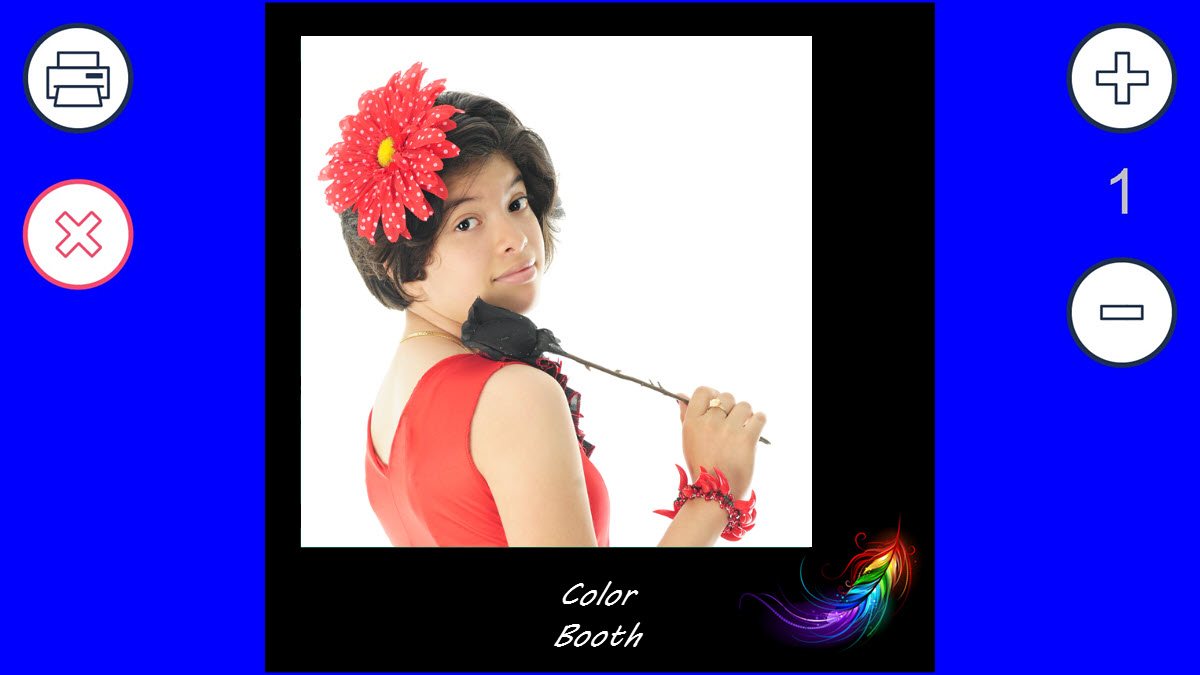
Blue Print Preview screen. Designs can have different print layouts, so both takeaway and screens can be varied (Breeze DSLR Remote Pro 3.15.3)
Create a set of profiles including all seven designs
We need seven profiles, one for each color of the rainbow Red, Orange, Yellow etc.
One of these designs will be chosen randomly when the booth starts, and for each new session.
1. Stay in the Photobooth Settings screen and select the Profiles… button. This takes you to the Photobooth Profiles screen.
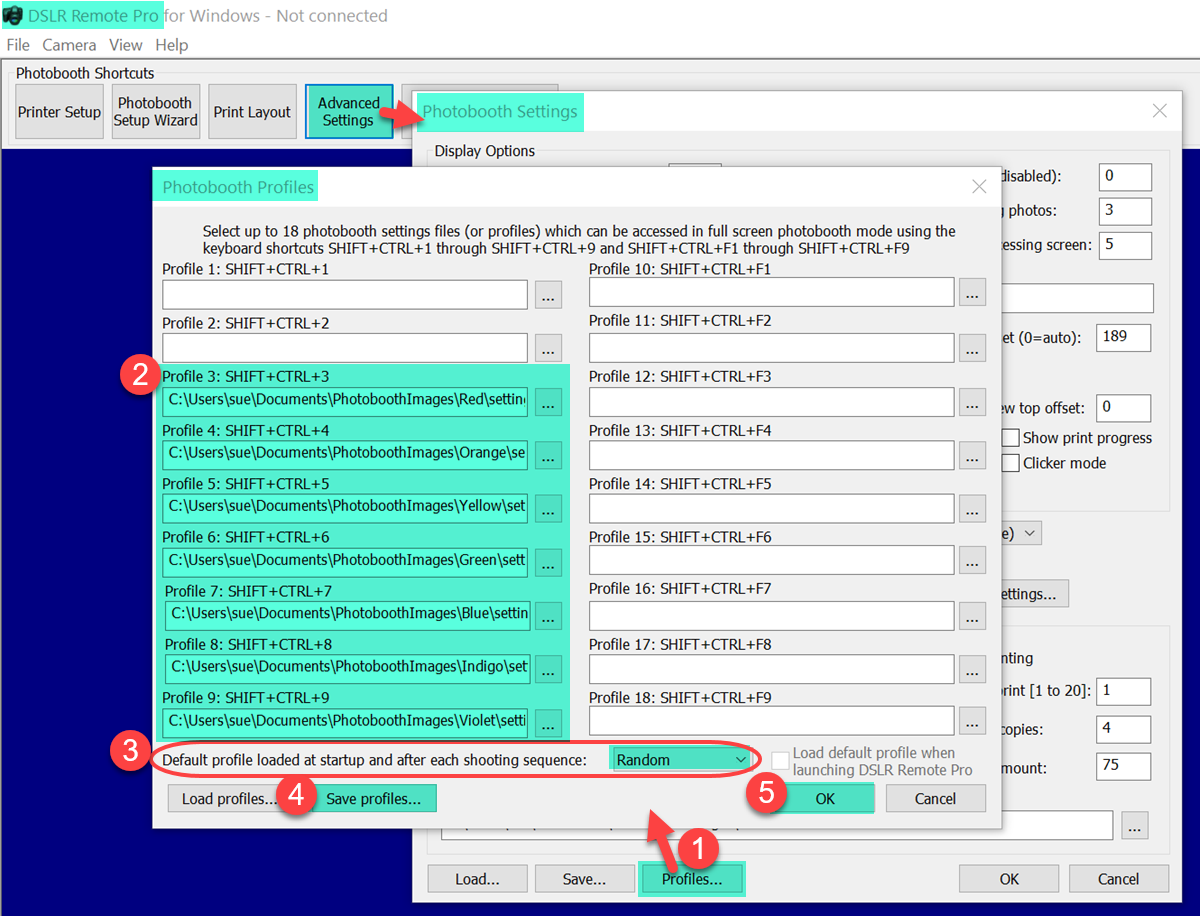
Setting up profiles for each color (Breeze DSLR Remote Pro 3.15.3)
(2) Set Profile 3 to C:\…\PhotoboothImages\Red\settings.xml
Set Profile 4 to C:\…\PhotoboothImages\Orange\settings.xml
… through to
Set Profile 9 to C:\…\PhotoboothImages\Violet\settings.xml
(3) Set Default profile loaded at startup and after each shooting sequence to Random. This will randomly choose and run one of your seven designs at the start of every session
(4) Use the the Save Profiles .. button so you can use these profiles again. I have called the profiles xml file Random Profiles.xml and saved it in the Red folder : …\PhotoboothImages\Red\Random Profiles.xml
(5) Click OK to leave the profiles screen
Note: Any time you are not using profiles, change (3) back to None and uncheck Load default profile when launching DSLR Remote Pro
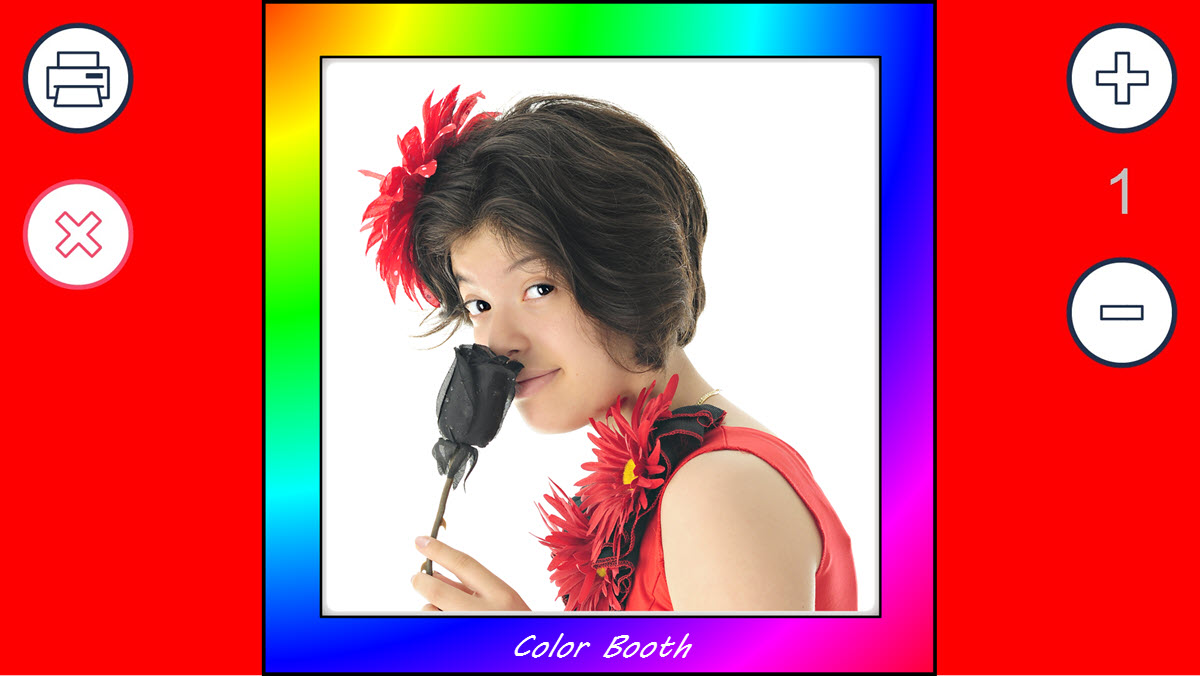
Test Color Booth
Start the booth and check it works properly. Color Booth will switch randomly between the seven designs. It may take a while to see all seven designs, just as it can take longer than expected to roll a six when you need one.
Using this approach with Breeze touch free booths
This approach works with touch free booths controlled by contactlessbooth.com
For each of the seven profiles you will need to
- Check the boxes Scan QR codes for strings and Scan QR codes for commands in Advanced Settings
- Ensure that the ready screen includes actions Select photobooth+start and/or Select video booth+start
This is explained in detail at How to run a contactless booth
Improving the start of the guest experience
So far each session starts with a different ready screen, as here
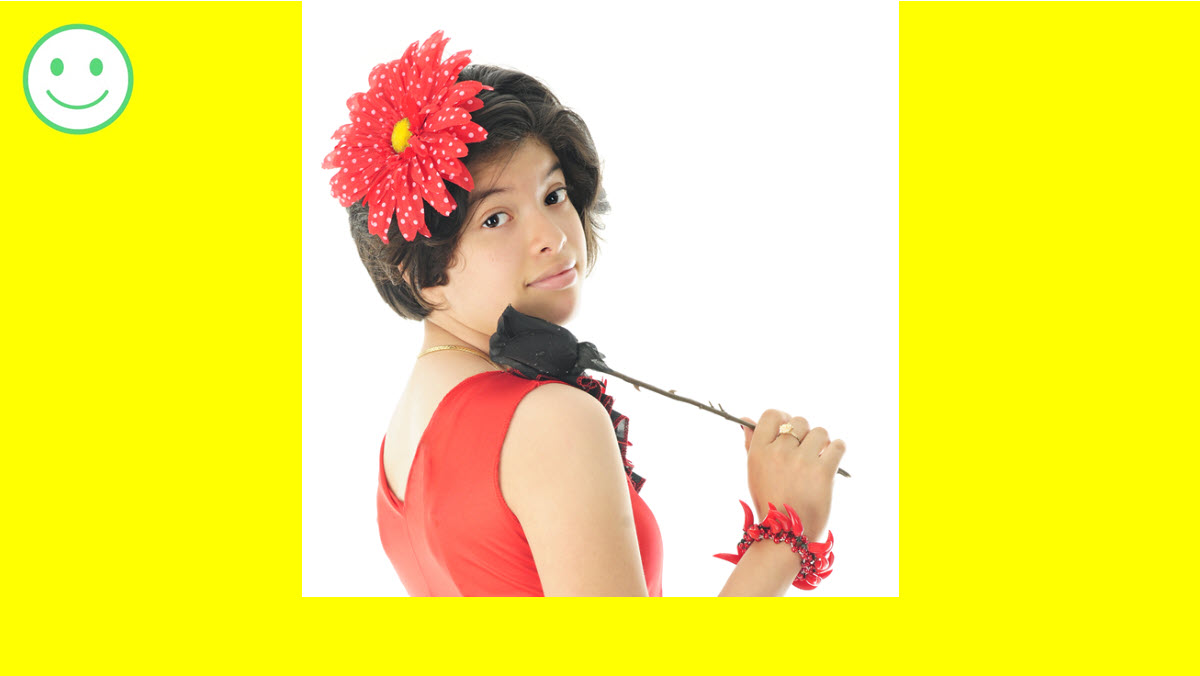
Yellow Ready screen with live view
This works fine, but you can improve the element of surprise by making each session start with the same ready screen.
Method 2 – Add a common Ready screen using touch screen actions
Making each session start with the same Ready screen adds interest to the booth, because the color is only revealed when guests touch the screen.
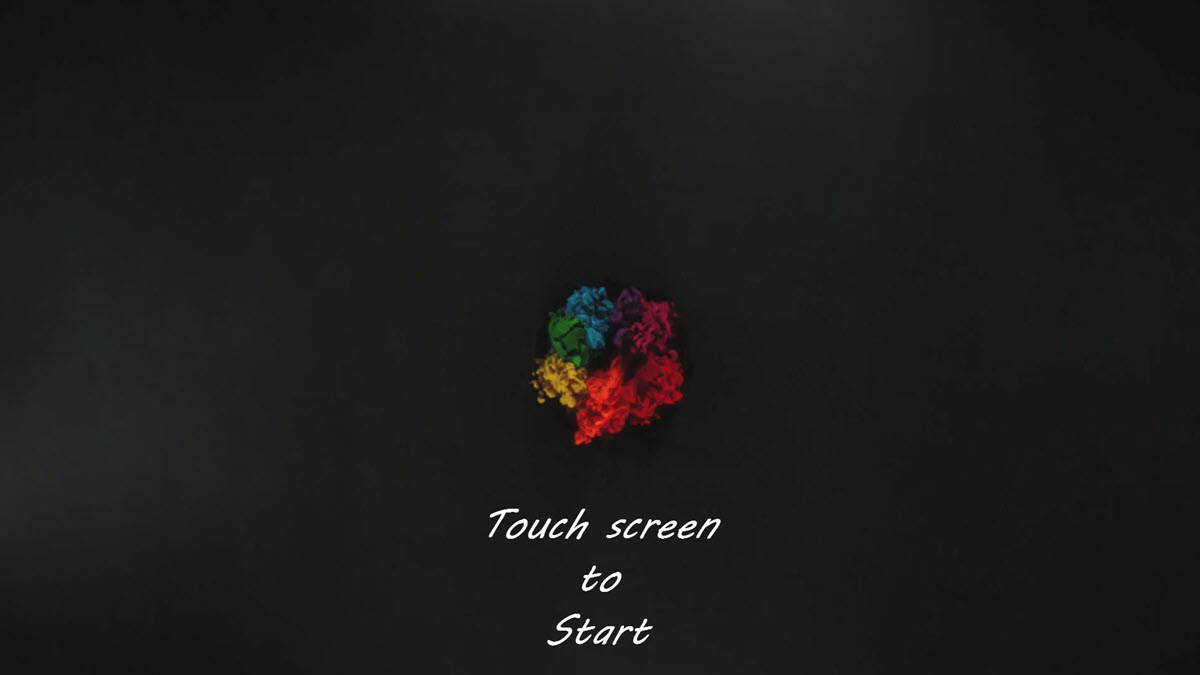
Using a common ready screen for all options hides the surprise until guests have started the action
Note: This is Method 2 in the online manual , and can also be used to build create Choose or Surprise Me and other more complex menus.
We shall add a single ready screen with a touch screen action called Random profile 3-10 + start
Random profile 3-10 + start chooses one of our profiles 3- 9 (the designs Red through to Violet) and starts the countdown for the design.
How to add a common Ready screen to Color Booth
Run the setup wizard again and create a design called Random Start Screen. This time
- At Step 1 choose a meaningful name for the design. I used Random Start Screen
- It doesn’t matter which options you choose at Steps 2 and 3 (they will not be used)
(Optional) Remove the live view from your Random Start Screen screen
If you don’t want to see the live view on this screen, take it out.
- Select the large ‘Advanced Settings’ button and remove the live view by unchecking Enable live view.
Make any other changes and save your design
- Select Save and update …\PhotoboothImages\Random Start Screen\settings.xml
Stop other profiles loading automatically while you work on this design
- Switch the Default profile to to None to stop profiles from being automatically loaded at startup and after each shooting session
- Load Random Start Screen
Replace the Ready screen and add the Random Touchscreen Action
Replace the Ready screen and any Ready animations and sound in C:\Users\sue\Documents\PhotoboothImages\Random Start Screen
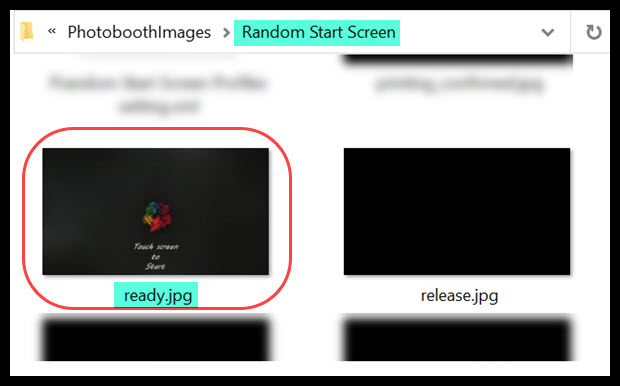
New Ready.jpg screen in the PhotoboothImages folder for Random Start Screen
Replace the touchscreen start actions for this Ready screen with the action Random profile 3-10 + start
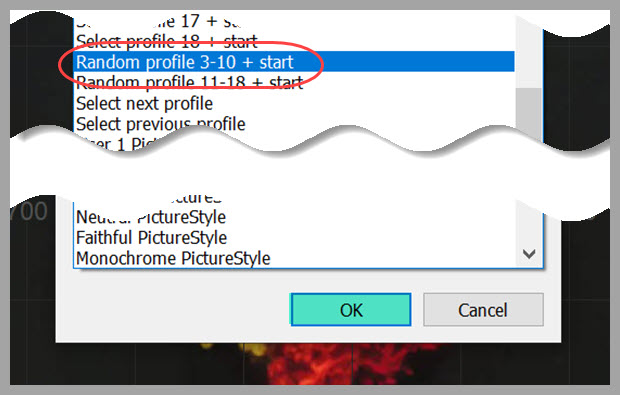
Adding the action Random profile 3-10 + start
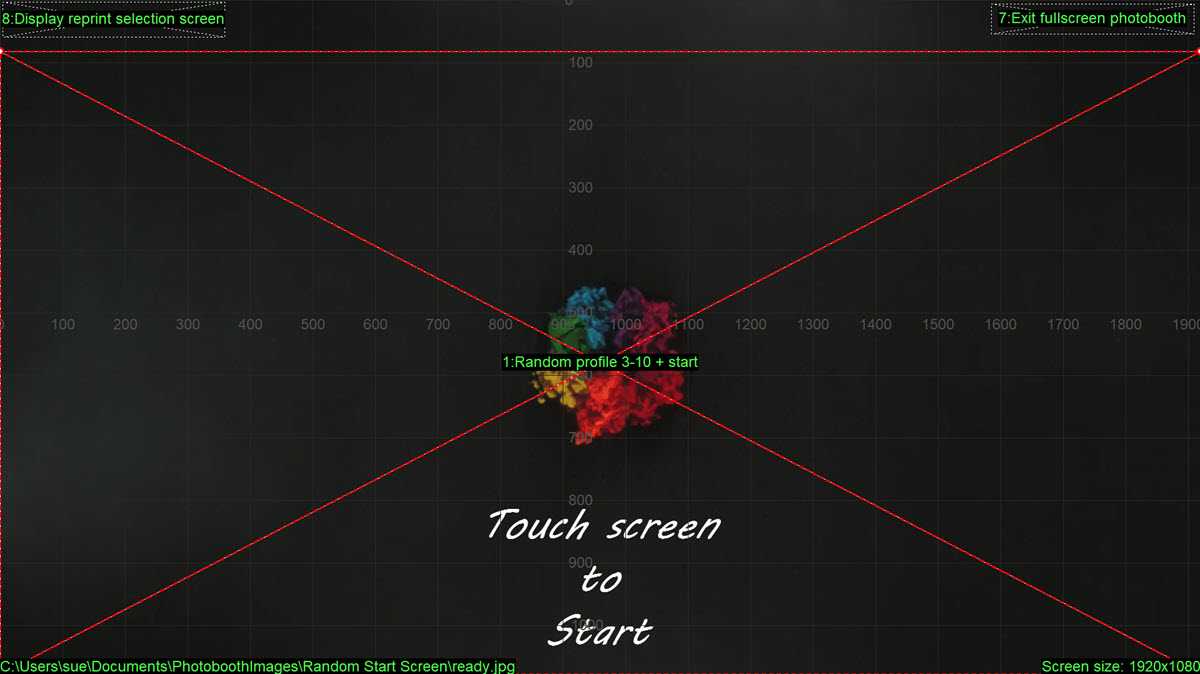
Fill the screen with the Random profile 3-10 + start action. A small area at the top of the screen has been kept free for Hidden Exit &/or Reprint Selection Screen buttons
Save your settings!
Saving the updated Photobooth settings for Random Start Screen
Add a new profile for Random Start Screen and make this run at the start of each session
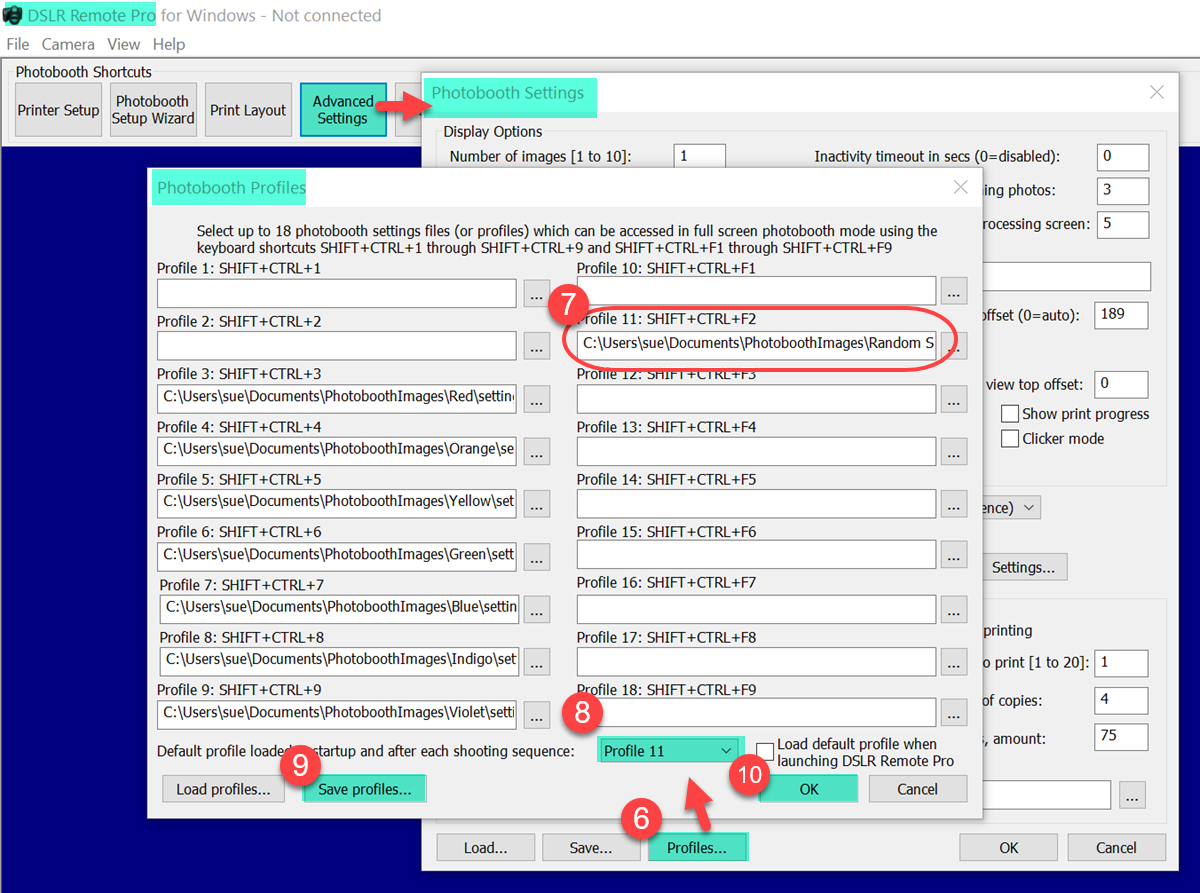
Add the new profile for the Random Start Screen (7), make this run at the start of each session (8) and save the updated set of profiles (9)
(6) Return to the DSLR Remote Pro Profiles screen
(7) Add the a new Profile 11 with your Random Start Screen Design
(8) Make Profile 11 run at the start of each session
(9) Save your updated set of profiles!!!
(10) Click OK to leave the profiles screen
Check everything works
Run your booth and check it works as you expect.
Warning: Combining this method with a contactless booth should only be attempted by relatively advanced users who are happy to adapt the script generating the QR code to send the instruction Random profile 3-10 + start. A simpler (but possibly slower) way to achieve the same effect is to copy the same ready screen/animation into each profile. This works with touchfree QR codes generated by contactlessbooth.com as above.
Method 3 – Using tokens to control random profiles
Advanced users should note that there is a third more flexible method of setting up random profiles using tokens. Combining tokens with profiles gives additional flexibility which is very useful for more advanced setups..
(1)The seven photobooth settings files are named settings1.xml, settings2.xml,… to settings7.xml and all stored in the same folder
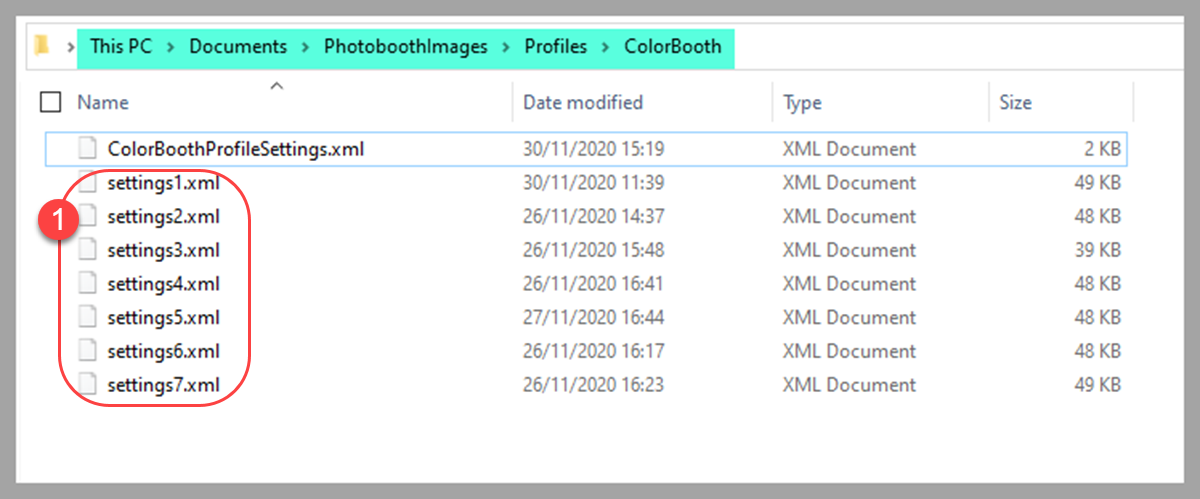
Each photobooth settings file is named sequentially and stored in the same folder (here C:\Users\…\Documents\PhotoboothImages\Profiles\ColorBooth)
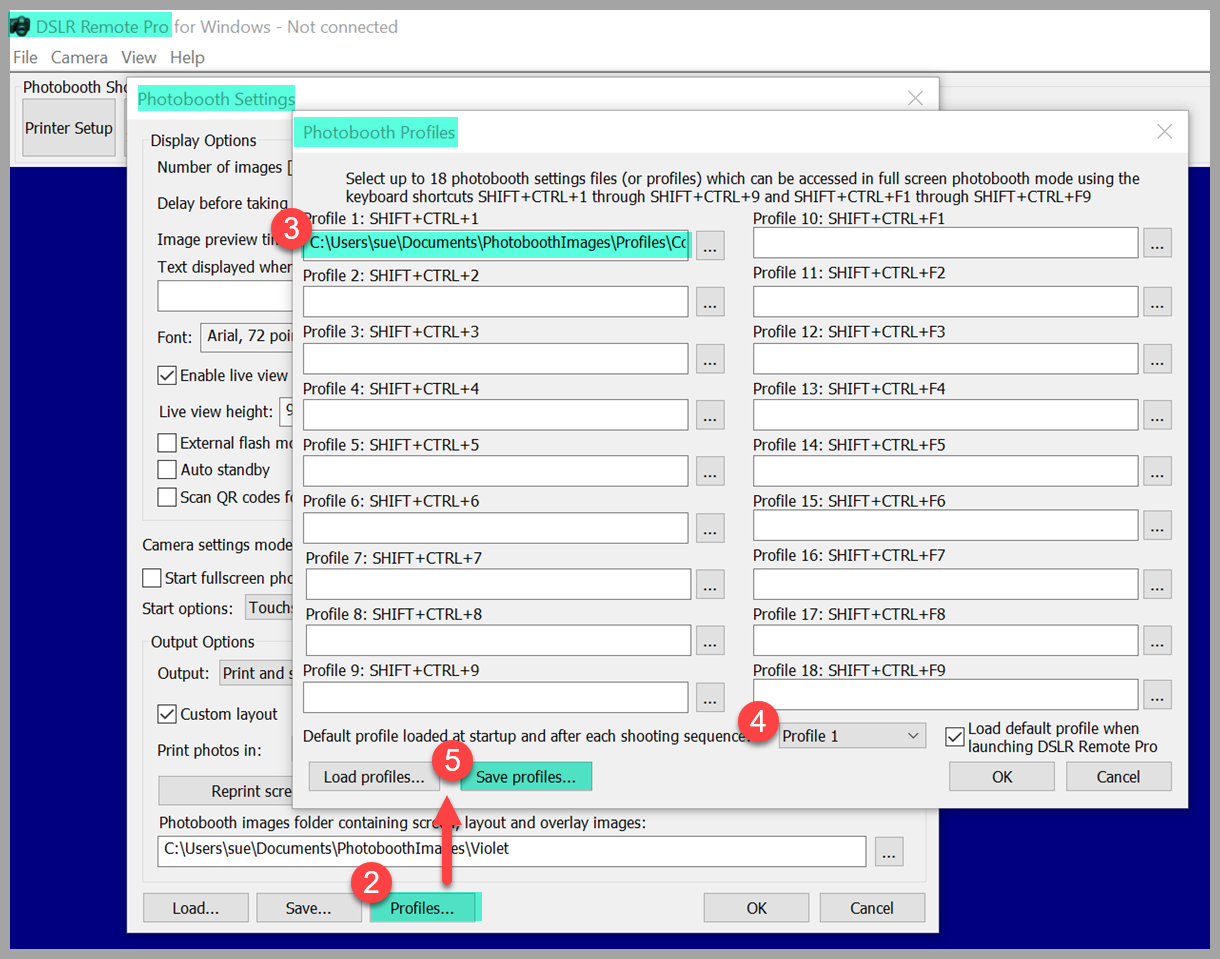
Photobooth Profiles screen for Method 3. Only one profile is required. The profile settings file name includes a random token. This randomly switches the photobooth settings files loaded for each session.
(2) Start DSLR Remote Pro and bring up the profiles screen
(3) Set profile 1 to C:\Users\sue\Documents\PhotoboothImages\Profiles\ColorBooth\settings{random,1,7}.xml
(4) Make profile 1 the Default profile. Each time the booth runs, {random,1,7} will be replaced by one of the numbers 1 to 7.
… When the random number is 1, this is settings1.xml (the photoboothsettings folder for my Red design) etc
(5) Remember to save the new set of profiles. I saved mine in the same folder as all the photobooth settings files, and called it ColorBoothProfileSettings.xml
Check everything works
As always run your booth and check it works as you expect.
From Color Booth to random animations, backgrounds and more
Each of the three methods builds a simple set of random profiles based on the colors of the rainbow.
- Use the same concept in a mirror booth by replacing the color designs with varied animations, audible comments and sounds.
- Create random action booths replace the color designs with instructions to Jump! Point! etc
Summary
I have run through three methods you can use to set up random profiles in DSLR Remote Pro, and add excitement and variety to your guests’ experience at events
- If you are new to profiles, use the first and simplest method 1. This is easy to combine it with touchfree operation if you wish.
- The next profiles tutorial (Part 3) will use the second method to build a design combining menu driven choice with a random ‘surprise me’ option.
- Method 3 gives more advanced users a brief taste of combining tokens with profiles..
Random profiles can be controlled touchfree, as explained in this tutorial.
Learn more about using profiles to build choice based booths
© Breeze Systems 2020