Background removal is a fantastic alternative to green screen. The quality is awesome, there’s no cumbersome backdrop, and lighting is much simpler. It doesn’t even matter when your guests wear green.
This tutorial explains how to get amazing effects using using AI (artificial intelligence) based background removal with Breeze Booth (DSLR + Windows) aka DSLR Remote Pro.
You need to use a paid third party service alongside DSLR Remote Pro, and a have reliable Internet connection at the event. Introduction
This tutorial explains how to
- run DSLR Remote Pro with your background removal service
- add a single background to prints and slideshow GIFs
- bring GIFs to life with animated backgrounds
You will need an API key from whichever background removal service you choose to use
Start DSLR Remote Pro and create or load your design
- If you are starting from scratch, run the Photobooth Setup Wizard to create the event
- Otherwise load the event or profile you want to use
Add background removal
Start the Remove Background Utility
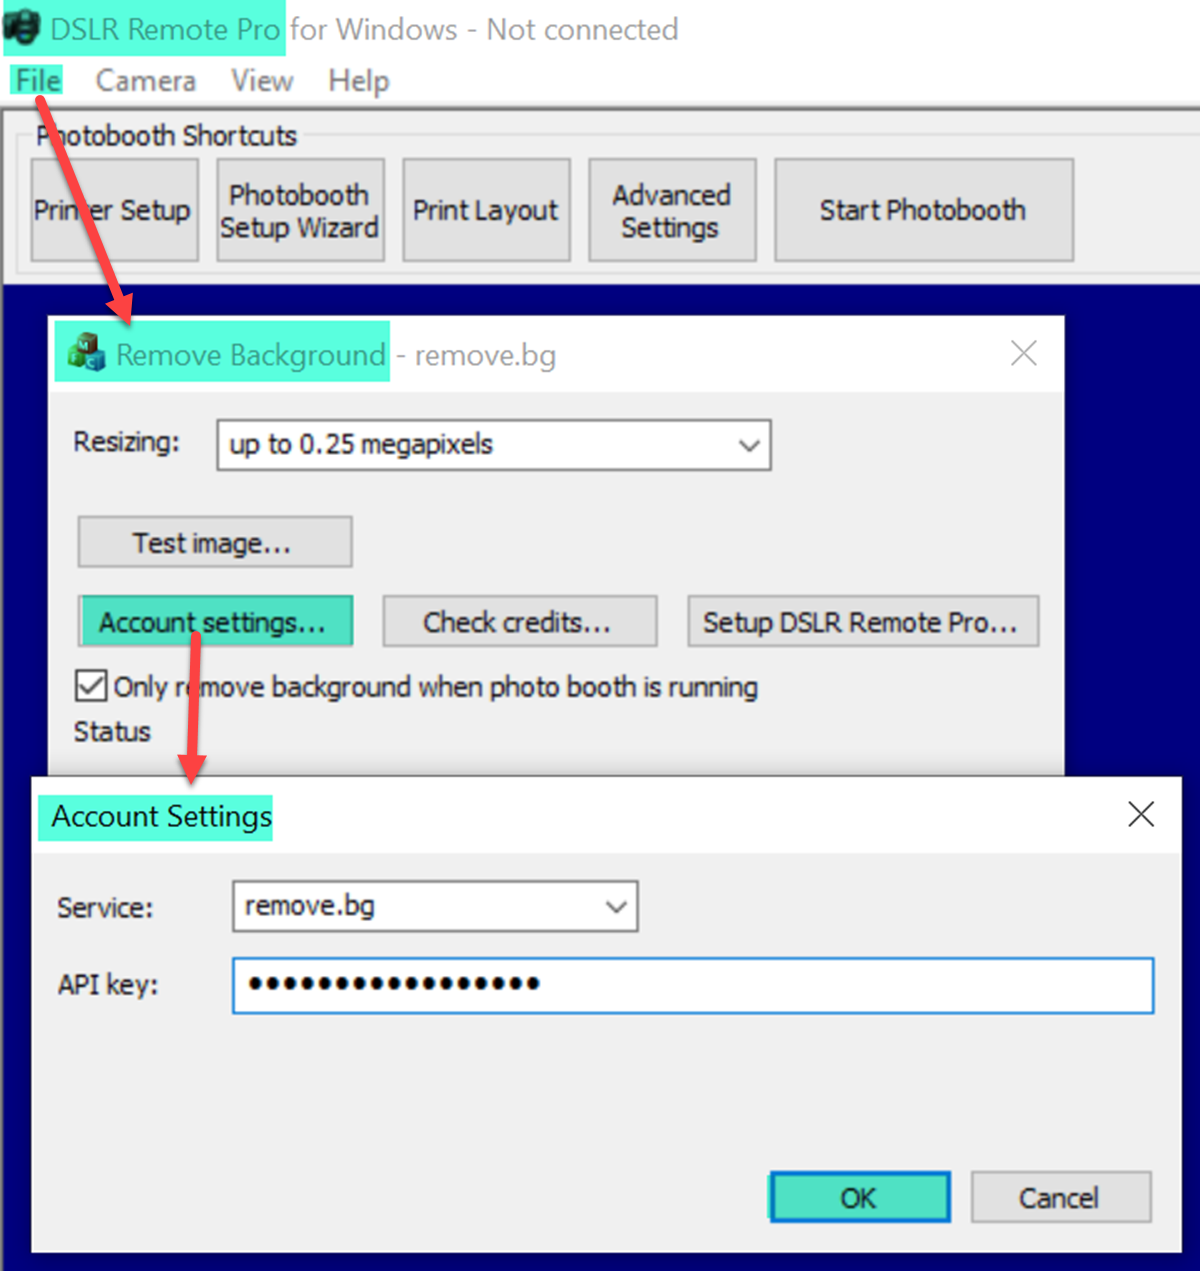
Running the Remove Background utility and adding an API key (DSLR Remote Pro 3.15.1)
To find out how many credits you have left, select Check credits..
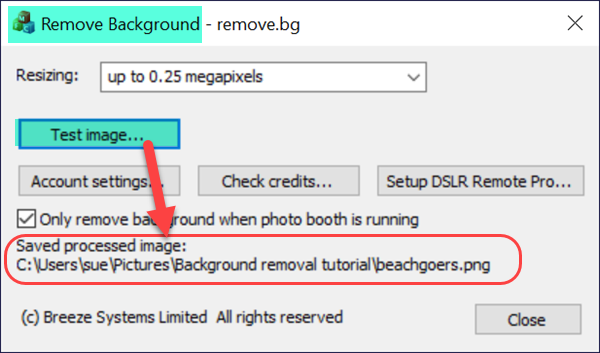
Test image... will check the service is working on the computer (this may use one of your credits)
Check Only remove background when … then click on the Setup DSLR Remote.. button
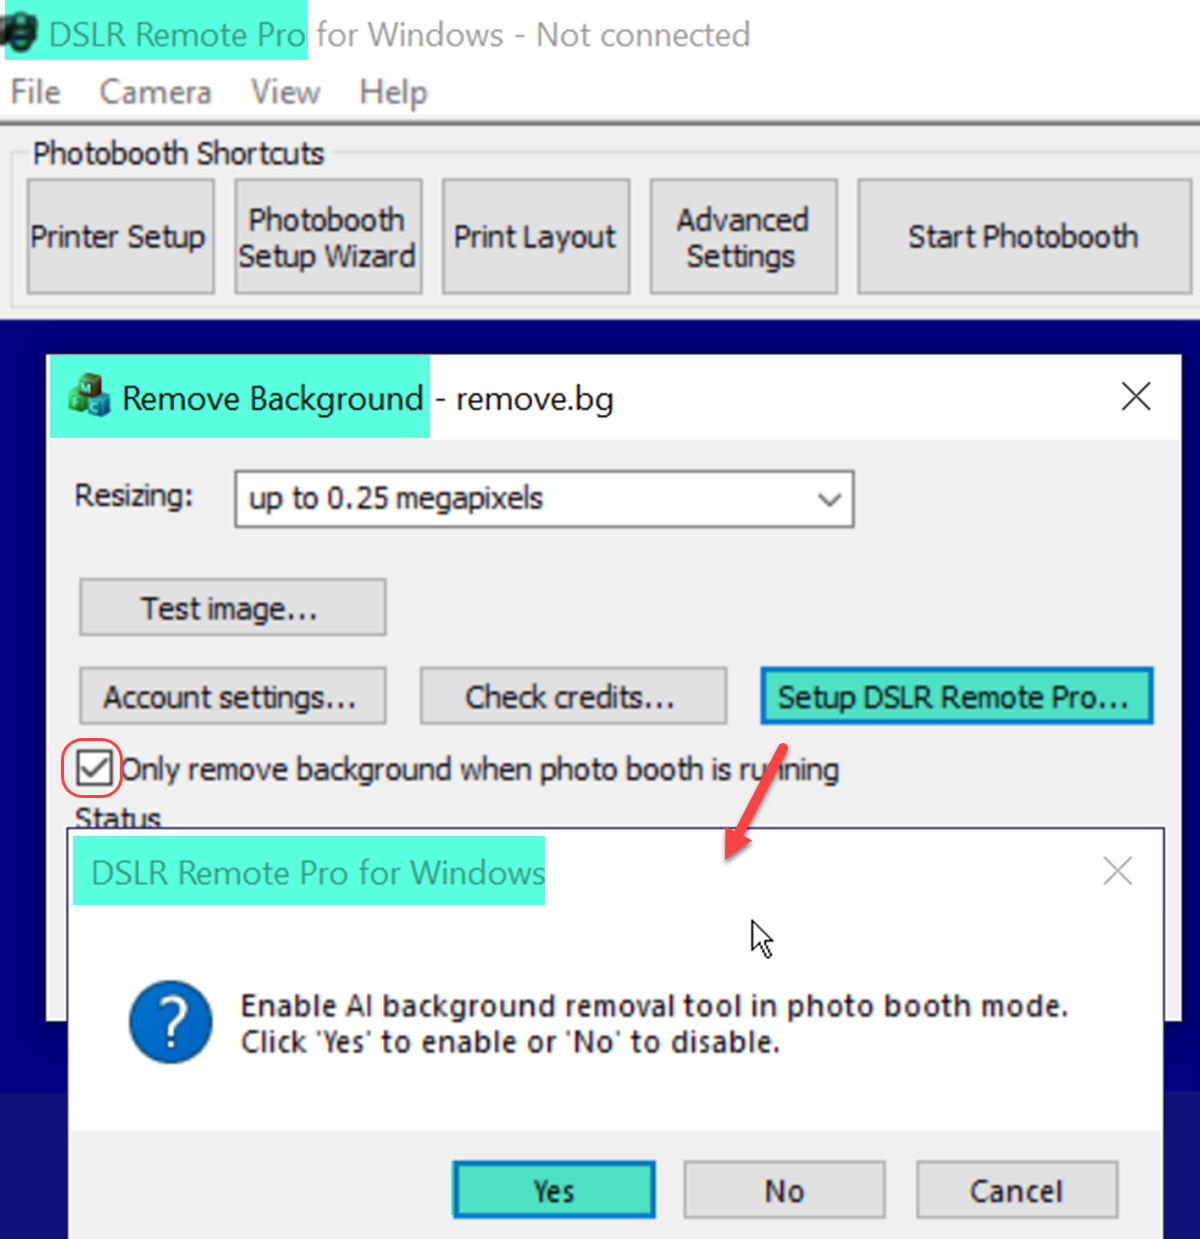
Set up DSLR Remote Pro to remove backgrounds from guest photos (Breeze DSLR Remote Pro 3.15.1)
Selecting small or full sized image
Some removal services offer small up to 0.25 megapixel png images either free or cheaper than full sized images. To take advantage of this for testing select up to 0.25 megapixels from the drop down Resizing menu:
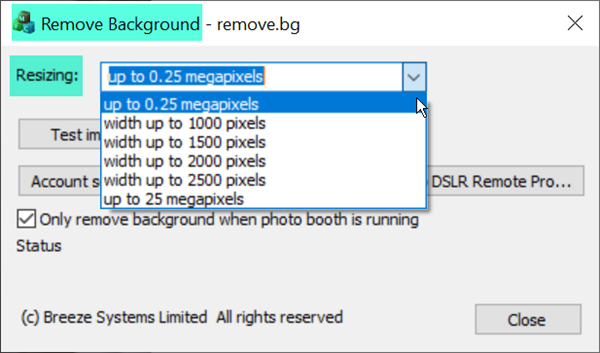
Some services charge less for smaller images. Selecting up to 0.25 megapixels from the Resizing menu in the Remove Background tool
Add the new background to your prints
Open the DSLR Remote Pro print layout editor and import your background image

Adding the background to your print (Breeze DSLR Remote Pro 3.15.1 print layout editor)
Click on Import background… and select the new background for your print. The background should be the same size in pixels as the print.
DSLR Remote Pro replaces the original backgroud with the background used in the Print Layout Editor.

You can resize and position this image on the print using drag and drop, or specify its precise position using pixel positions. The Print Layout Editor settings above produce the result below.
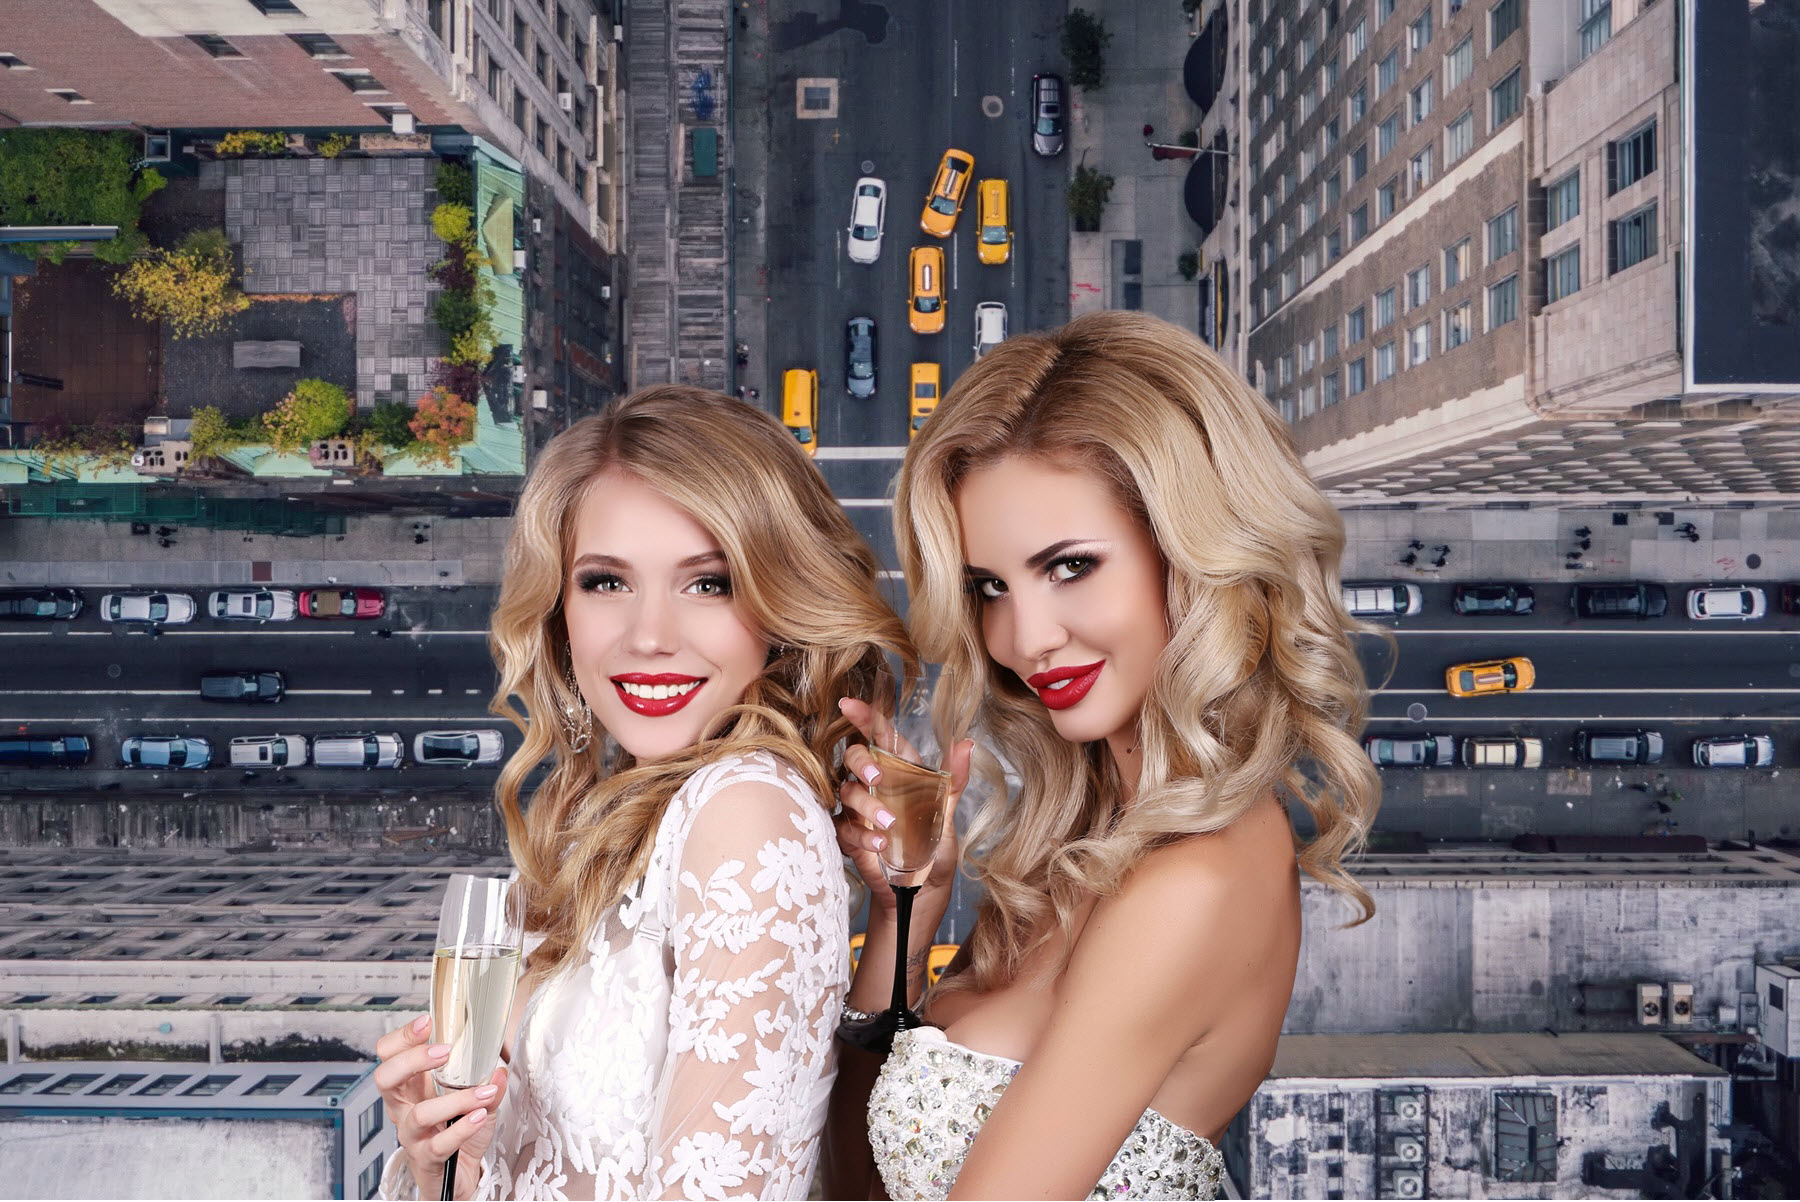
Print with smaller figures against the a New York background (Breeze DSLR Remote Pro 3.15.1)
In the next example background removal is used to remove an unwanted background:
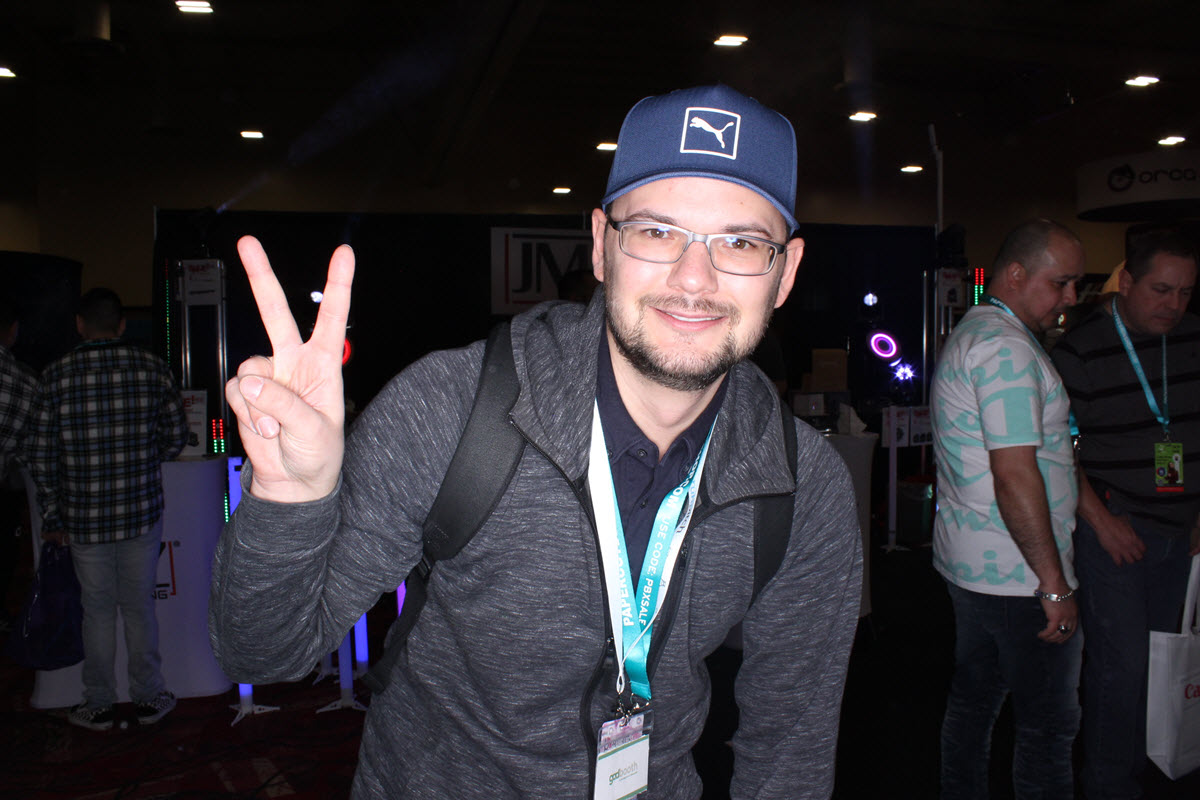
DSLR Remote Pro running at a busy tradeshow
This 3 shot booth adds overlays and graphics to the print. Each photo also overlays the previous image.
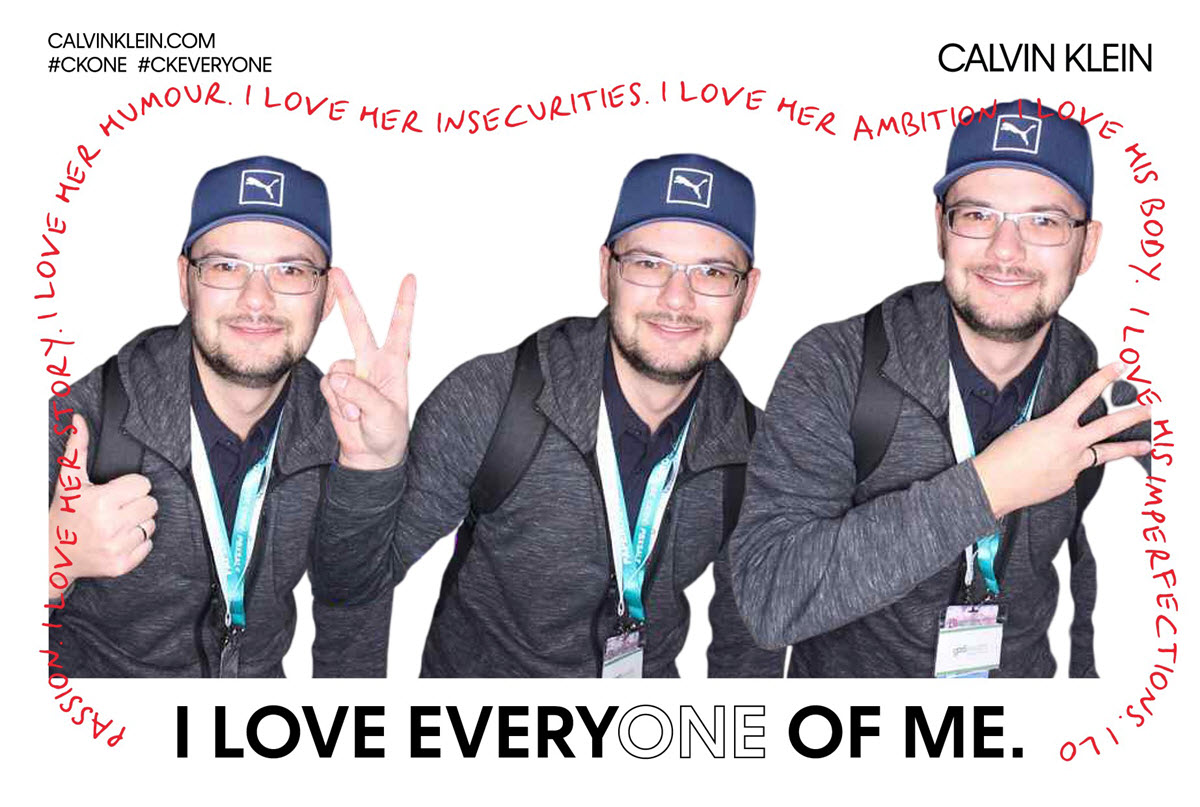
On the print the cluttered background has vanished (Design courtesy of The Photo Booth Guys)
Simple Slideshow GIF with one background
- Create a slideshow GIF as usual
- Add your background to the PhotoBoothImage folder, remembering to call it gif_background.jpg
- Run the AI background removal tool & select Setup DLR Remote Pro..
- Run the booth
Two photo GIF with a single background
Settings used for the simple GIF above:
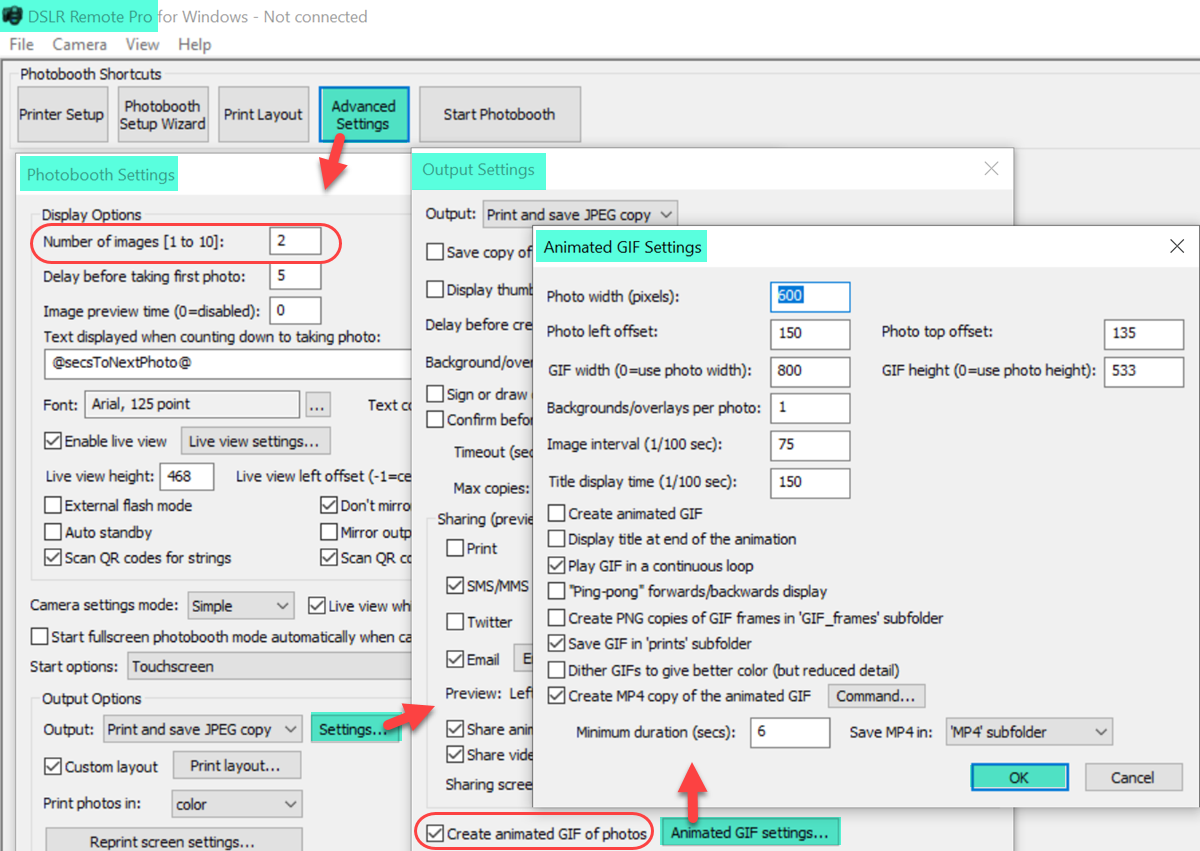
Animated GIF settings window for 2 photo GIF with single background (DSLR Remote Pro 3.15.1)
Slideshow GIF with four backgrounds
Liven up a GIF using several backgrounds:
Two photo GIF with four backgrounds
What I changed:
- There are now 4 backgrounds in the PhotoboothImages folder called gif_background_1.jpg, gif_background_2.jpg, gif_background_3.jpg and gif_background_4.jpg
- Make Backgrounds/overlays per photo 2 on the Animated GIF Settings window
- To help stop the MP4 from getting too large when you have multiple backgrounds reduce Minimum duration to 3 seconds*
*Videos posted on Instagram must be at least 3 seconds long at the time of writing
Taking this simple concept to a whole new level…
Virtual world tour
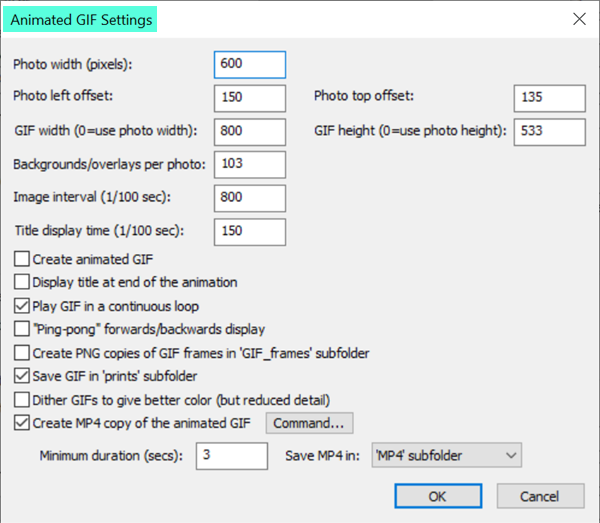
This single photo GIF uses 103 backgrounds to zoom around the world
These are the animated GIF settings used to create this GIF. When making GIFs on this scale, create only the MP4 copy of the GIF and not the GIF itself
Advanced users using profiles with background removal
To use background removal with profiles, every profile must have transparent green screen enabled and Delay before printing set to 60 seconds*. You can achieve this in two ways
- Either load a profile, then run the background removal tool as above, then save the profile with the same name/directory. Repeat for each profile (recommended)
- Or load a profile, set up transparent green screen, set Delay before printing to 60s, then save the profile with the same name/directory. Repeat for each profile.
*60 seconds is usually long enough for the image to be uploaded to your background removal service, processed and new image downloaded to the booth. DSLR Remote Pro will create the print as soon as this image arrives.
You can run background removal on some profiles and not others, but this is fiddly to set up. Details here
Summary
We have covered how to run DSLR Remote Pro with your background removal service, how to add a single background to prints and slideshow GIFs, and brought GIFs to life with animated backgrounds.
We focused on replacing image backgrounds using Breeze DSLR Remote Pro. There’s a lot more you can do with GIFs and prints. Don’t forget to brand GIFs and prints, try animating GIF overlays, use random overlays and backgrounds, and much more. Check out the online manual to learn more.
© Breeze Systems 2020