Breeze Booth (iPad+iPhone) can shoot photos, GIFs and video with external Canon cameras, as well as the front and rear cameras built into the device.
Which cameras can I use?
Choose from a huge range of Canon EOS R series, M series, DSLR and PowerShot cameras. Full list
How easy is it to switch between the iPad camera and a external camera?
Very simple. You switch between internal and external camera in the Breeze Booth app.
How it works
Connect the camera to the iPad/iPhone with a USB connection. It’s best to have a charging port so you can charge the iPad/iPhone at the same time.
Booth supports devices with both USB C and lightning connectors.
Devices with USB C connection
We recommend using a USB C hub with a USB C charging port so you can charge the device and connect to the camera at the same time.
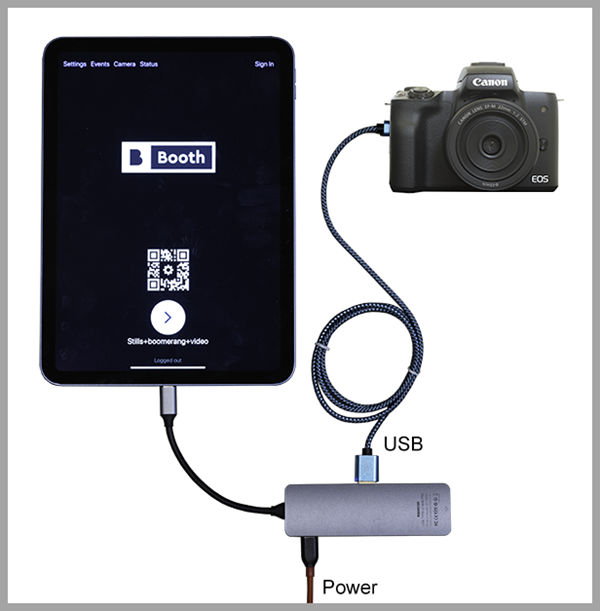
Breeze Booth (iPad+iPhone) connected to Canon camera via USB C hub with USB C charging port
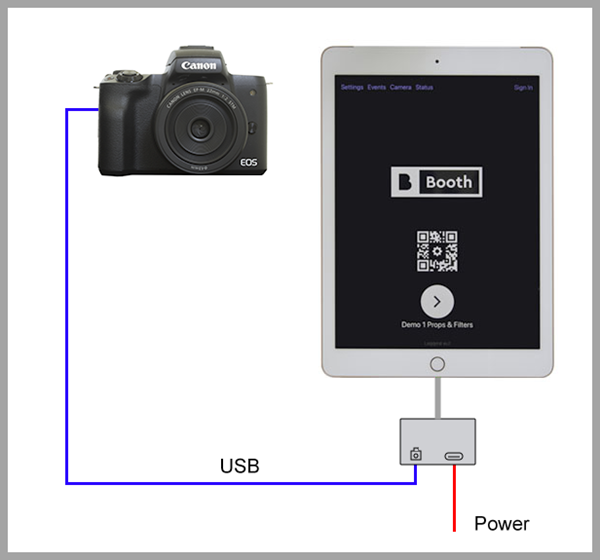
You can also connect devices with USB C connectors directly to the camera, but won’t be able to charge the device at the same time.
Devices with lightning connector
For iPhones and older devices with lightning connectors, you need a lightning to USB adaptor. We recommend the lightning to USB adaptor has a lightning charging port so you can charge the device and connect to the camera simultaneously.
Breeze Booth (iPad+iPhone) connected to Canon camera via lightning to USB adptor with lightning charging port
Connect the Breeze Booth for iPad to your Camera
- Connect your camera to the iPad or iPhone running Booth as above
- Start the Breeze Booth App, select Camera from the Home page, and toggle on External Camera.
- Switch on the external camera
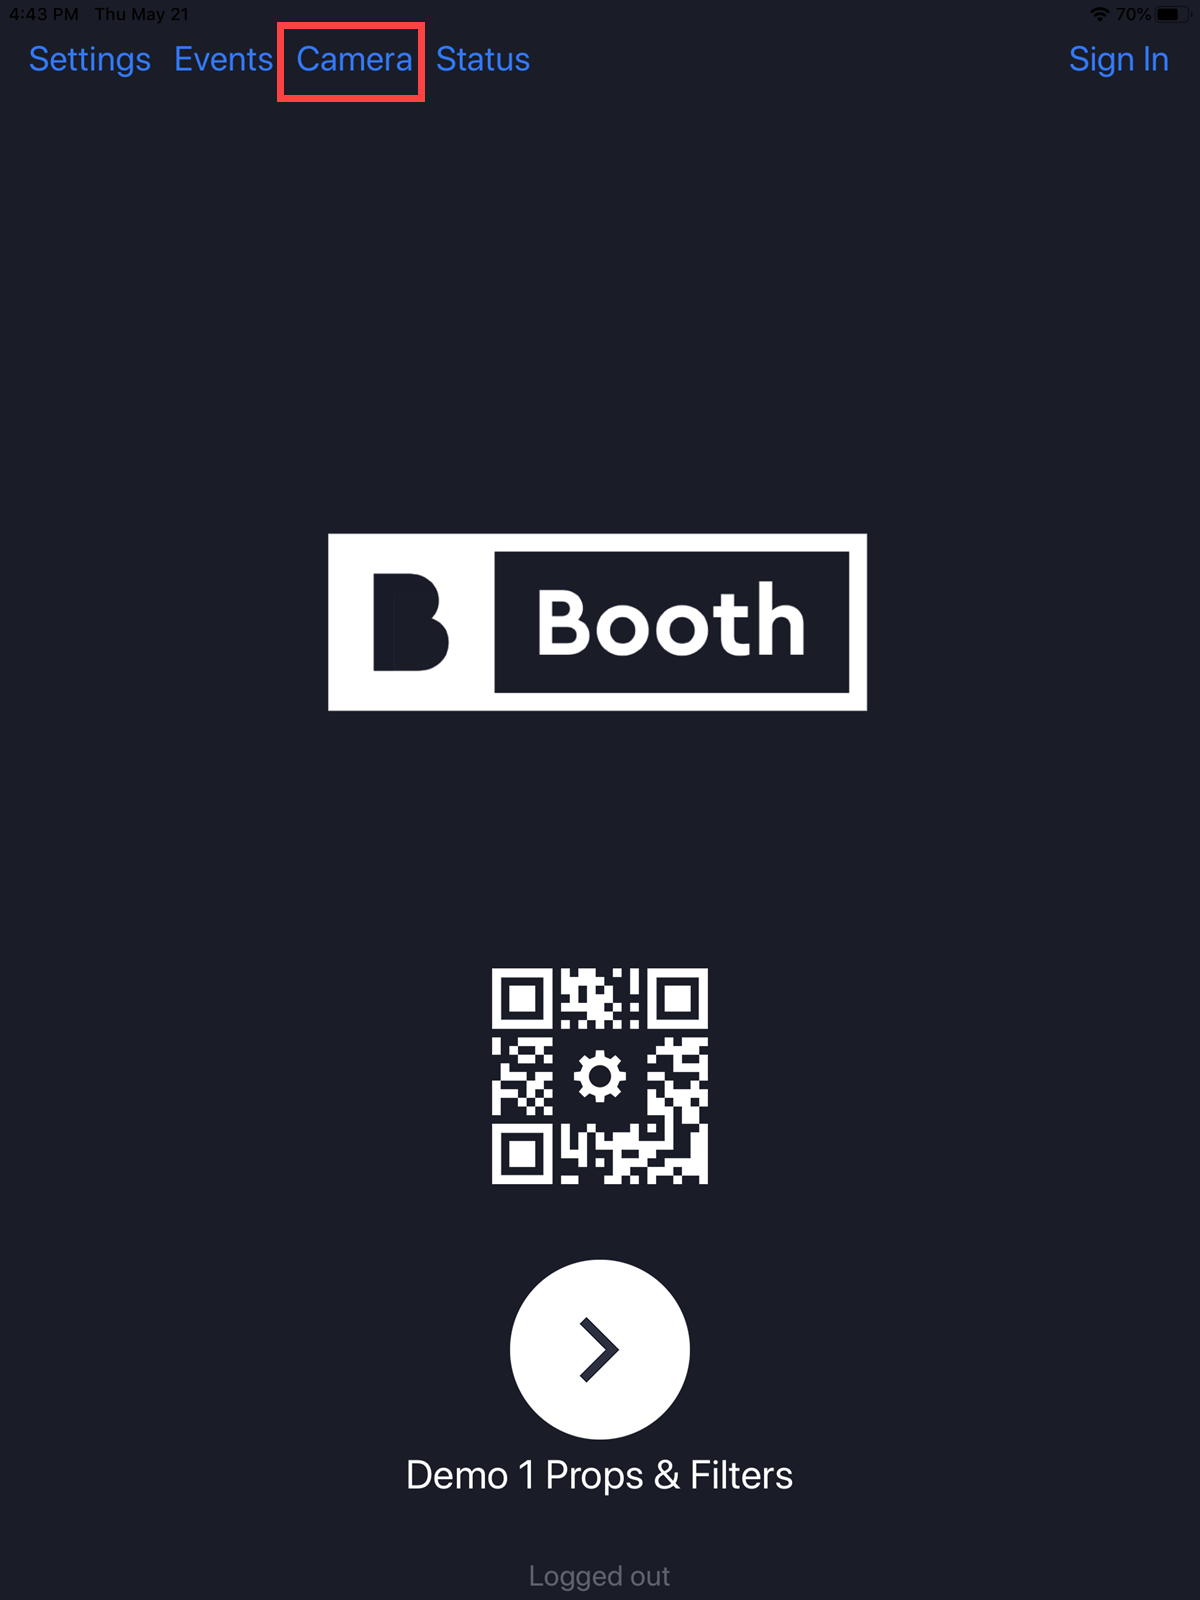
1. Breeze Booth for iPad home screen with Camera option highlighted
The camera settings screen will display a graphic showing a camera with a red X if it is not connected to a camera:
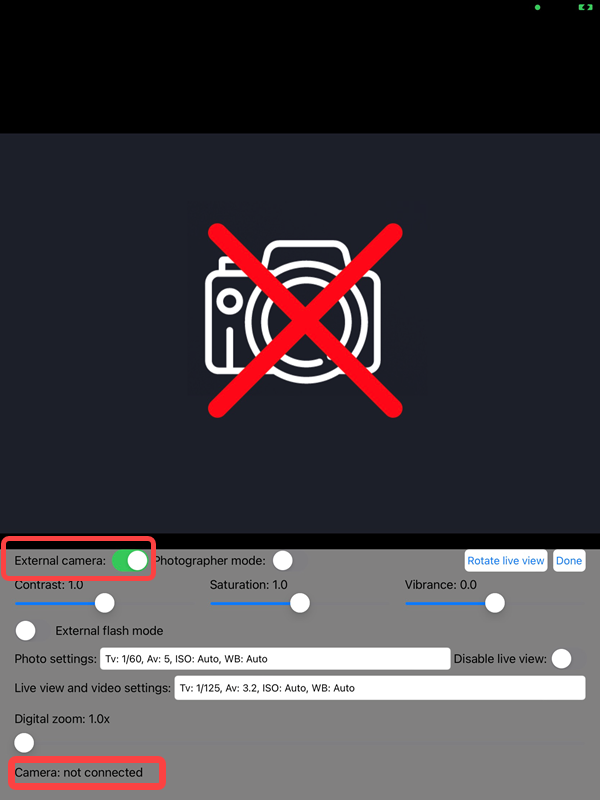
2a. Camera settings showing external camera toggled on but camera not connected
When you connect the camera it may take a few seconds for the graphic showing a camera with a red X to be replaced with live view images from the camera.
It may also take several seconds to connect to the camera if the memory card is full of images.
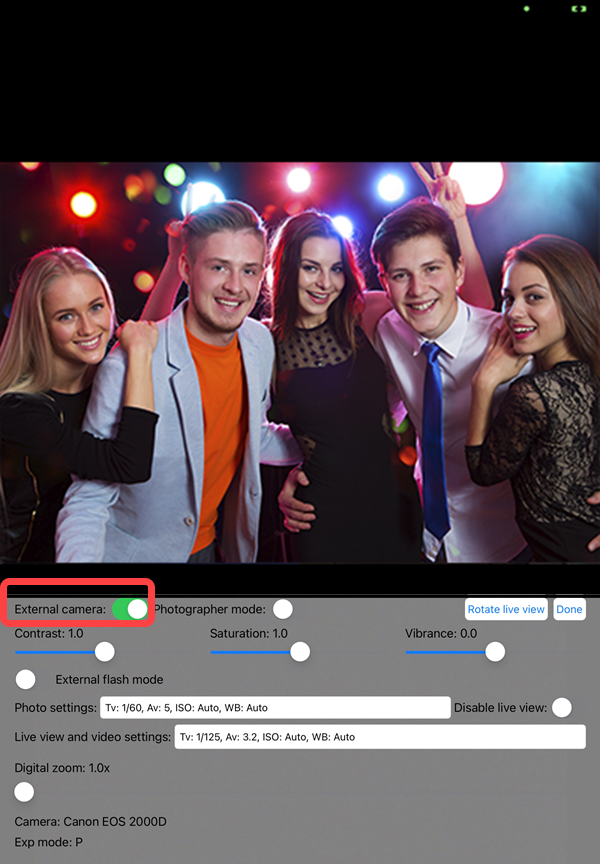
3. Camera settings showing external camera toggled on & camera connected
Rotating the live view
If the live view image from your external camera is not the right way up, tap Rotate live view to rotate it. The live view is rotated 90 degrees each time Rotate live view is pressed
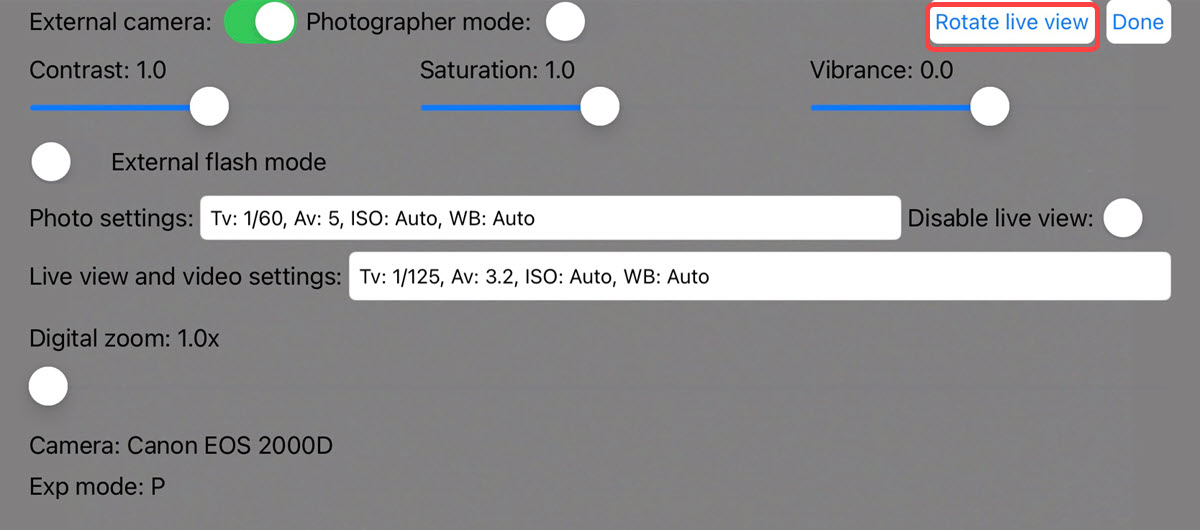
Touch to rotate the live view through 90 degrees the live view
Adjusting the camera settings
The optimum camera settings depend upon the type of lighting and the camera model.
Set the exposure mode dial to M and the image quality to JPEG not raw or HDR/HEIF. The medium/fine JPEG setting should give good results and will be slightly faster than the large JPEG settings due to smaller file sizes.
The online manual suggests camera settings for
- Mirrorless cameras (e.g. Canon EOS M50 or Canon EOS R10)
- Canon Rebel series DSLR cameras (e.g. Rebel T6/EOS 1300D or Rebel T7/EOS 2000D)
- Mid range and high end Canon DSLRs (e.g. Canon EOS 90D)
- Continuous lighting with any camera
For help selecting the best camera settings see the online manual here
Leaving the camera settings screen
Finally select Done to return to the App home screen
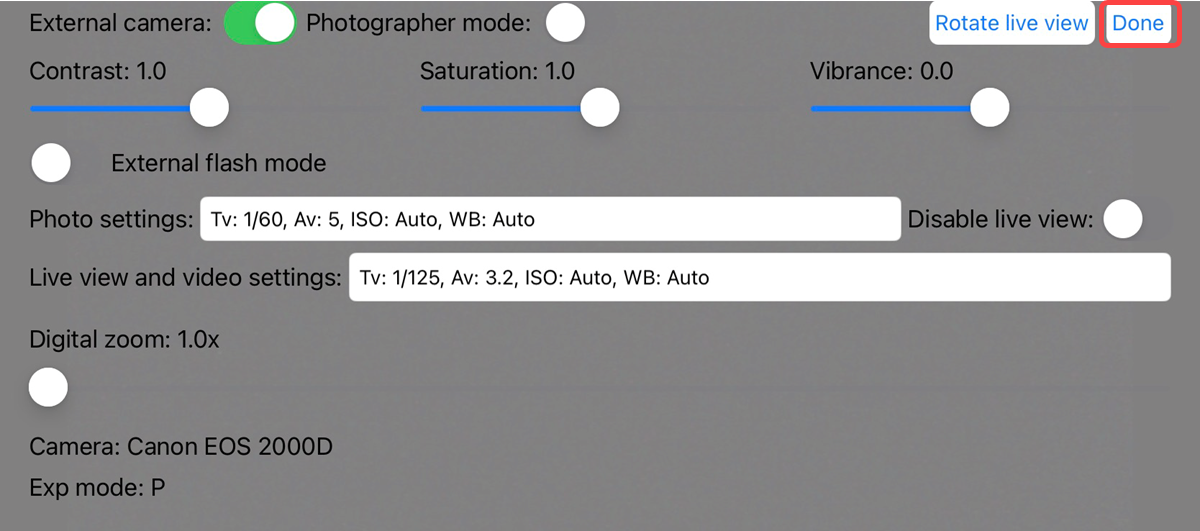
Select Done to return to the home screen
More about using an external camera with Breeze for iPad
Do I still need the Breeze Booth camera controller to use a Canon camera with Breeze Booth (iPad+iPhone)?
There’s no need to use the old Windows or Raspberry Pi Camera Controller to connect to an external camera.
© Breeze Systems 2023