This is the first of two tutorials explaining how to create simple surveys which record guest data and consent in DSLR Remote Pro. The second tutorial will explain how to use data collected by a survey.
Simple Surveys Part 1 covers creating surveys with
- consent and other checkboxes
- email address collection and autoemail
- text fields
- mandatory and optional fields
- building multi-page surveys
- Linking to information screens
Simple Surveys Part 2 will cover
- Customizing the survey screen (colors, fonts and layout)
- using data collected in prints and message content
- separating images into folders based on survey response
- organizing data into folders which respect GDPR and individual guests privacy requirements
DSLR Remote Pro can also create surveys which include custom graphics. This is outside the scope of these tutorials.
Simple Surveys Part 1
- What is a Breeze survey?
- Setting up the initial event
- Switching survey screens on and off
- Building survey screens
- Testing survey screens
- Multi-page surveys
What is a Survey in Breeze?
Breeze surveys collect reponses from guests just before the count down starts.
Use surveys to collect guest data and consent to Terms and Conditions, record consent to use images and much more. Most surveys are quite short and use only one screen. More detailed surveys can cover up to ten screens.
Recording consent is especially important for
- Events subject to GDPR and CCPA
- Corporate clients
- Assuring clients and guests that you will handle their images in a professional manner
Survey data can also be used to
- capture data about guests and visitors,
- organise images into different folders,
- display guest names and other data on prints and in messages,
- and much more
DSLR Remote Pro’s analytics report can be used to detail guest responses to your surveys. The report can also combine responses from other booths running DSLR Remote Pro, Breeze Booth for iPad and Webcam Photobooth.
Survey data can also be made available to other applications
Setting up the initial event
I have run the Photobooth Setup Wizard to build a simple single photo event. Check the email option at Step 2 if you want to share photos.
You can adapt an existing event instead of running the setup wizard. (To use automatic emails, the event needs a sharing screen.)
If you are using DSLR Remote Pro to share images from the booth, check your email account is set up and working.
Switching survey screens on and off
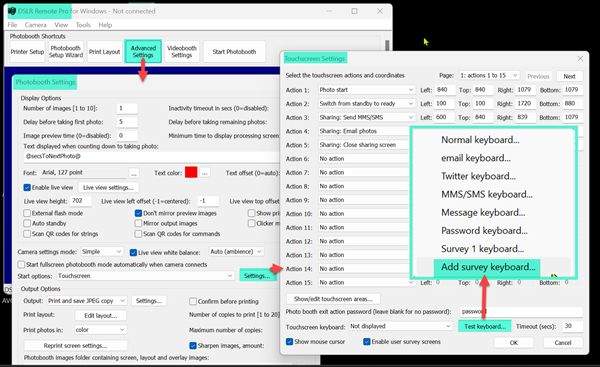
Click on Advanced Settings, then the Touchscreen Settings.. button
In the Touchscreen Settings window check Enable user survey screens (at the bottom of the window)
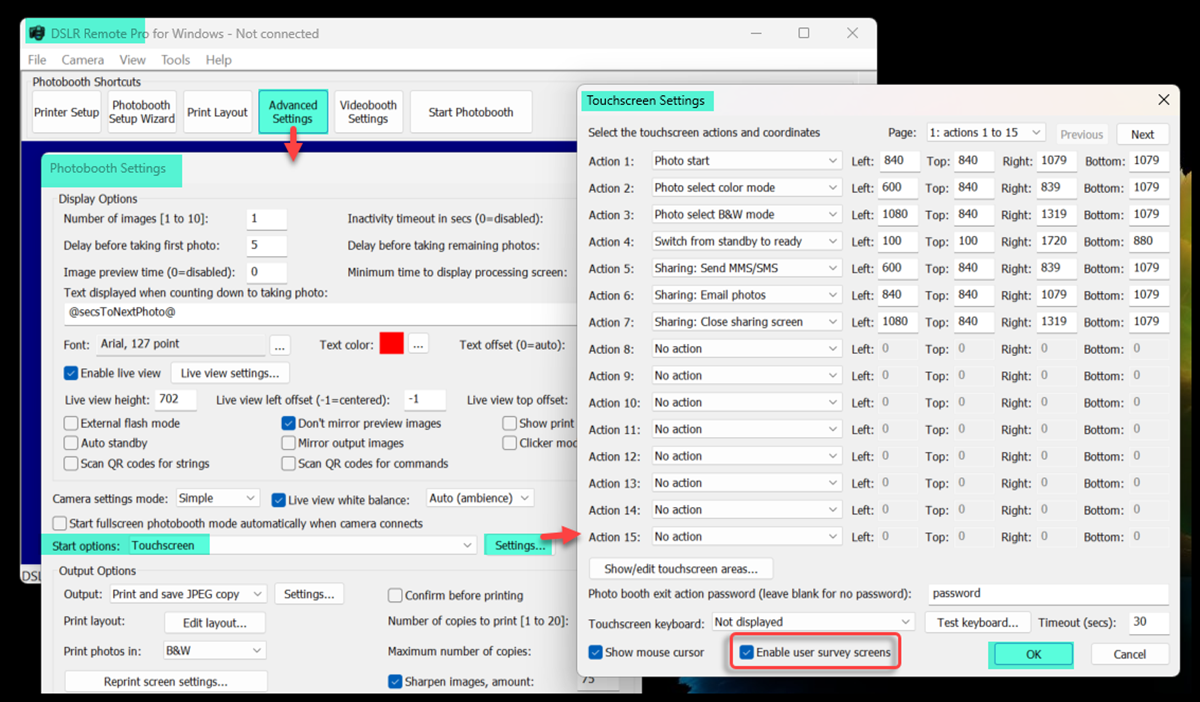
Checking Enable user survey screens (Breeze DSLR Remote Pro 3.19.1)
Note: Surveys can be switched on and off by checking and unchecking Enable user survey screens.
Building survey screens with the Survey Generator
DSLR Remote Pro uses survey keyboards to collect different types of data.
Note: This tutorial explains how to use the Survey Generator to build simple surveys. These surveys can be further customized later. Learn how to build more complex surveys with custom interfaces here
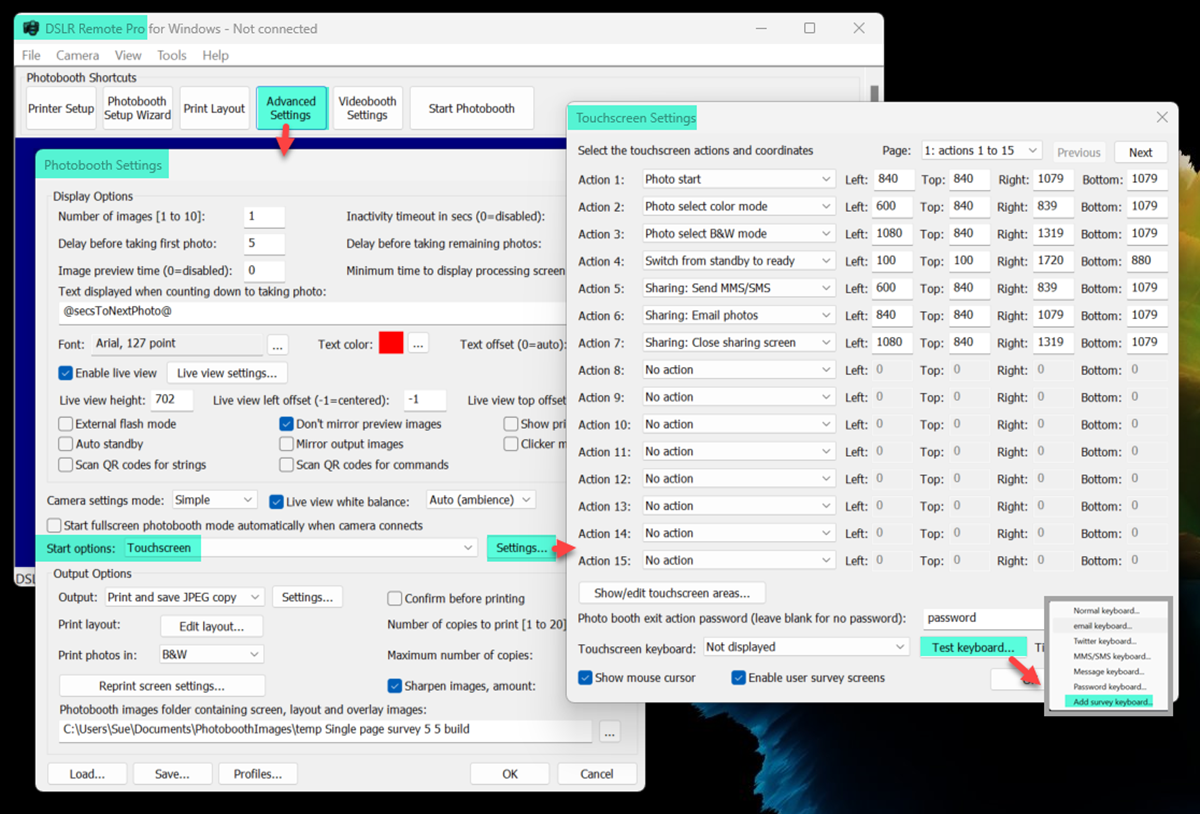
To build the first survey screen click on Test keyboard… in the Touchscreen Settings window
This brings up a list of keyboard types. Select Add survey keyboard
Adding a survey keyboard (Breeze DLSR Remote Pro)
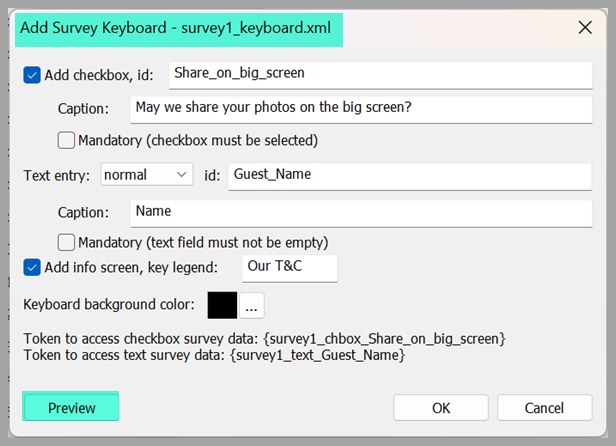
You will see a window Add Survey Keyboard – survey1_keyboard.xml
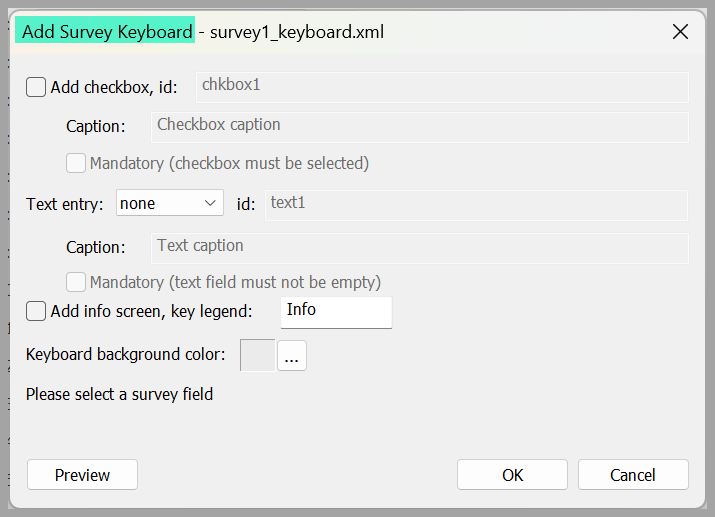
Initial Add survey keyboard screen for first page of a survey (Breeze DSLR Remote Pro 3.19.1)
Use this page to specify the data you want to collect on the first (or only) page of your survey.
- Each survey screen can contain a checkbox, data entry field or both. You can also add a button linking to an Information page.
- You can make both checkbox and data fields mandatory, acting as a gate guests have to pass before taking photos or videos.
- All field names can be changed*. We recommend choosing meaningful field names, which you will recognise later.
- You can replace text on the Info button (maximum 8 characters)
- You can change the background color of the screen in the generator. If a color close to black is chosen, survey text is displayed in white, otherwise the text is black.
* except automatic email, see below. Field names for automatic emails must contain only letters, numbers and underscores and must start and end with a letter or number.
Check box
Check Add checkbox to use a checkbox.
- Use the default id (chkbox1) or replace it with a meaningful alternative, such as Share_on_Big_Screen below
- Add your caption, in this example May we share your photos on the big screen?
- Your checkbox can be optional or mandatory.
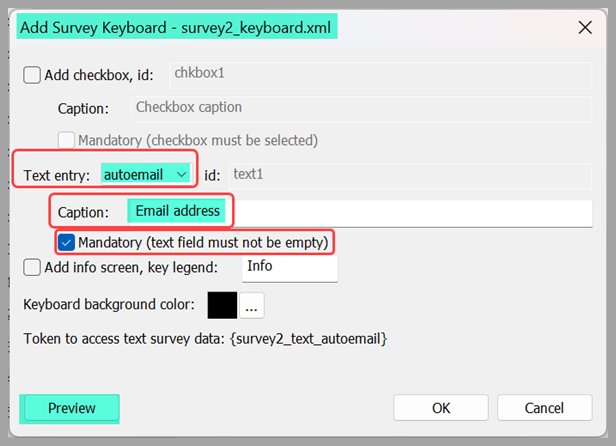
Text entry field
The text field has a drop down menu of text types
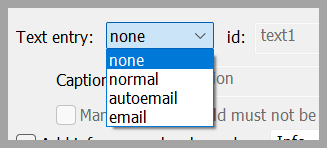
- None: no text field is displayed on this survey page
- Normal: free text entry
- autoemail: automatically sends an email* with images from the session to this address
- email: collects an email address but does not use this to share images
Use email or autoemail to record an email address at the start of a session.This can be combined with a check box to record consent to store and use the address for marketing or other purposes.
*Automatic email: Providing you also have a sharing screen an email is sent automatically to this address. DSLR Remote Pro uses id autoEmail to recognise this field.
Information button
Checking Add info screen creates an extra jpg image in the PhotoboothImages folder. Edit this image to add your own text.
First survey page – Worked example
Sample Add Survey Keyboard – survey1_keyboard.xml window including caption, text field for guest name and link to Info screen (Breeze DSLR Remote Pro 3.19.1)
Before closing the window, select Preview to see what this screen looks like on your computer.
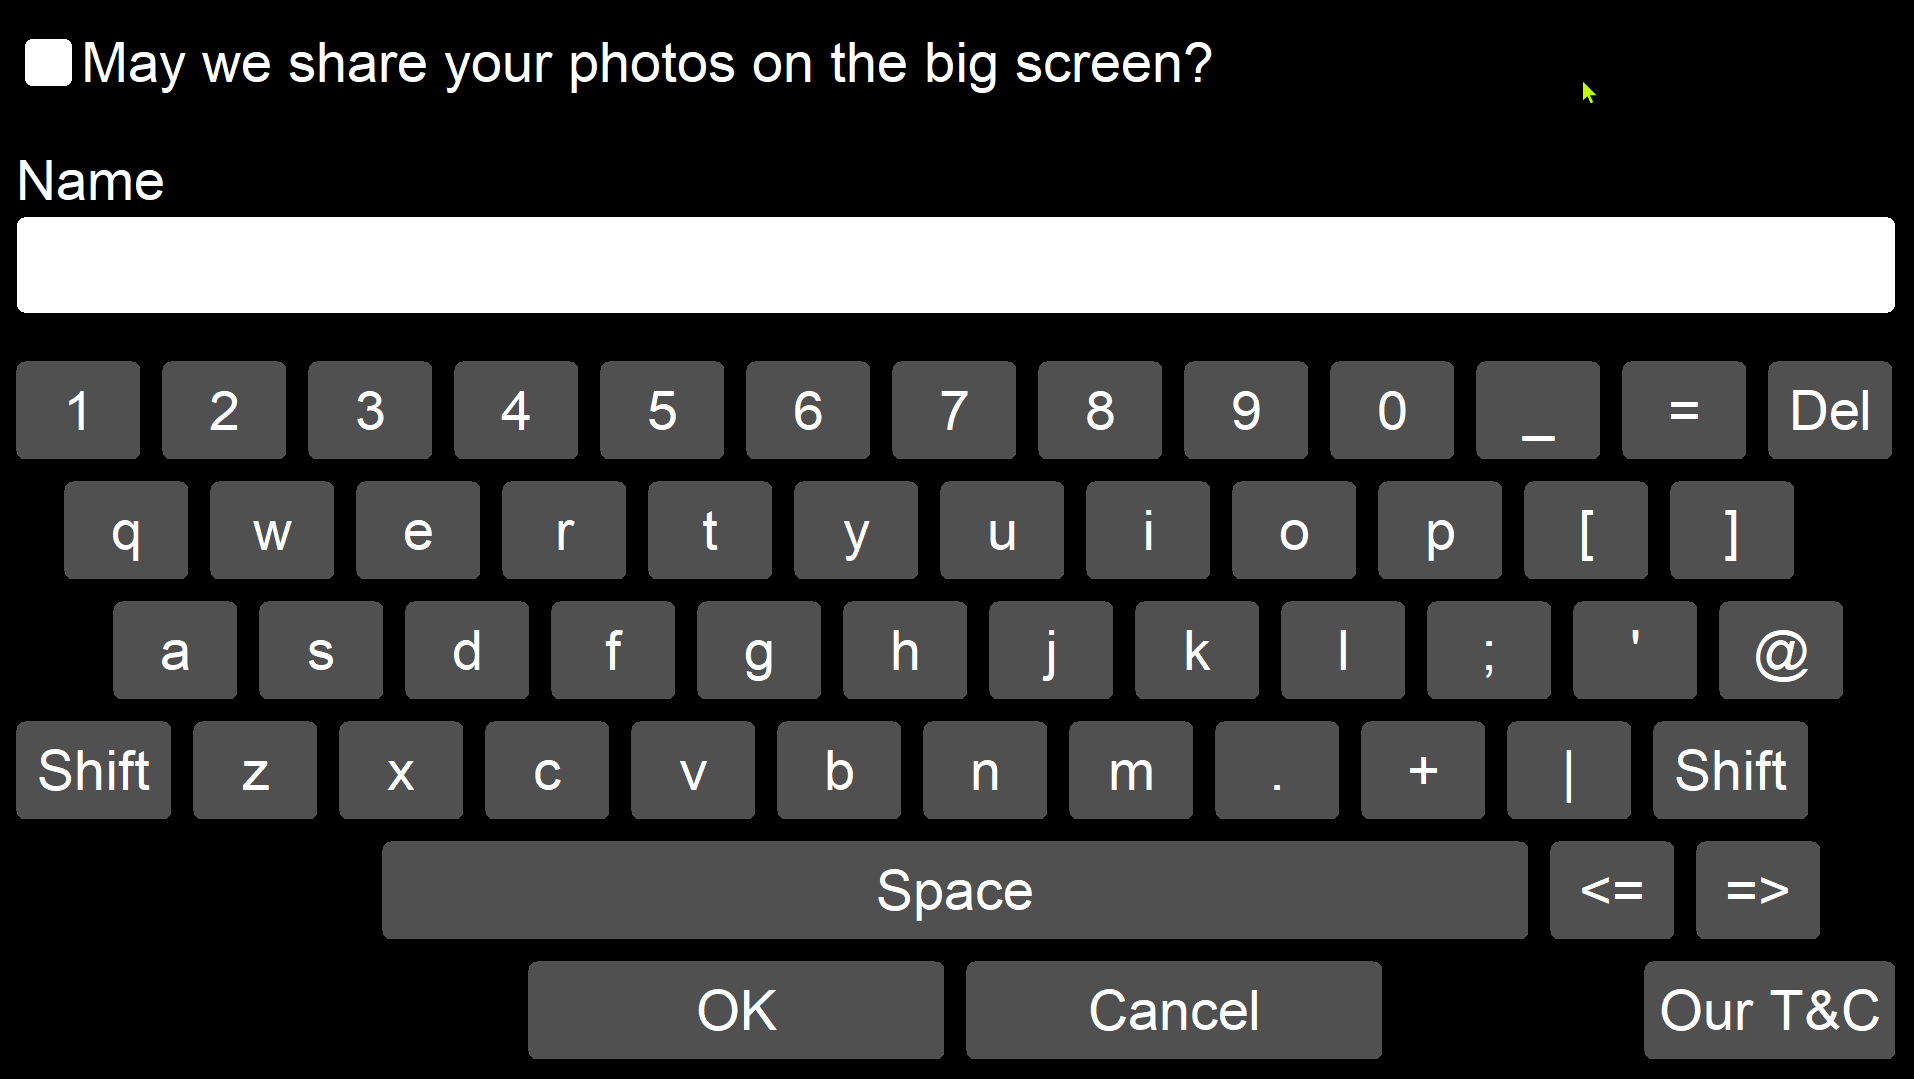
Cancelling the screen in Preview mode allows you to change the screen design, then check preview it again as many times as you like.
Field ids
It’s helpful to use meaningful field ids such as Guest_Name because
- field ids are used in survey data reports
- field ids form part of special tokens such as {survey1_text_Guest_Name}. Learn more in the next survey tutorial.
If your field ids don’t fit the rules (letters, numbers and underscores only, start and end with a letter or number) you will be warned to change them.
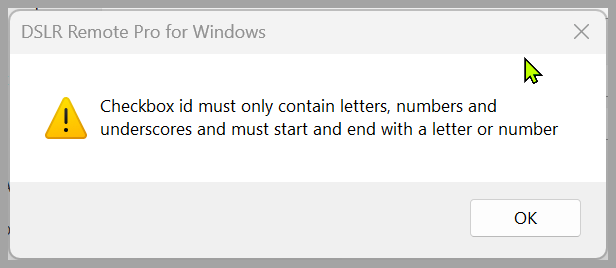
Warning of constraints on checkbox ids. Share_on_big_screen and Guest_Name are fine, Share on big screen or Guest Name will be rejected
When you have finished, select OK to save your work.
Run the booth screens and check everything works as expected.
Next we shall add a second screen which captures the guest email address.
Second survey screen – collecting email address
Run the survey generator again to add a second screen to your survey. The second survey screen is called Survey 2, and so on up to Survey 10.
Using the survey generator to add the second page of a survey ( Breeze DSLR Remote Pro 3.19.1)
Building a second survey page with a mandatory field to enter guest email address. (Breeze DSLR Remote Pro 3.19.1)
Preview the new screen to check it looks as you expect:
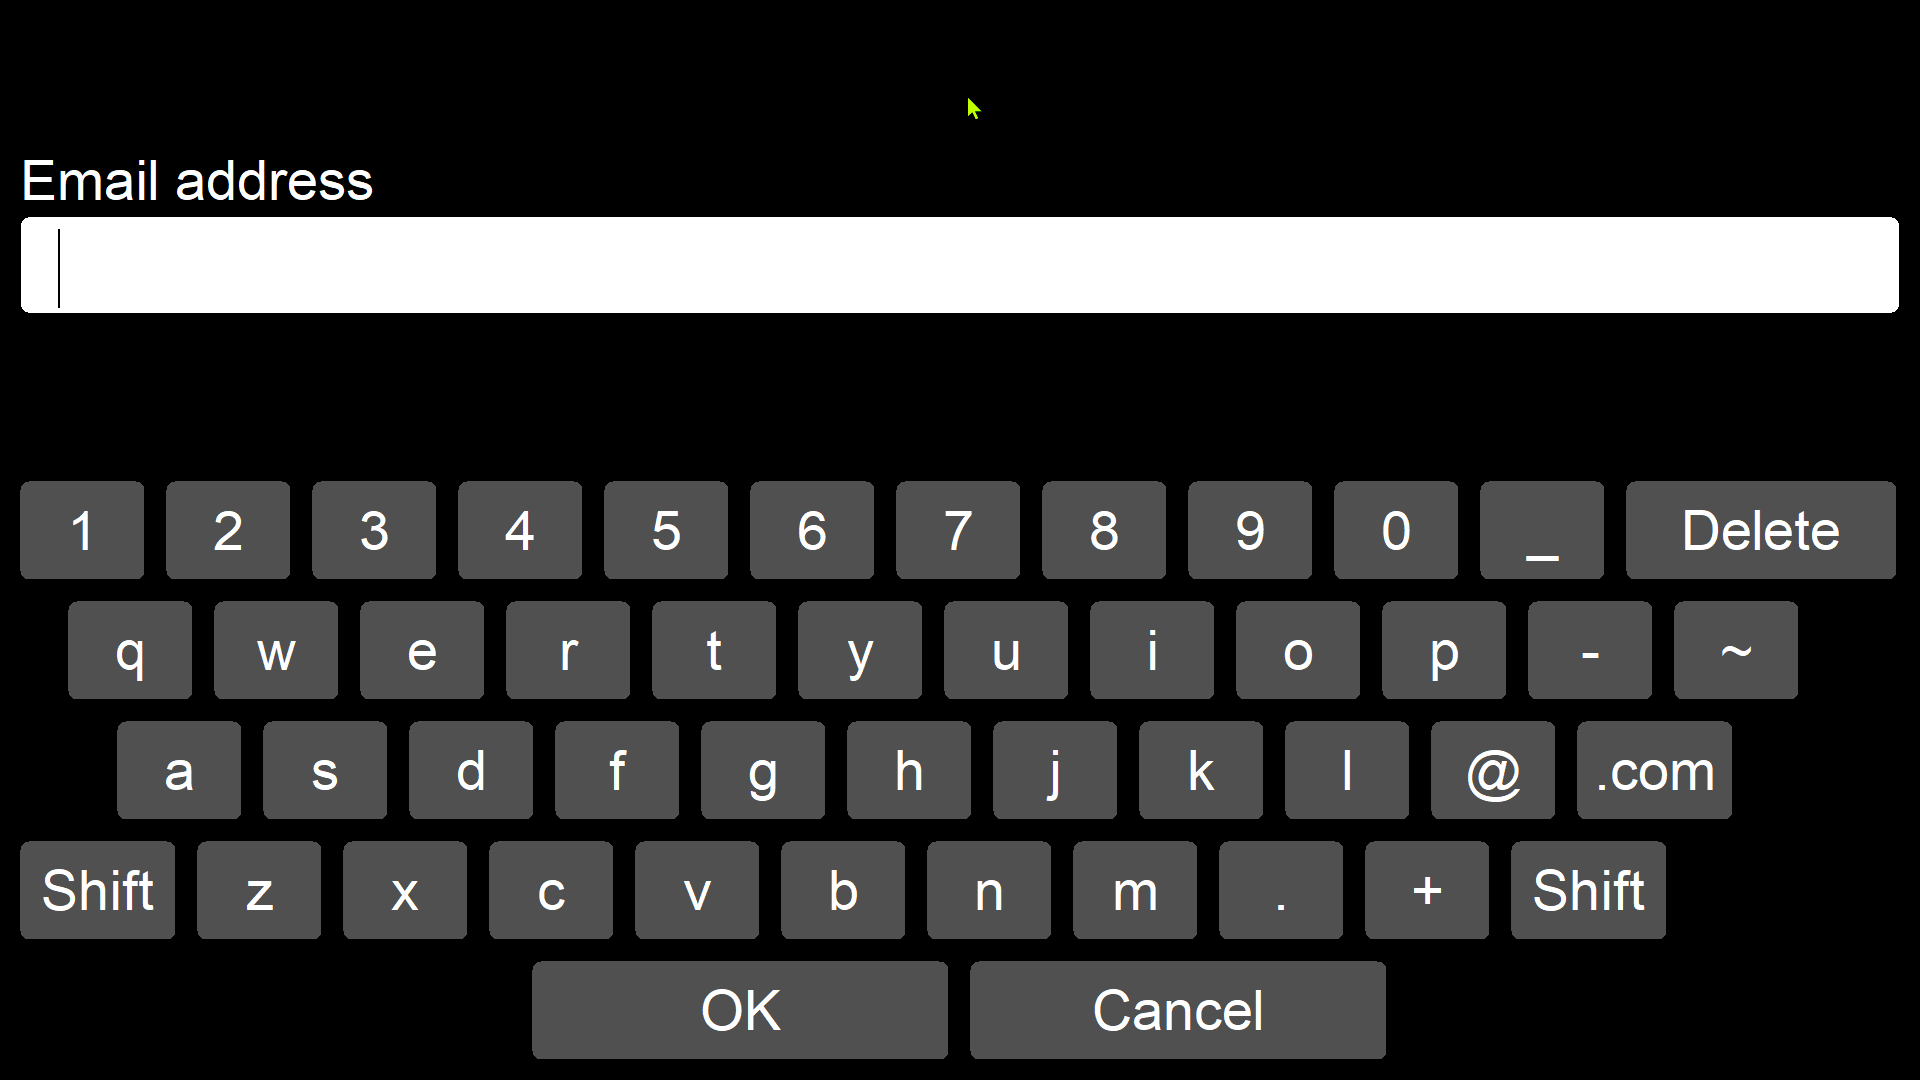
Survey page to collect guests email address
Accept the new screen by pressing OK, or choose Cancel to edit it.
Run the booth to check everything works as expected.
Mandatory fields, gates and leaving the survey
Note that:
- The first survey screen in this tutorial has no mandatory fields. If the guest selects OK without filling out any fields, the second survey screen will be displayed
- The second screen acts as a gate. autoemail is mandatory. Guests must enter an email address to start the countdown
- If guests choose Cancel at any stage, the booth returns to the Ready screen
Customizing survey Info screens
If guests choose the Info button (labelled Our T&C in the worked example) they are taken to the Info screen for the current survey page.
Survey Info screens are stored in the PhotoboothImages folder, and must be edited to include the information you want to provide.
They are named (survey1_keyboard_info.jpg), (survey2_keyboard_info.jpg) etc and are automatically created by the survey generator for each survey page linking to an Info screen.
Edit these images in PhotoShop or another image editor to cover the information you want to provide.

Default Info screen for first page of a survey (Breeze DSLR Remote Pro 3.19.1)
Survey Info screens have an underlying touchscreen action to return guests to the survey when they press OK. You can replace the OK text, but need to keep the action in roughly the same place.
Note: Links to Info screens can also be added to the Ready screen. Learn more
Making changes after saving a survey page
The simplest way for beginners to change a survey page after it has been saved is to
- go to your PhotoboothImages folder for the event
- delete both survey1_keyboard.xml and survey1_keyboard.jpg*
*for the first page of your survey. If you want to replace the 4th page, you need to delete survey4_keyboard.xml and survey4_keyboard.jpg
- return to Add survey keyboard and create a new page.
Creating more complex surveys
To build more complex surveys see the online manual
© Breeze Systems July 2023