Update February 2023. Sadly Snapchat withdrew Snap Camera on January 25th, so Snap Camera props can no longer be used with Webcam Photobooth. Breeze Booth ( iPad+iPhone) offers virtual props
This tutorial runs through integrating Snap Camera with Webcam Photobooth to add amazing 3D ‘lenses’ (virtual props) to your photos and GIFs.
What do I need?
You will need a web camera* and a Windows (11 or 10) PC or tablet, with these 4 programs installed
- Breeze Webcam Photobooth
- Snap Camera
- AutoHotKey**
- Breeze Webcam_Snap_Camera.ahk script, free to Webcam Photobooth users
*Use a high quality camera for good results. This can be a separate web cam or the camera built into the PC.
**AutoHotKey is a free automation scripting language which you need to run the Webcam_Snap_Camera.ahk script
The script is set up to offer guests a choice of 2 Snap Camera lenses, and works with photos and GIFs. Shoot in color or B&W, and let guests switch between them.
This tutorial shows you how to get Snap Camera working with your photo booth, running through
- Setting up Snap Camera to work with Webcam Photobooth
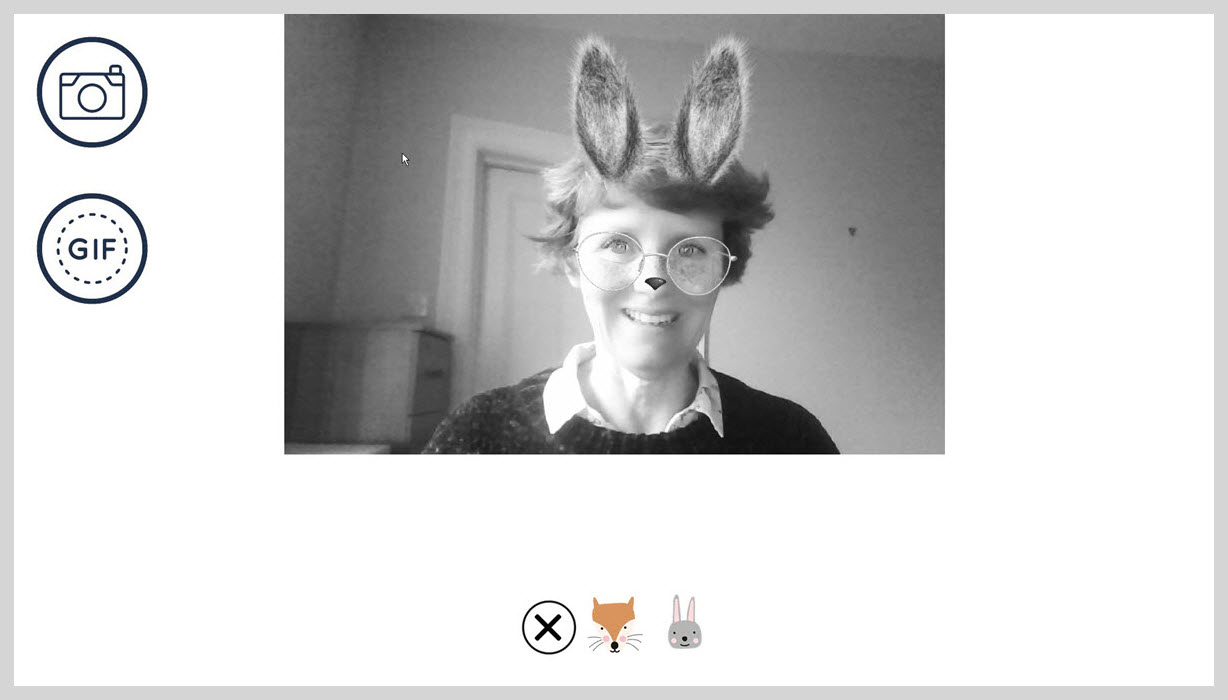
- Customizing your Ready screen so guests can switch between props and turn them on and off
- Changing the number of props
- Moving the prop buttons to fit your screen design
- Adjusting the script for different resolution screens
- Troubleshooting
The script has been written for screen resolutions of 1920 by 1080 pixels. You may need to change it slightly if your screen has a different resolution.
My screen is 1920 by 1080. How do I get started?
Check you have downloaded and installed Webcam Photobooth, Snap Camera, AutoHotKey and the Webcam_Snap_Camera.ahk script on your computer. There are download links at
Start Snap Camera and choose two lenses
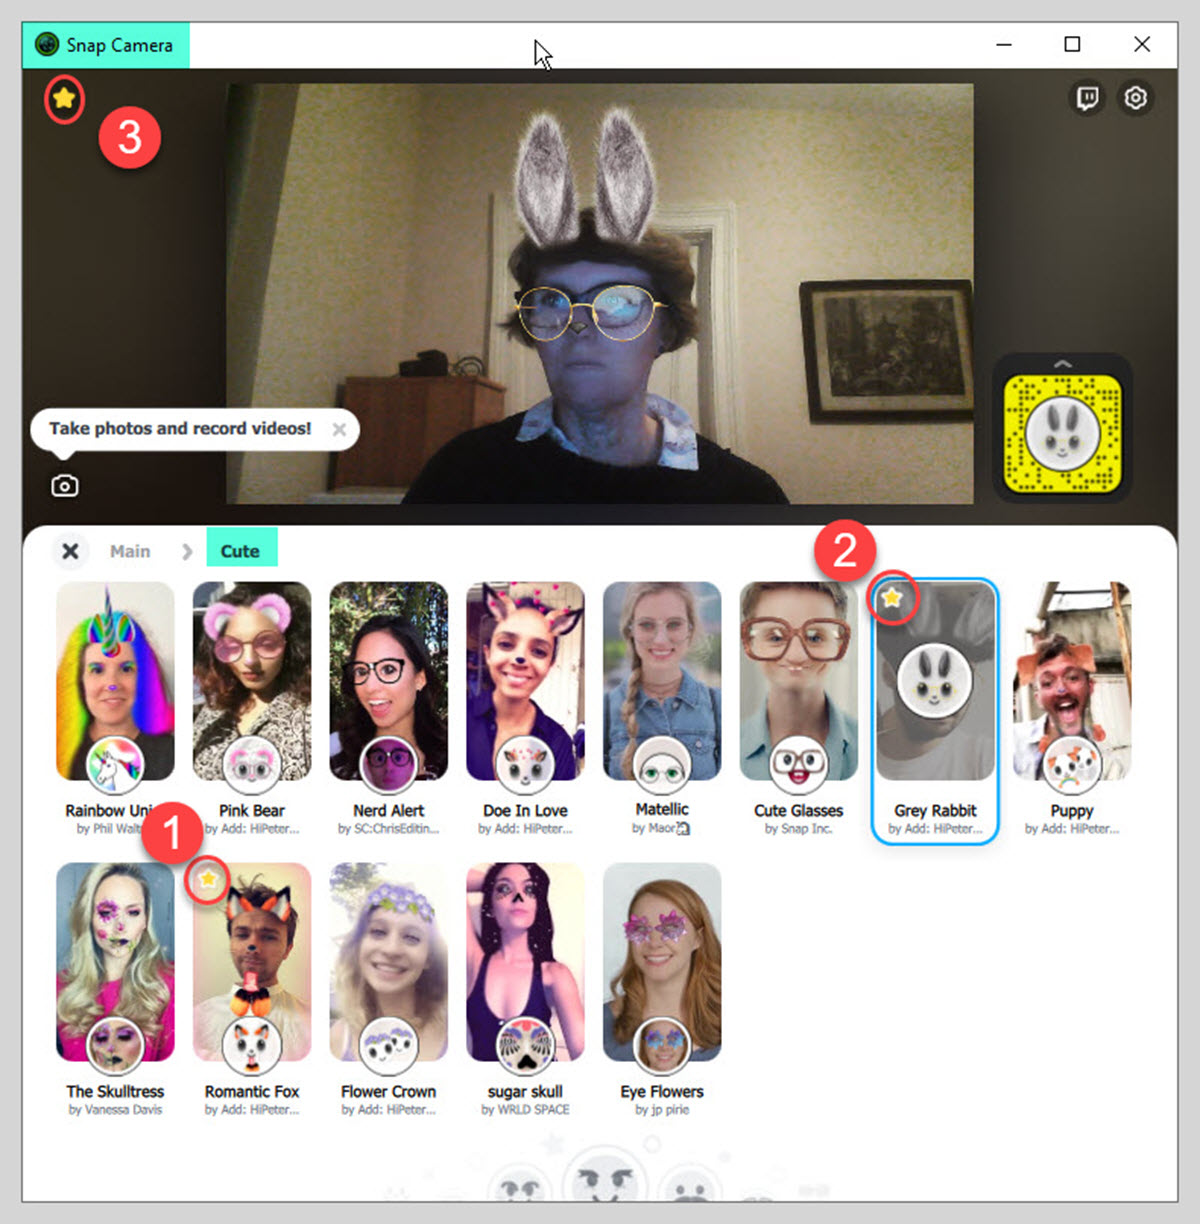
Click on the star in the top left corner to ‘favorite’ a lens
(1) and (2) Choose two lenses by clicking on the star in the top left corner of each lens.
NB I chose lenses from the ‘Cute’ Menu. Choose any pre-designed lenses, or design and add your own.
(3) Then click on the Favorites star in the top left corner of the window to list your selections
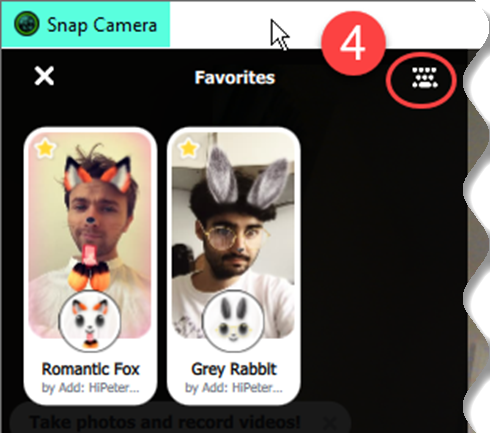
Snap Camera Favorites
(4) Add Hotkeys for each lens
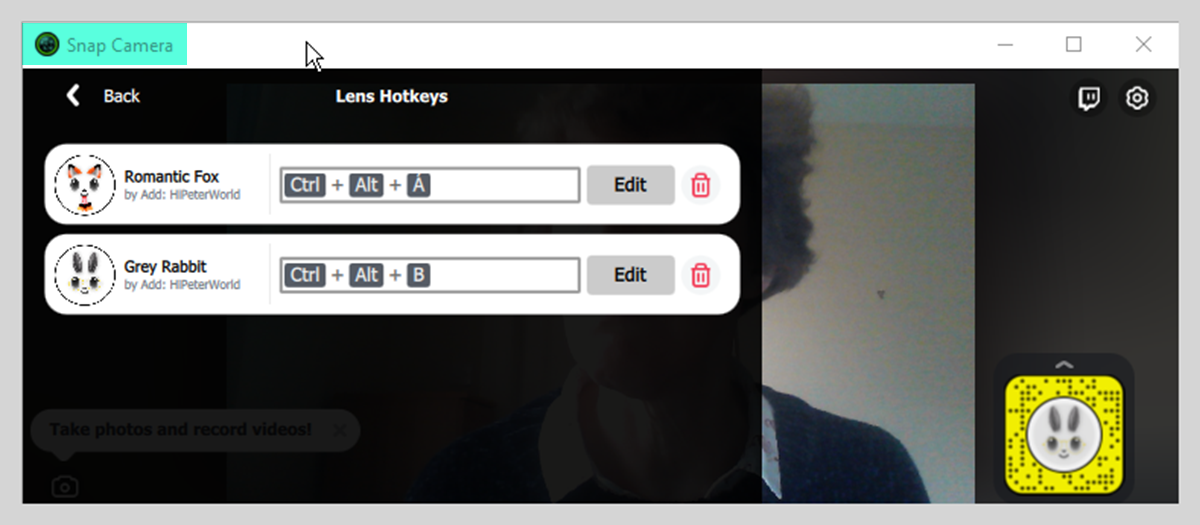
Adding hotkeys for each lens in Snap Camera
You need to select Edit then type the shortcut key into your keyboard. For your first lens hold down the CTRL , Alt and A keys at the same time. Save this Hotkey and move to the next lens. Use CTRL , Alt and B for the second lens. The go back to the main Snap Camera screen.
Guests will be able to switch between lenses and toggle them on and off at the booth. You can add an optional button for turning lenses on and off in the Snap Camera settings:
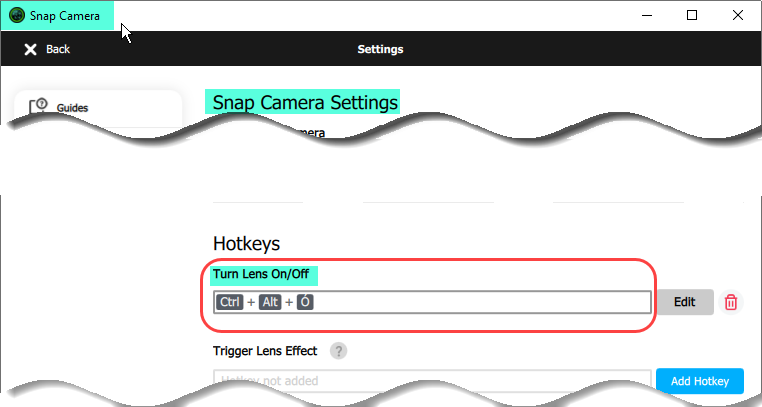
Go to the Snap Camera settings to add the hotkey to turn lenses on and off from the booth (optional)
Scroll down the settings page until you find Turn lens On/Off. Add CTRL , Alt and O and save the setting. (Use the letter O, not zero.)
Go back to the main page and leave Snap Camera running.
Start the script running
Start the Webcam_Snap_Camera.ahk script by double clicking on it.
Start Webcam Photobooth
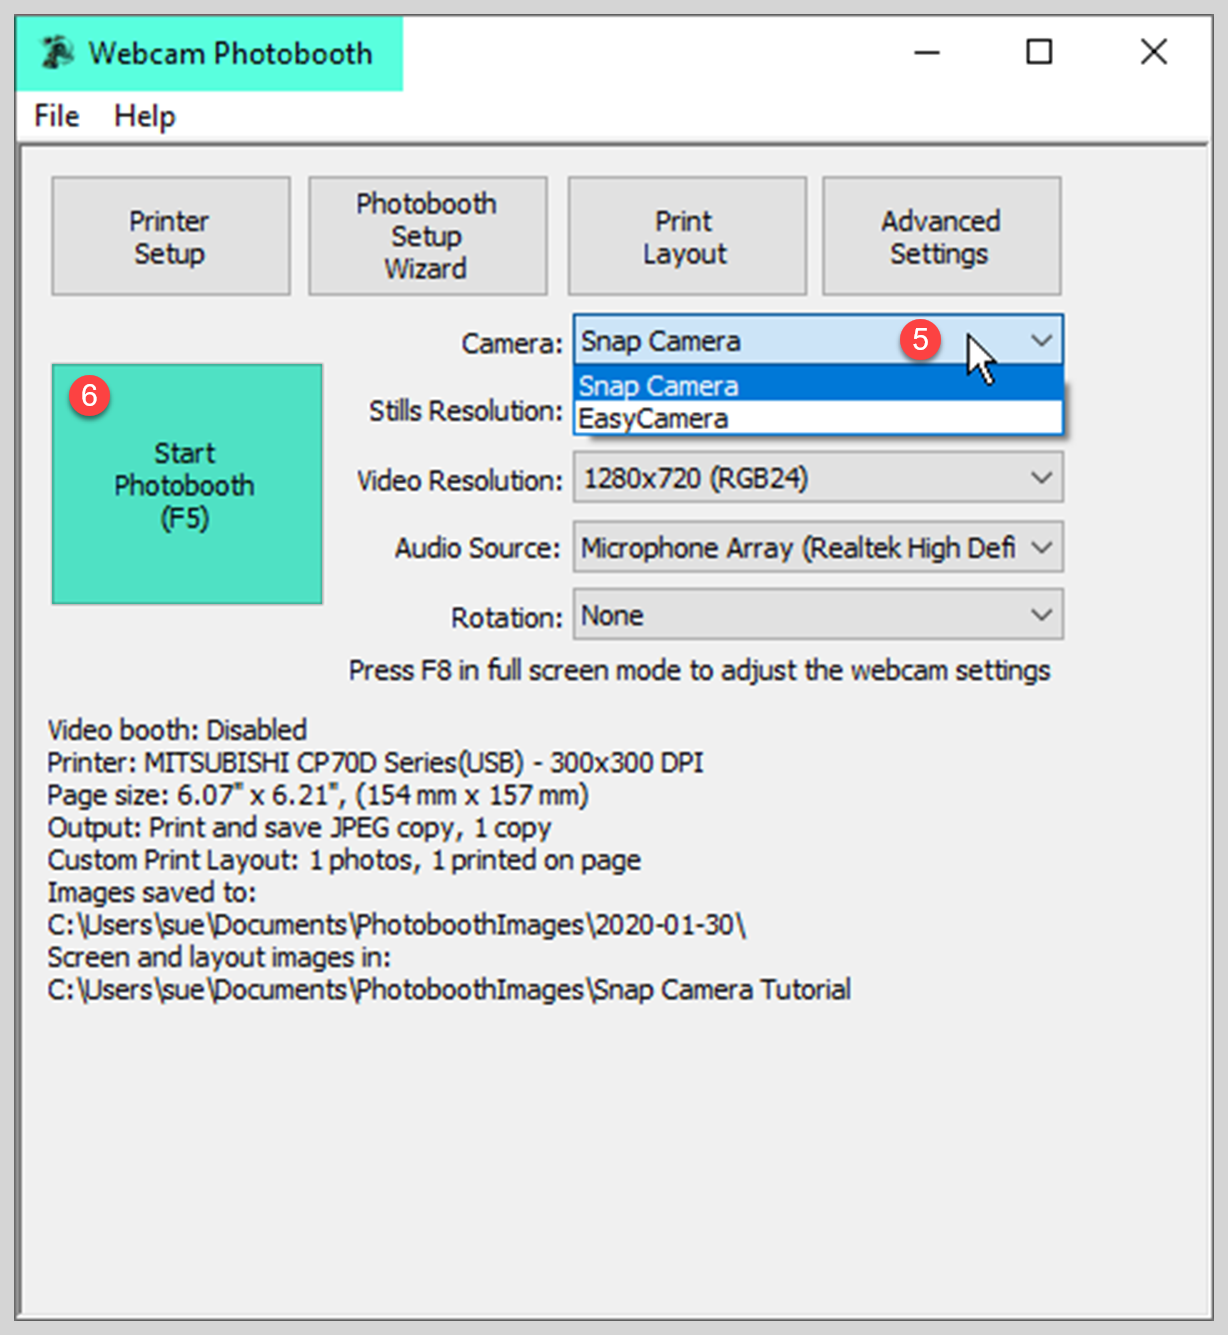
Webcam Photobooth 2.5.1 selecting Snap Camera
- Start Webcam Photobooth
- Use one of your own interface designs, or run the Setup Wizard to create a working system.
- (5) Select Snap Camera
- (6) Start the booth running
Customize your Ready screen
Take a copy of the ready.jpg in your PhotoboothImages folder and edit it, adding graphics for the new props
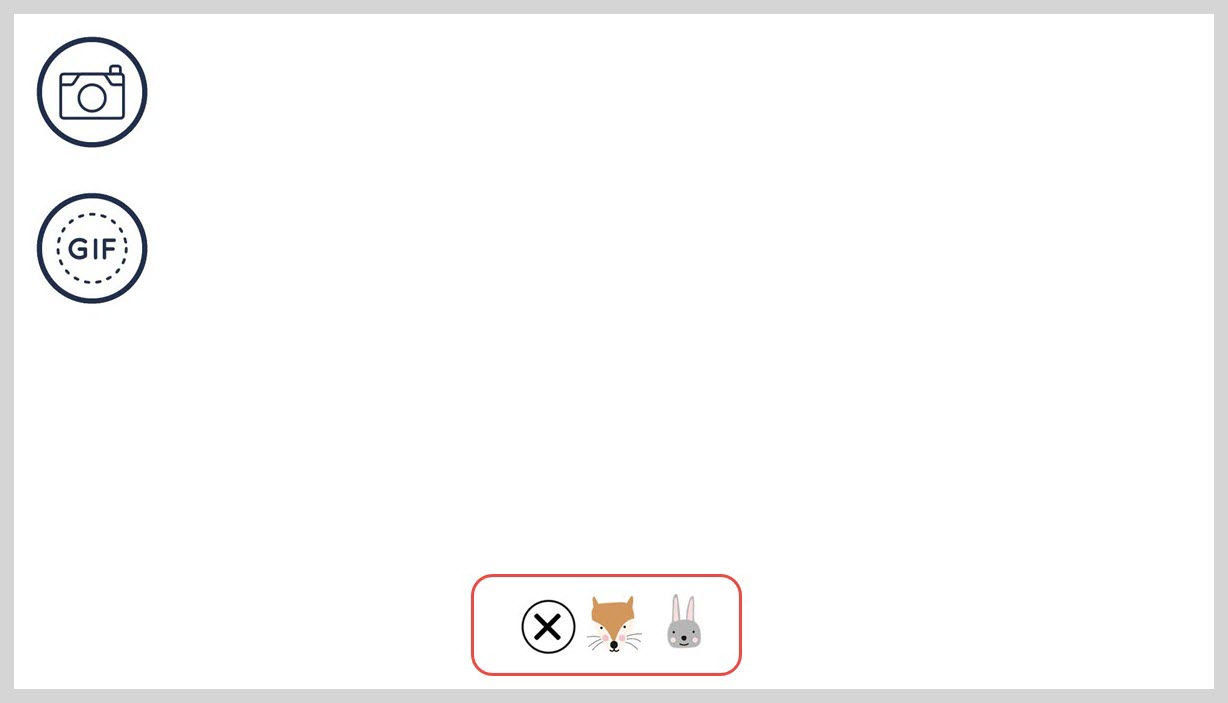
ready.jpg for 2 Snap Camera props with icons highlighted (Breeze Webcam Photobooth 2.5.1)
The new ready.jpg must be the same size in pixels as the image it replaces. If you are not sure where to position the graphics, run Webcam Photobooth and the script, and click on Ctrl + Alt + S. This will display the toolbar area in red:
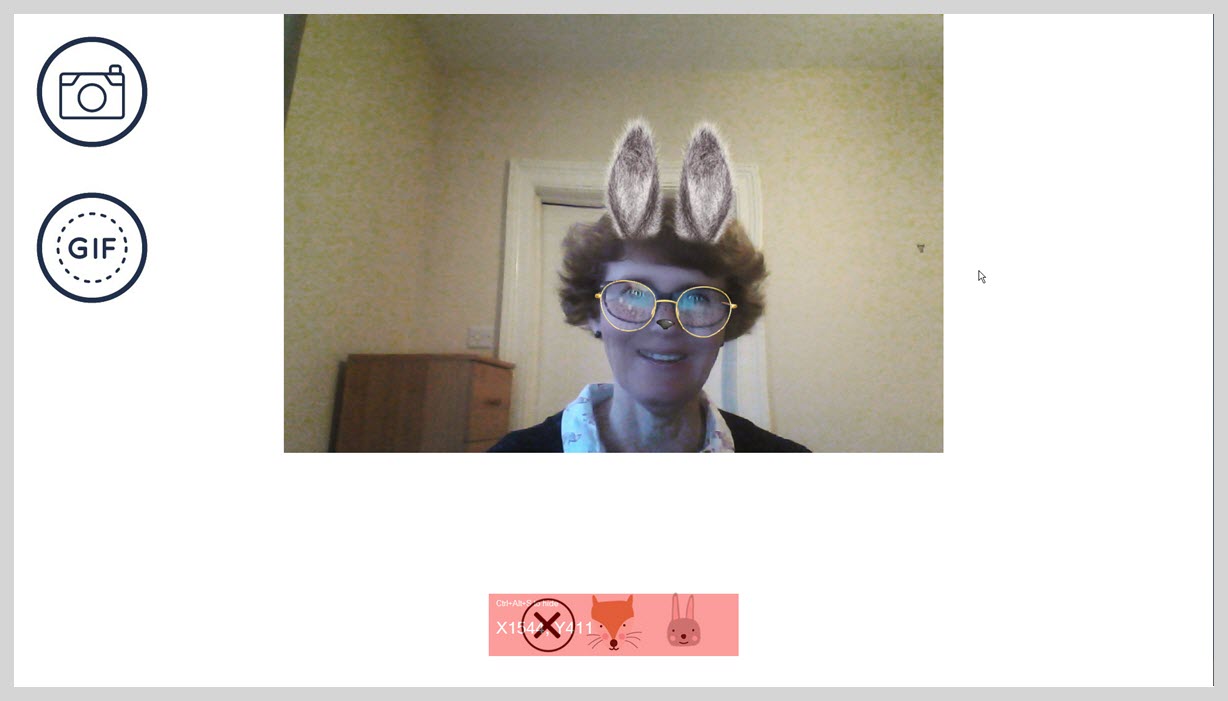
To check your graphics are positioned correctly, type Ctrl + Alt + S to show the toolbar location. Ctrl+S removes the locator.
Changing the number of props
To give guests a bigger selection of props you need to make one or two small changes to the AHK script.
- Change the number of props
- Depending on the size of your graphics on the ready screen, you may need to make the toolbar wider.
You also need to
- edit your ready screen to add graphics for the extra prop
- select the extra lens in Snap Camera
Edit the number of props in the AHK script
Open the script in Microsoft Notepad or any editor of your choice
Find the line numProps:=2
To offer three props, just change 2 to 3 and save the script with a new name
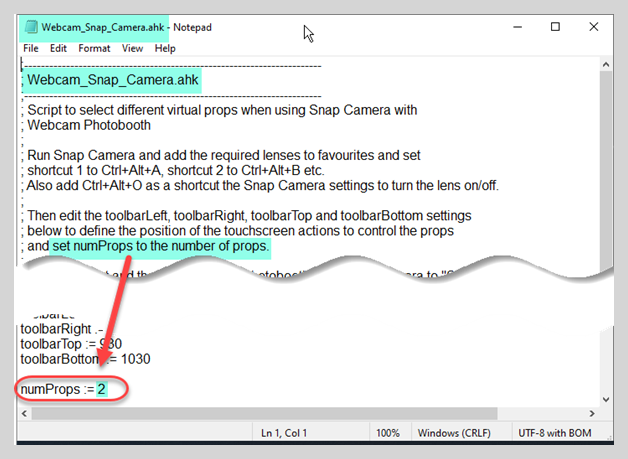
Editing Webcam_Snap_Camera.ahk to change the number of props
Increase the size of the toolbar
The standard script has a 300 pixel wide toolbar positioned centrally below the live view.
To keep the central position and make the toolbar 100 pixels wider I changed the value of toolbarLeft to 760 and toolbarRight to 1160, then saved my changes.
Edit the ready screen to add the extra prop
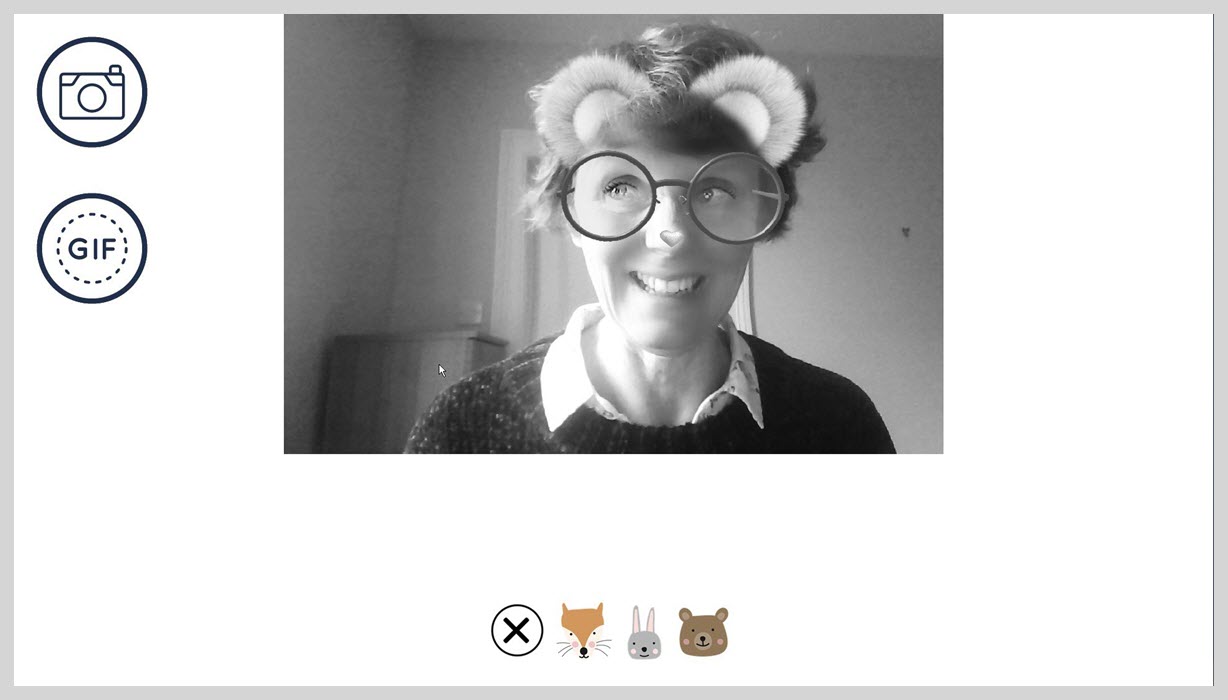
I changed my ready.jpg adding graphics for the third prop and put the new image into my PhotoboothImages folder as before

ready.jpg offering guests choice of 3 props
Select the extra lens(es) in Snap Camera
Now go back to Snap Camera. Favorite your extra lens(es) and add the Hotkey. For the third prop this is CTRL + Alt + C.
When you have saved the new Hotkeys return to the main Snap Camera screen.
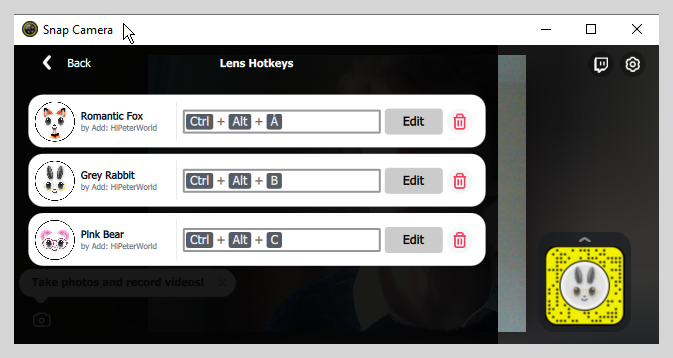
Adding a third Hotkey to Snap Camera for an extra prop
Check everything works
- Start Snap Camera (if it is not running)
- Double click on your new script to run it.
- Start Webcam Photobooth and start the booth running.
- If Webcam Photobooth was left running while you made the changes, exit full screen photo booth mode and go back into it to show your new ready screen.
- Check your graphics line up with the toolbar using Ctrl + Alt + S as before
All done!
You should have a working system now. Toggle all your props on and off to check they work.
The rest of this tutorial shows how to change the AHK script to move the prop icons, which is useful if your screen has a different resolution or the toolbar position doesn’t fit the screen design. There are also a few notes outlining what to do if some of your Hotkeys don’t work.
Adapting the script for different screen sizes, and repositioning the icons on the ready screen
You may find the toolbar position for the prop icons interferes with other parts of your screen design. To move the icons, you need to change the toolbar position. If your screen resolution is not 1920 by 1080, you probably need to move the toolbar to a better position. There’s a little pixel counting required to make these changes but nothing too challenging.
Editing the ahk script to move the prop buttons is very simple if you keep them in a horizontal line. (Making more complex changes is out of the scope of this tutorial.)
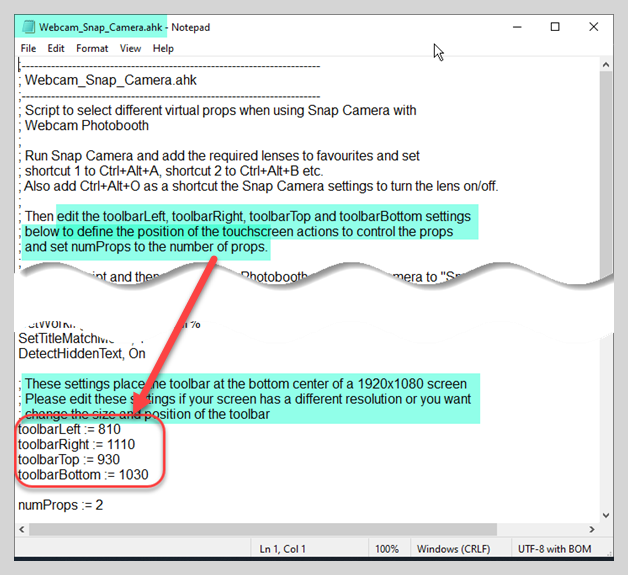
The standard ahk script sets the toolbar position as
toolbarLeft := 810
toolbarRight := 1110
toolbarTop := 930
toolbarBottom := 1030
What does this mean?
- the left end of the toolbar is 810 pixels from the left of the screen
- the right end of the toolbar is 1110 pixels from the left of the screen
- the top of the toolbar is 930 pixels from the top of the screen
- the bottom of the toolbar is 1030 pixels from the top of the screen
The standard toolbar is 300 pixels wide (1100 – 810) and 100 pixels high ( 1030-930). This is designed for 3 icons up each to 100 pixels square.
You could also use the standard toolbar for 4 props each up to 75 pixels square.
To change the position or size of the icons on your screen, change the values of toolbarLeft, toolbarRight, toolbarTop and toolbarBottom.There are a few examples below.
Don’t forget to use the toolbar locator (Ctrl + Alt + S) to check you that the toolbar and ready screen icons line up correctly.

The toolbar locator is great for checking everything is lined up correctly
Placing the icons at the lower left corner of a 1920 by 1080 screen
toolbarLeft := 30
toolbarRight := 540
toolbarTop := 980
toolbarBottom := 1080
Adapting the script for different sized screens
Not all computer screens are the same size, and they come in many different resolutions. If you have a small touchscreen you will need to edit the script to move the toolbar.
Icons placed centrally below the live view for a 1280 x 1024 pixel screen
toolbarLeft := 490
toolbarRight := 790
toolbarTop := 875
toolbarBottom := 975
Icons placed at the lower left corner of a 1280 x 1024 pixel screen
toolbarLeft := 30
toolbarRight := 540
toolbarTop := 924
toolbarBottom := 1024
What do to if the Hotkeys don’t work
Many programs use the Hotkey shortcuts, and some of these may interfere with the operation of the Webcam_Snap_Camera.ahk script. If some Hotkeys casue strange effects or don’t work at all, you may need to change them.
- Your Hotkeys will only work if you use the same set of keys in Snap Camera and the ahk script. Check both programs for typos.
Many programs use the Hotkey shortcuts, and some of these may interfere with the operation of the Webcam_Snap_Camera.ahk script.
- If you have checked for typos and your Hotkeys still do not work, or unexpected things happen when you use them, you may need to change the Hotkey settings.
- Do not use any of the shortcuts used by Webcam Photobooth
You will need to tell both Snap Camera and Webcam_Snap_Camera.ahk what keys to use. There are more details in the notes included with the script.
Summary
We have been through
- How to set up Snap Camera to work with Webcam Photobooth
- Updating your Ready screen so guests can switch between props and turn them on and off
- Offering a choice of more than 2 props
- Moving the toolbar/prop buttons to fit your screen design
- Adjusting the script for different resolution screens
- Troubleshooting
Have fun!
© Breeze Systems 2022